Extreme Film Pushing: Ilford HP5 Plus @ 3200
I like fast film and I cannot lie. So let's push it, push it real good. And see what we get. Today: Ilford HP5 pushed to 3200.

1: Ilford HP5 Plus @ 3200 👈🏼
2: Ilford HP5 Plus @ 6400 (Pt. 1)
3: Ilford HP5 Plus @ 6400 (Pt. 2)
Erik Brammer has been sharing concert photos taken with pushed HP5 on the Crown + Flint Discord lately, and I’ve found his work inspiring. I’ve never actually shot HP5 before, not to my knowledge anyway, always preferring lower speed films for reasons that I long ago forgot. Lately, what with winter being on us, I’ve been wanting to do more twilight and night photography, as well as photography in the metro stations of Lisbon. This means my ISO 100 film isn’t going to cut it; ISO 400 film isn’t going to cut it either. I need more speed.
So, for the first time, having gotten a color calibration target for Christmas, I thought I should be methodical about my testing. So I bought some Ilford HP5 Plus, hearing that it pushes well, and set about shooting some photos.
The datasheet for HP5 Plus indicates that “good image quality can also be obtained” at speeds up to 3200, so I figured this is a good place to start my experimentation.
Methodology
I took a test photo of a Datacolor Spyder Checkr 24 using a Canon P with a Canon 50mm f/1.4 lens, in reasonably uniform lighting in my home office. I rated the film 3200, metered the scene with the Crown + Flint app on my iPhone which yielded an EV100 of 5.0, and I shot the frame at f/4 and 1/60s. Being a rangefinder, I can’t get very close with this setup, so future tests will use a different camera and lens.
The film was developed in Adox XT-3 at 1+1 dilution at 20º for for 22:30, using the Ilford spiral tank agitation schedule (four inversions in first 10 seconds, and again every minute thereafter).
I then scanned the film using my usual process—an iPad mini as the backlight, a Negative Supply 135 film holder, and a Valoi copy stand to hold the camera. The scans were made with a Fujifilm X-Pro3 fitted with a Laowa 65mm f/2.8 2x Ultra Macro APO lens. Shots were made at ISO 160, f/5.6, and 1/8s.
Scans were captured using Capture One, and editing with the linear film profile, in monochrome mode.
Test Shots
The goal here is to achieve something approximating what could be measured with a densitometer. I don’t have a densitometer, but I do have a Datacolor Spyder Checkr 24 calibration target, and a willingness to experiment. The results below are a bit half-assed, but as we’ll see they get the job done well enough.
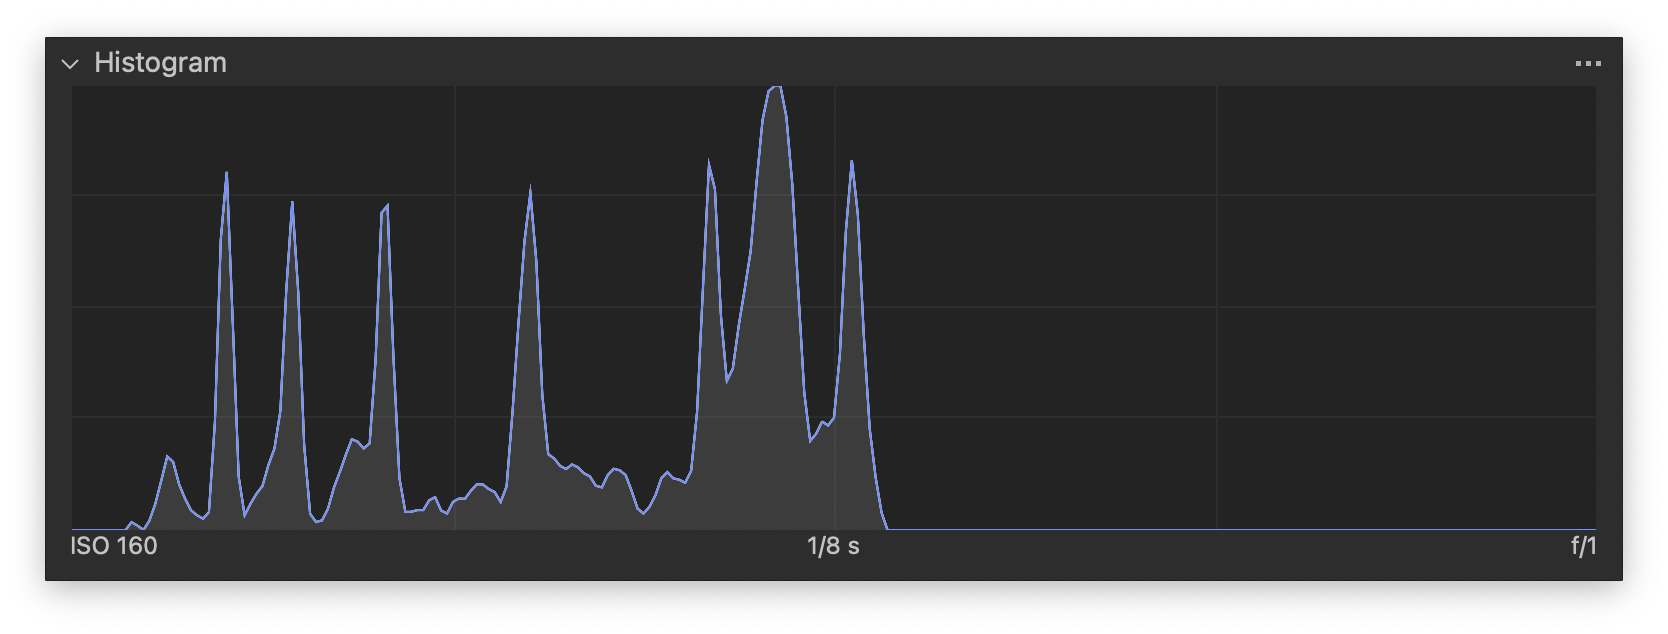
Here is the monochrome portion of my calibration target, as scanned without any processing or inversion. With the setup I use, the images usually come in a bit underexposed, just like this one, but the only way around this is to either slow the shutter speed (it’s already too slow for my liking), increase the ISO (noise, I guess?), or purchase a brighter light source (€€€).
Anyway, we see six clear spikes in the histogram, one for each sample in the target. We also see a seventh, much larger spike between the two lightest values—this is the target frame, which is slightly lighter than the darkest target, and we can ignore it.


As scanned
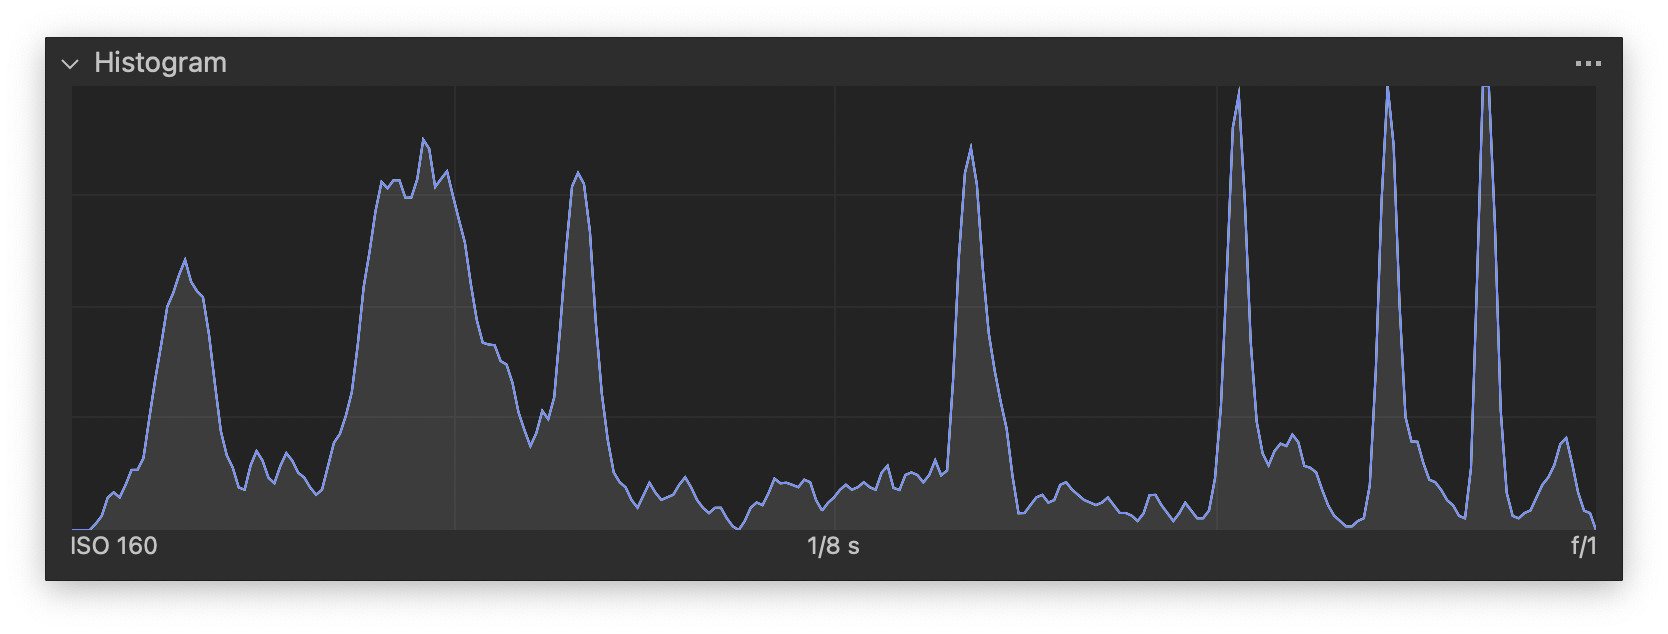
Or I can just trim the levels. Because the Fujifilm X-Pro3 sensor is ISO-invariant, this is roughly equivalent to raising the ISO in the camera. Anyway, it works fine.
At this point we have to be careful not to read too much into the grain. This is actually a pretty tight crop, so the grain is going to be exaggerated. Plus, if I move to a different analog camera so I can get closer in the future, it will be difficult to compare grain across tests. So just ignore it for now.


Levels trimmed
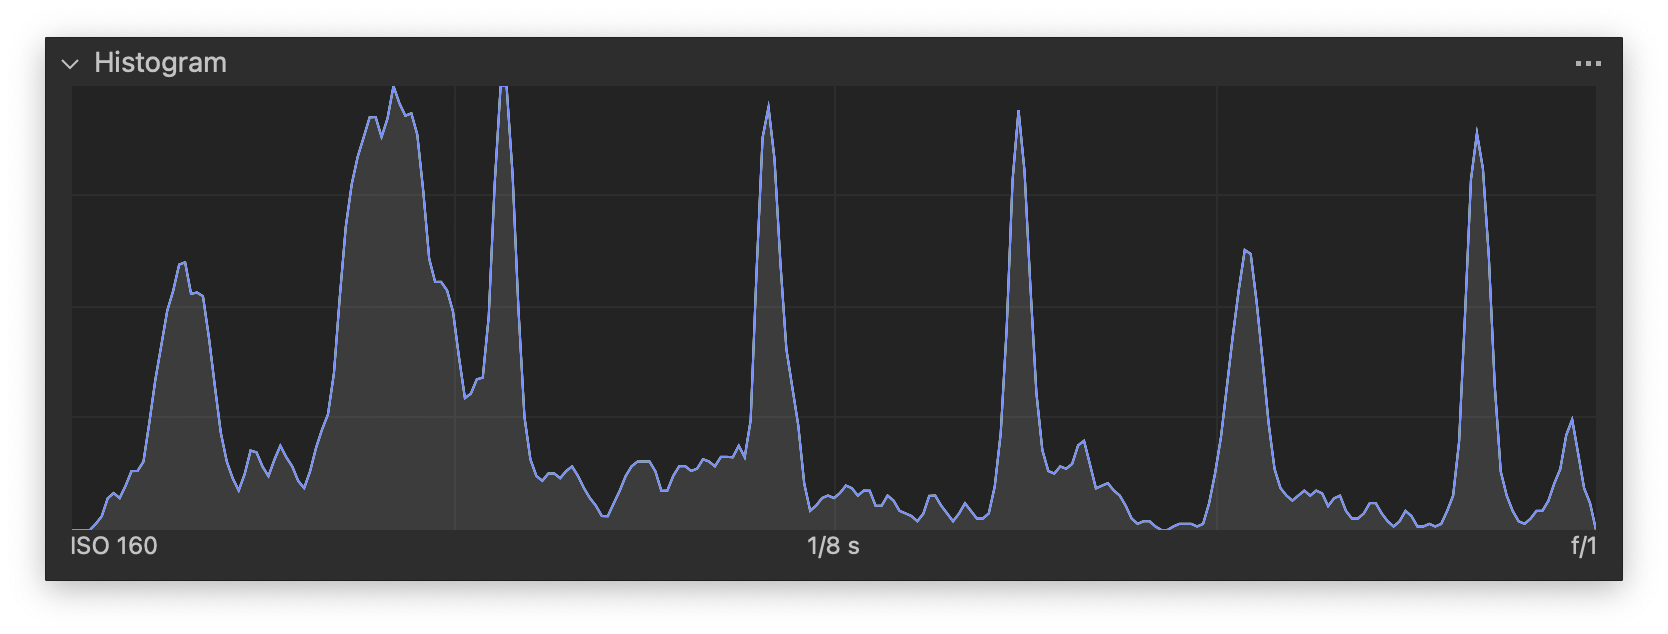
Then I invert the levels in Capture One. Already we can see an issue. The tones should be evenly spaced out, but there is too much separation in the shadows, and not enough in the highlights. This is a good problem to have when pushing film! Usually the shadows get compressed when pushing film, so the development did a great job of recovering the shadows.


Levels inverted
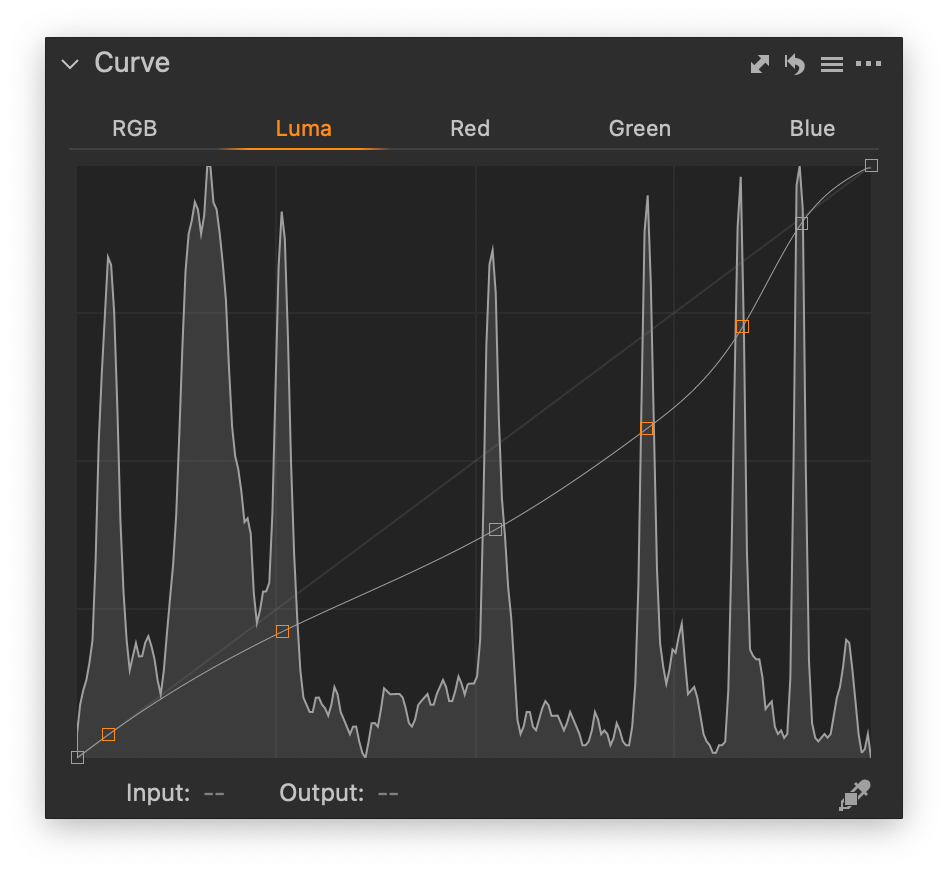
The uneven levels are easy enough to fix with the curves tool in Capture One. I made small adjustments to each peak to evenly distribute them throughout the tonal space.


Levels equalized

Beautiful. But does it look good in photos?
Real World Results
I took the roll out in my Canon P in a variety of dark, often high-contrast situations to see how the film fared, then scanned it as above and applying the curves adjustment I obtained from the calibration target test shot.


Broadly speaking, I am impressed.
Subjectively, the grain feels subdued—moreso than Fomapan 400 shot at box speed and developed in Rodinal. But I need to do a proper comparison. Anyway, the grain is fine.
The density is, with few exceptions, appropriate, not thin at all. The shadow detail is present. In some of the scans, extreme highlights showed as blown out, but with some additional editing I was able to pull additional detail out of those highlights without much effort.
Conclusions
Would I continue to shoot my Canon P in low light conditions? Probably not. The rangefinder patch is just too hard to see, and when the lens has to be opened fully to f/1.4, the focus isn’t as good as I would like. Going forward, I know I prefer an SLR for low-light photography.
But would I shoot Ilford HP5 Plus at ISO 3200 in the future? Without hesitation. The film is shockingly well behaved under these circumstances. I don’t have any doubts about the image quality of HP5 at this speed.
Next time: Let’s take it up a notch, and push a roll to 6400. Spoiler alert: It doesn’t go as well.
Support this blog
If you enjoy reading this blog, I encourage you to consider purchasing a book or print to show your support. And if you're into analog photography, check out my new mobile app Crown + Flint.

