Extreme Film Pushing: Ilford HP5 Plus @ 6400 (Pt. 1)
What happens if we push Ilford HP5 plus to 6400? Let's fuck around and find out. Spoiler alert: It doesn't go as well as I hoped.

1: Ilford HP5 Plus @ 3200
2: Ilford HP5 Plus @ 6400 (Pt. 1) 👈🏼
3: Ilford HP5 Plus @ 6400 (Pt. 2)
I love shooting film at 6400. Handheld shots indoors. Street photography at f/22—no need to focus! Night photography! Fast film opens up lots of possibilities.
But shooting fast film means either spending money on Ilford Delta 3200, spending lots of money on Kodak T-Max P3200, or pushing cheaper film. I love T-Max P3200, but I also like money.
So, for the first time, having gotten a color calibration target for Christmas, I thought I should be methodical about my testing. So I bought some Ilford HP5 Plus, hearing that it pushes well, and set about shooting some photos.
The datasheet for HP5 Plus indicates that “good image quality can also be obtained” at speeds up to 3200. And they were not lying. But if we can get good image quality at 3200 so easily, can we get at least acceptable quality at 6400?
The answer is yes…but mostly no. But maybe yes. It's confusing.
Methodology
I took a test photo of a Datacolor Spyder Checkr 24 using a Pentax ME Super with a SMC Pentax 55mm f/1.8 lens, in reasonably uniform lighting in my home office. I rated the film 6400, metered the scene with the Crown + Flint app on my iPhone which yielded an EV100 of 5.0, and I shot the frame at f/4 and 1/125s.
The film was developed in Adox XT-3 at 1+1 dilution at 20º for for 27 minutes, using the Ilford spiral tank agitation schedule (four inversions in first 10 seconds, and again every minute thereafter). I calculated this development time myself, not finding anything suitable in the Massive Dev Chart for this combination of speed and dilution.
I then scanned the film using my usual process—an iPad mini as the backlight, a Negative Supply 135 film holder, and a Valoi copy stand to hold the camera. The scans were made with a Fujifilm X-Pro3 fitted with a Laowa 65mm f/2.8 2x Ultra Macro APO lens. Shots were made at ISO 160, f/5.6, and 1/2.5s.
Scans were captured using Capture One, and editing with the linear film profile, in monochrome mode.
A change in methodology
Wait a second I hear you say…last time I scanned my film at 1/8s. Why did I slow this down? Great question. In the past, I had a rather unstable camera scanning setup, and 1/8s was a compromise between getting enough exposure, and reducing the effect of my floor vibrating. I've got a more sturdy rig now, in fact it is remarkably solid.
But this time I realized that at 1/8s, I wasn't using the full dynamic range of my Fujifilm’s digital sensor. Everything was getting compressed into half the dynamic range, and then for each image I was adjusting the levels by hand to stretch that out.

This made me nervous, not just for the loss of tonal resolution, but because Capture One applies levels before curves. I spent so much energy creating that custom curve in my experiments with 3200, but I couldn’t be sure that the curve was being applied consistently or accurately, given that I was adjusting the levels for each image.
I had two options: Buy a brighter light source, or suck it up and use a longer shutter speed. It turns out, after a bit of experimentation, that 1/2.5s will neatly fit the film’s dynamic range into the digital sensor’s, ensuring that I don’t need to touch the levels at all, and so the curve I generate will be applied uniformly and correctly to each image.
Test Shots
The goal here is to achieve something approximating what could be measured with a densitometer. I don’t have a densitometer, but I do have a Datacolor Spyder Checkr 24 calibration target, and a willingness to experiment. The results below are a bit half-assed, but as we’ll see they get the job done well enough.
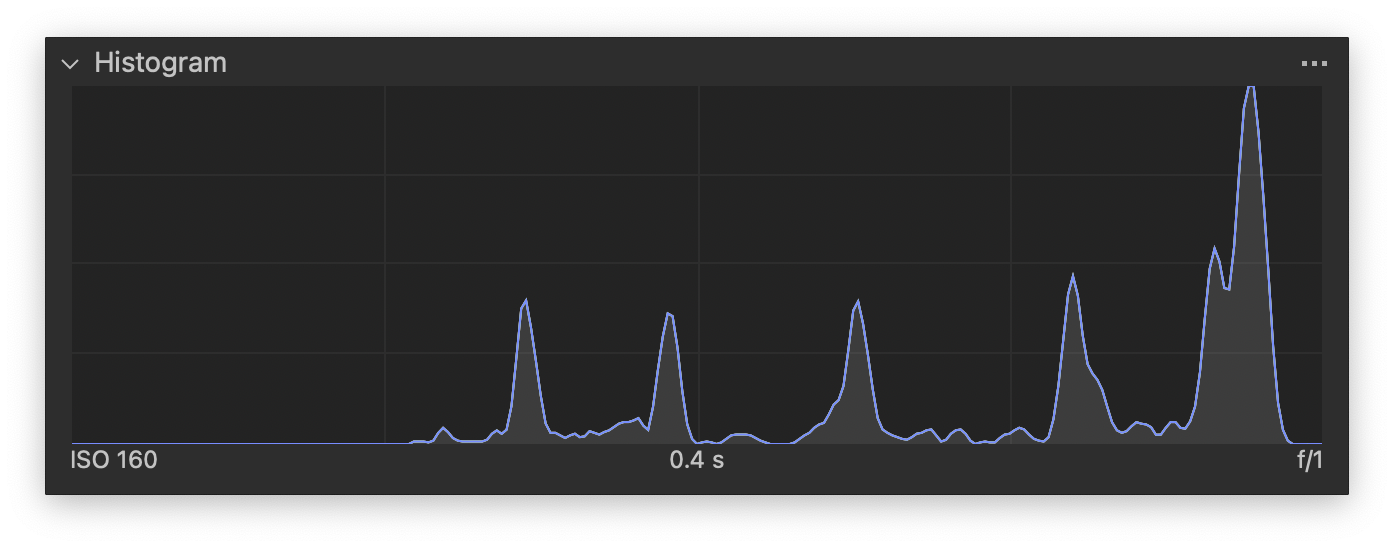
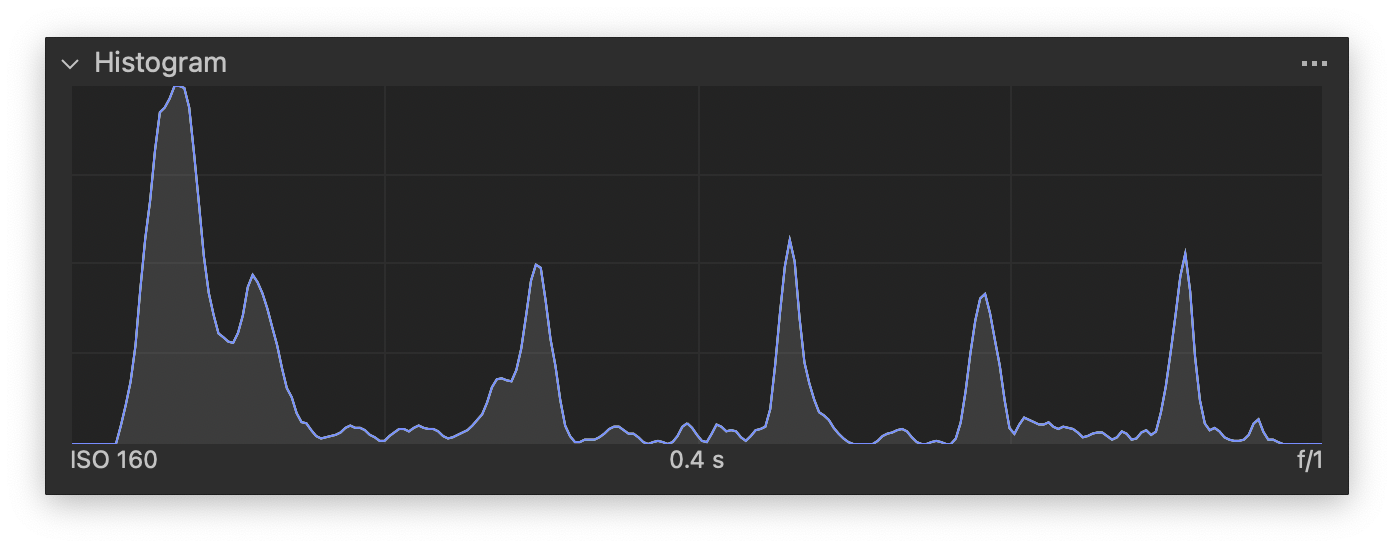
Here is the monochrome portion of my calibration target, as scanned without any processing or inversion.
First, we observe that the negative is pretty thin. Indeed, almost all the shots on this roll are pretty thin, something I should come back to in a moment.
We can also see significant loss of shadow detail, as the darkest square (which is lightest in the first, unprocessed image of the negative) blends in with the slightly lighter target frame. You can see this in the rightmost spike—it should show three at least somewhat distinct values, one for the second darkest target, a larger spike for the target frame, and a final spike for the darkest target. That’s not what we’re seeing.

As scanned
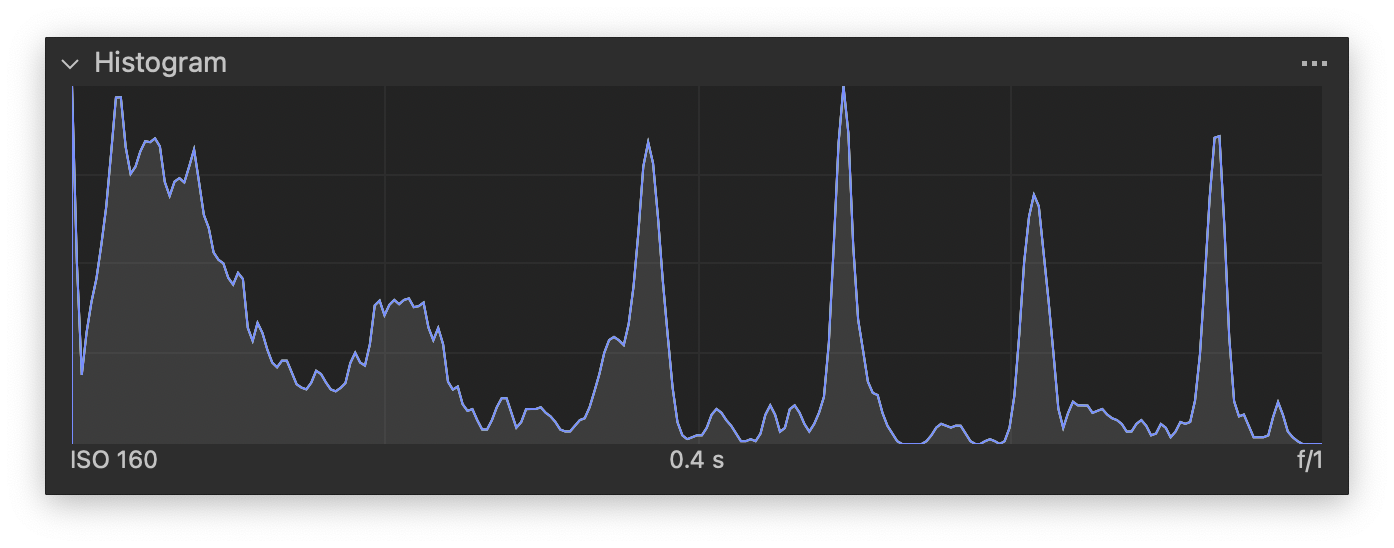
Then I invert the levels in Capture One. Already we can see another issue. The tones should be evenly spaced out, but there is too much separation in the midtones, and not enough in the highlights. Notice the gap between the spikes on the left, and the three spikes on the right. Notice also that the spikes on the right are a little bunched up, indicating a slight loss of contrast in the highlights.
None of this is surprising—pushing film increases overall contrast, and loses shadow detail, and that is precisely what we are seeing here. Still, the negative is so thin…


Levels inverted. Note loss of shadow detail
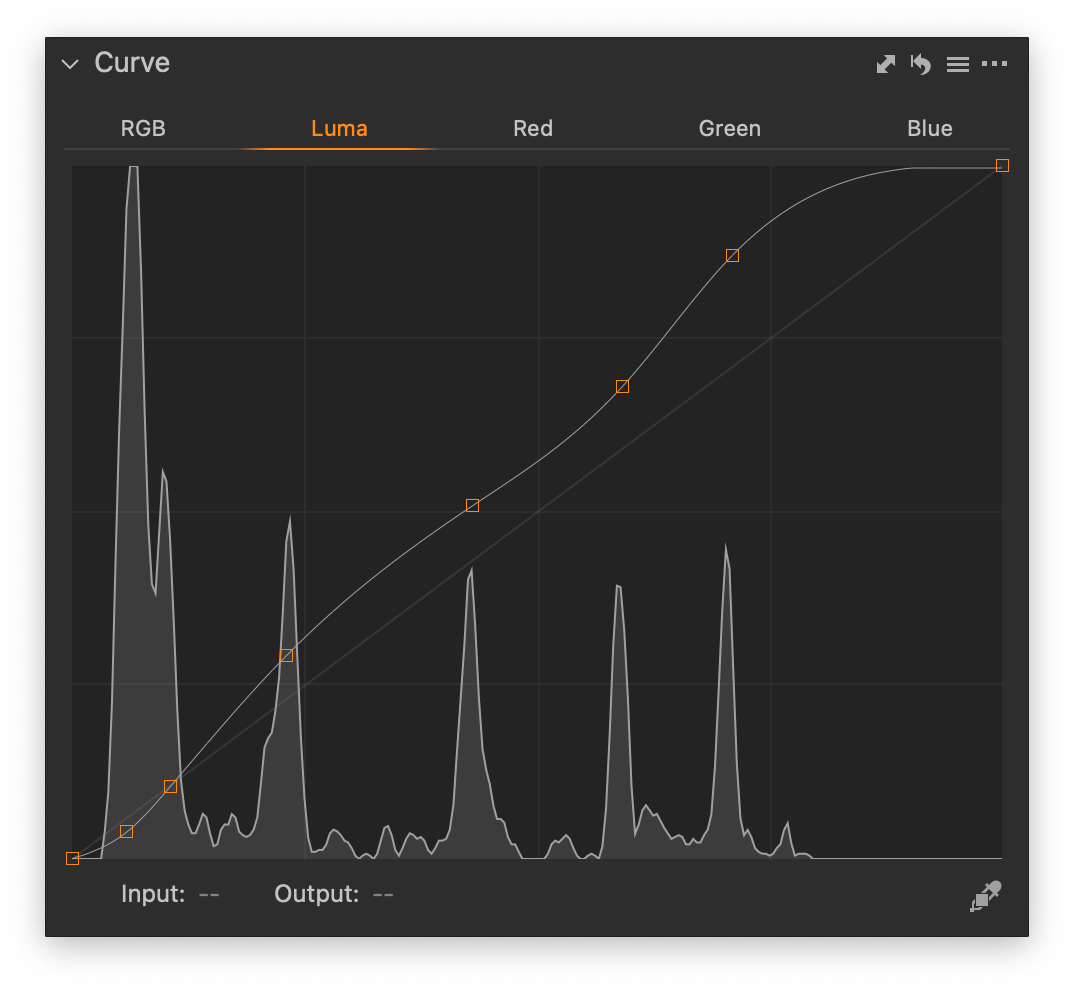
So let’s normalize the spikes as best we can. With the curves tool, I take a reading on each of the targets, and adjust those points on the curve to evenly space them out. But we have created a new problem—we’ve radically increased the noise in the shadows. Look how ragged the left-most peaks in this histogram have become. Look at the dark tones in the image! This is not good.


Moreover, although it is not at all apparent in the test target, we’re now also blowing out the highlights in some of the photos, a point I’ll return to in a moment.
This is where I get a little flustered. My neat, mathematical approach is breaking down on me. We need to play with the numbers a bit. Let’s lift the shadows to reduce the noise, even though it means a reduction in the tonal range. And let’s flatten the highlights slightly because of the blowout highlights I’m going to show you. Here’s the result.

Issues
Thin Negatives
The negatives almost universally were too thin. There were a couple of exceptions at the end of the roll, and their existence confuses me.
I figure there are two possible causes, and sorting out which is the real cause will be the topic of next week’s post. The first possible cause is that I have changed cameras. The roll I shot at 3200 I shot on a recently serviced Canon P. I trust it’s shutter speeds. This roll I shot on a Pentax ME Super that seems like the shutter speeds are probably fine, but which hasn’t had a service in almost twenty years. Maybe the Pentax is the problem.
The second possible cause is that I under-developed the film. I made a best estimate at the development time, but I knew I was in uncharted territory. Maybe the developer, diluted to 1+1, was exhausted before the 27 minutes were up. Maybe 27 minutes was too short a time. Lots of things to try for next time.
I really have no idea how to tell these scenarios apart just looking at these negatives, which means I’m going to need to shoot another roll…
[Update: I did shoot another roll, and it appears the culprit is under-development, and nothing to do with the cameras.]
Blown Out Highlights
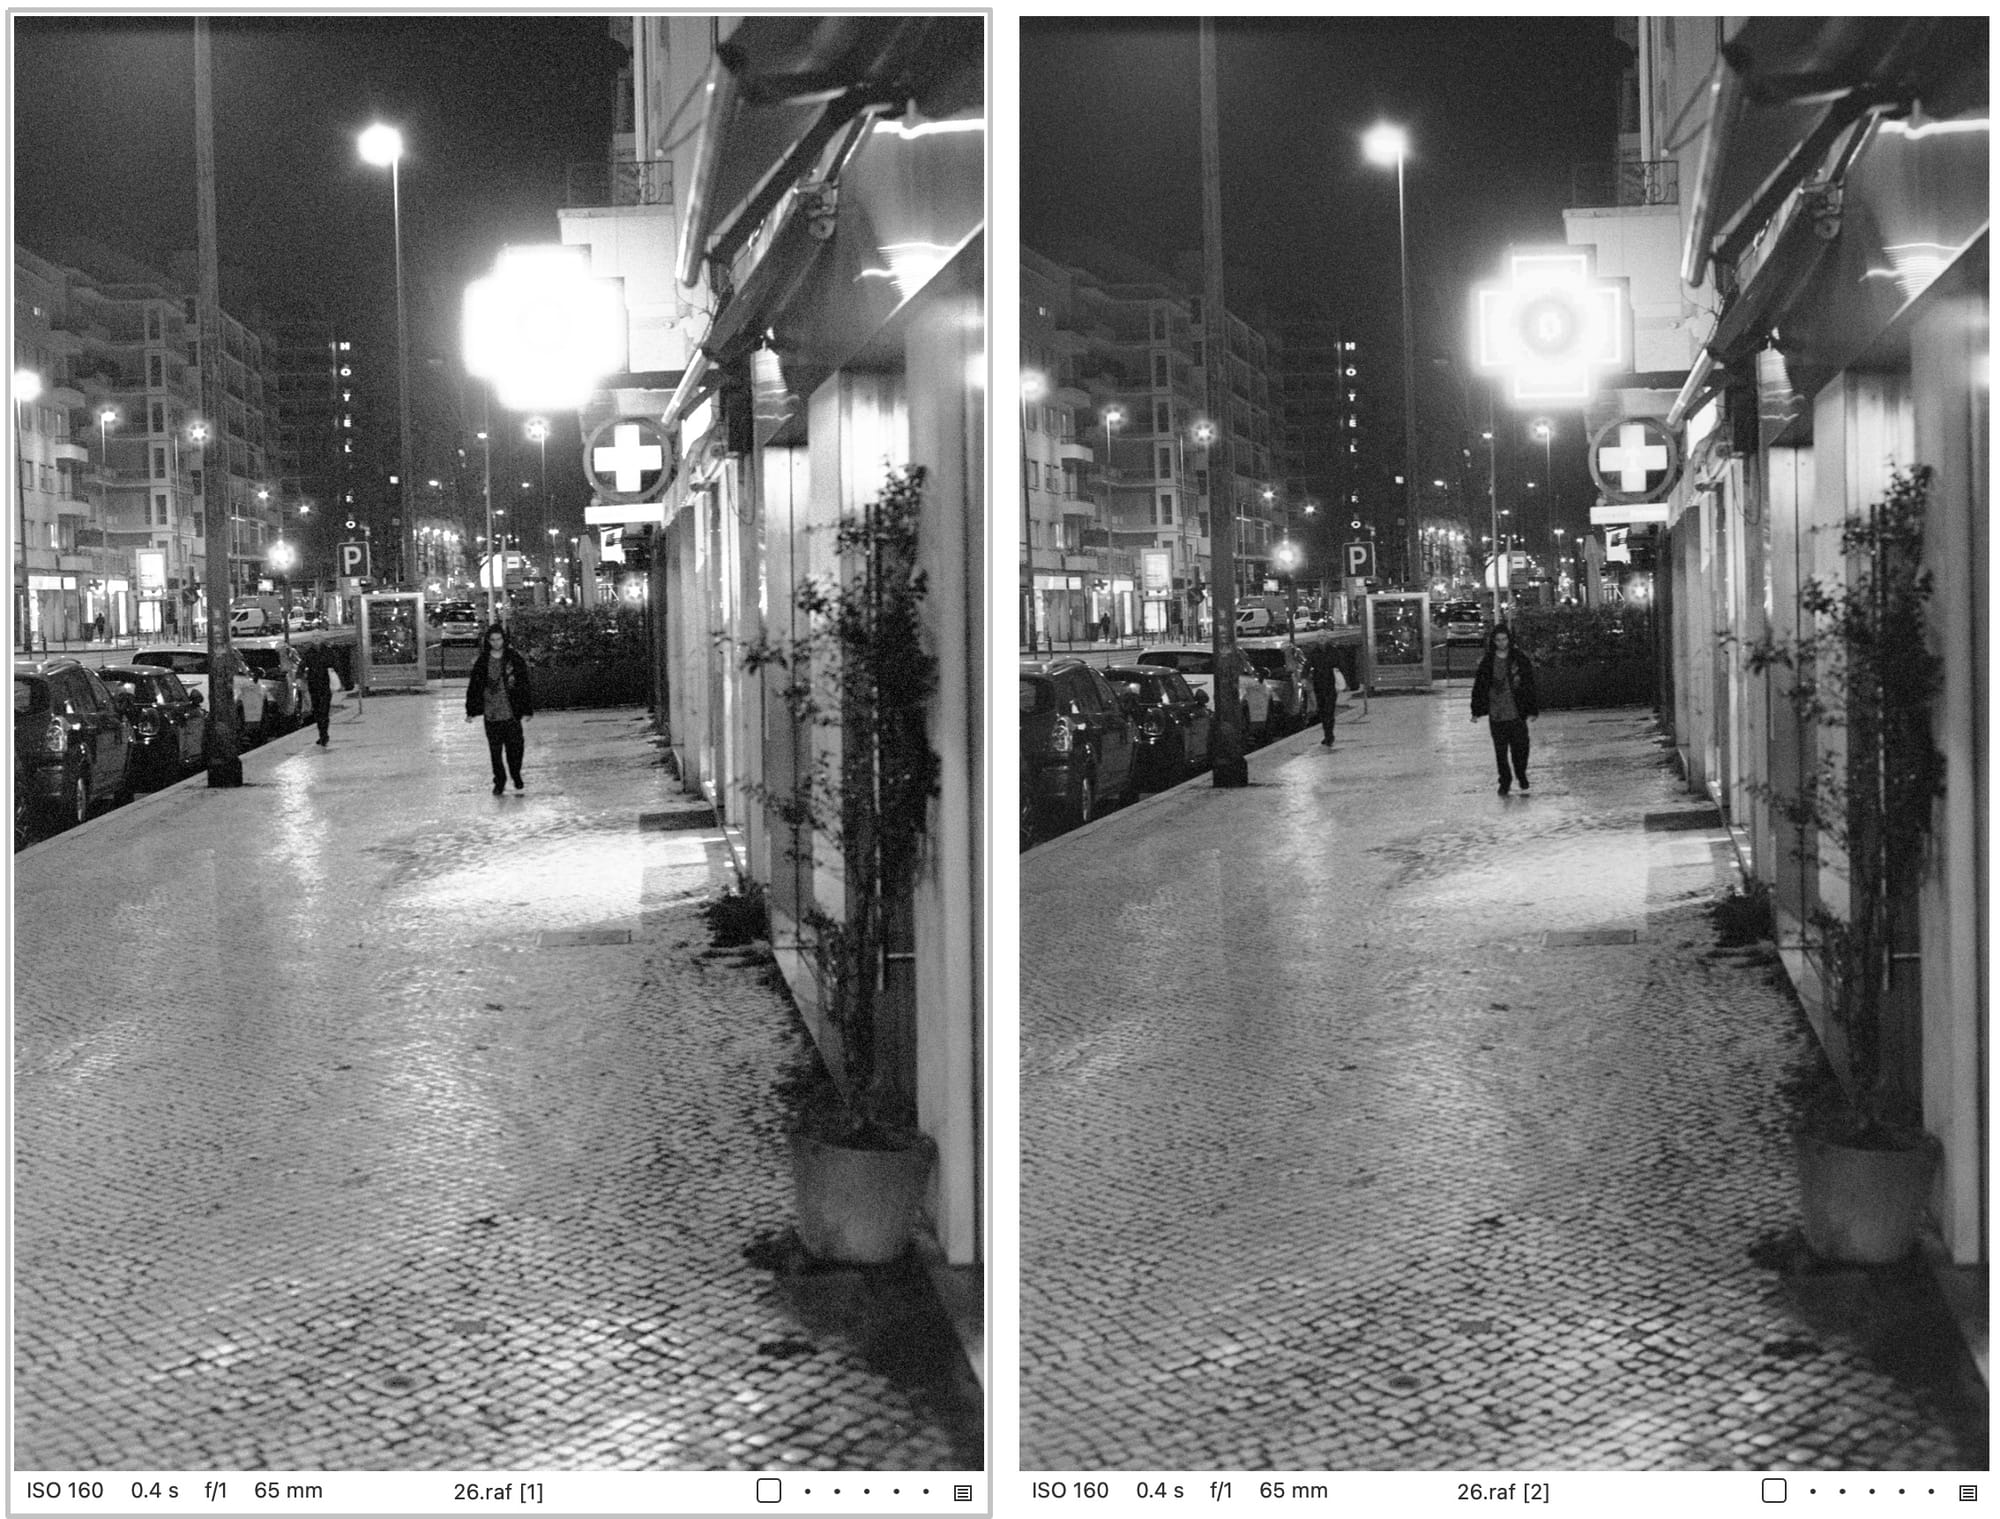
The highlights aren’t actually blown out, there is plenty of detail in the negatives. But the high contrast of the extreme push, and the curve I’ve applied is definitely pushing the highlight detail into blow-out territory. I expect this is a natural consequence of pushing—I can trade some shadow detail for highlight detail and vice-versa, but there isn’t a lot of space to get both, it seems. This sits uneasily with me, and I can’t help but feeling that I’ve missed something, and that I need to continue playing with my settings.
One thing is certain, however—the white patch on the test target can never be as bright as a European pharmacy sign (IYKYK), and I may need to make a different curve specifically for night photography.
The good news is, the film is retaining extreme highlight detail, despite the thin negatives and high contrast!
Real World Results
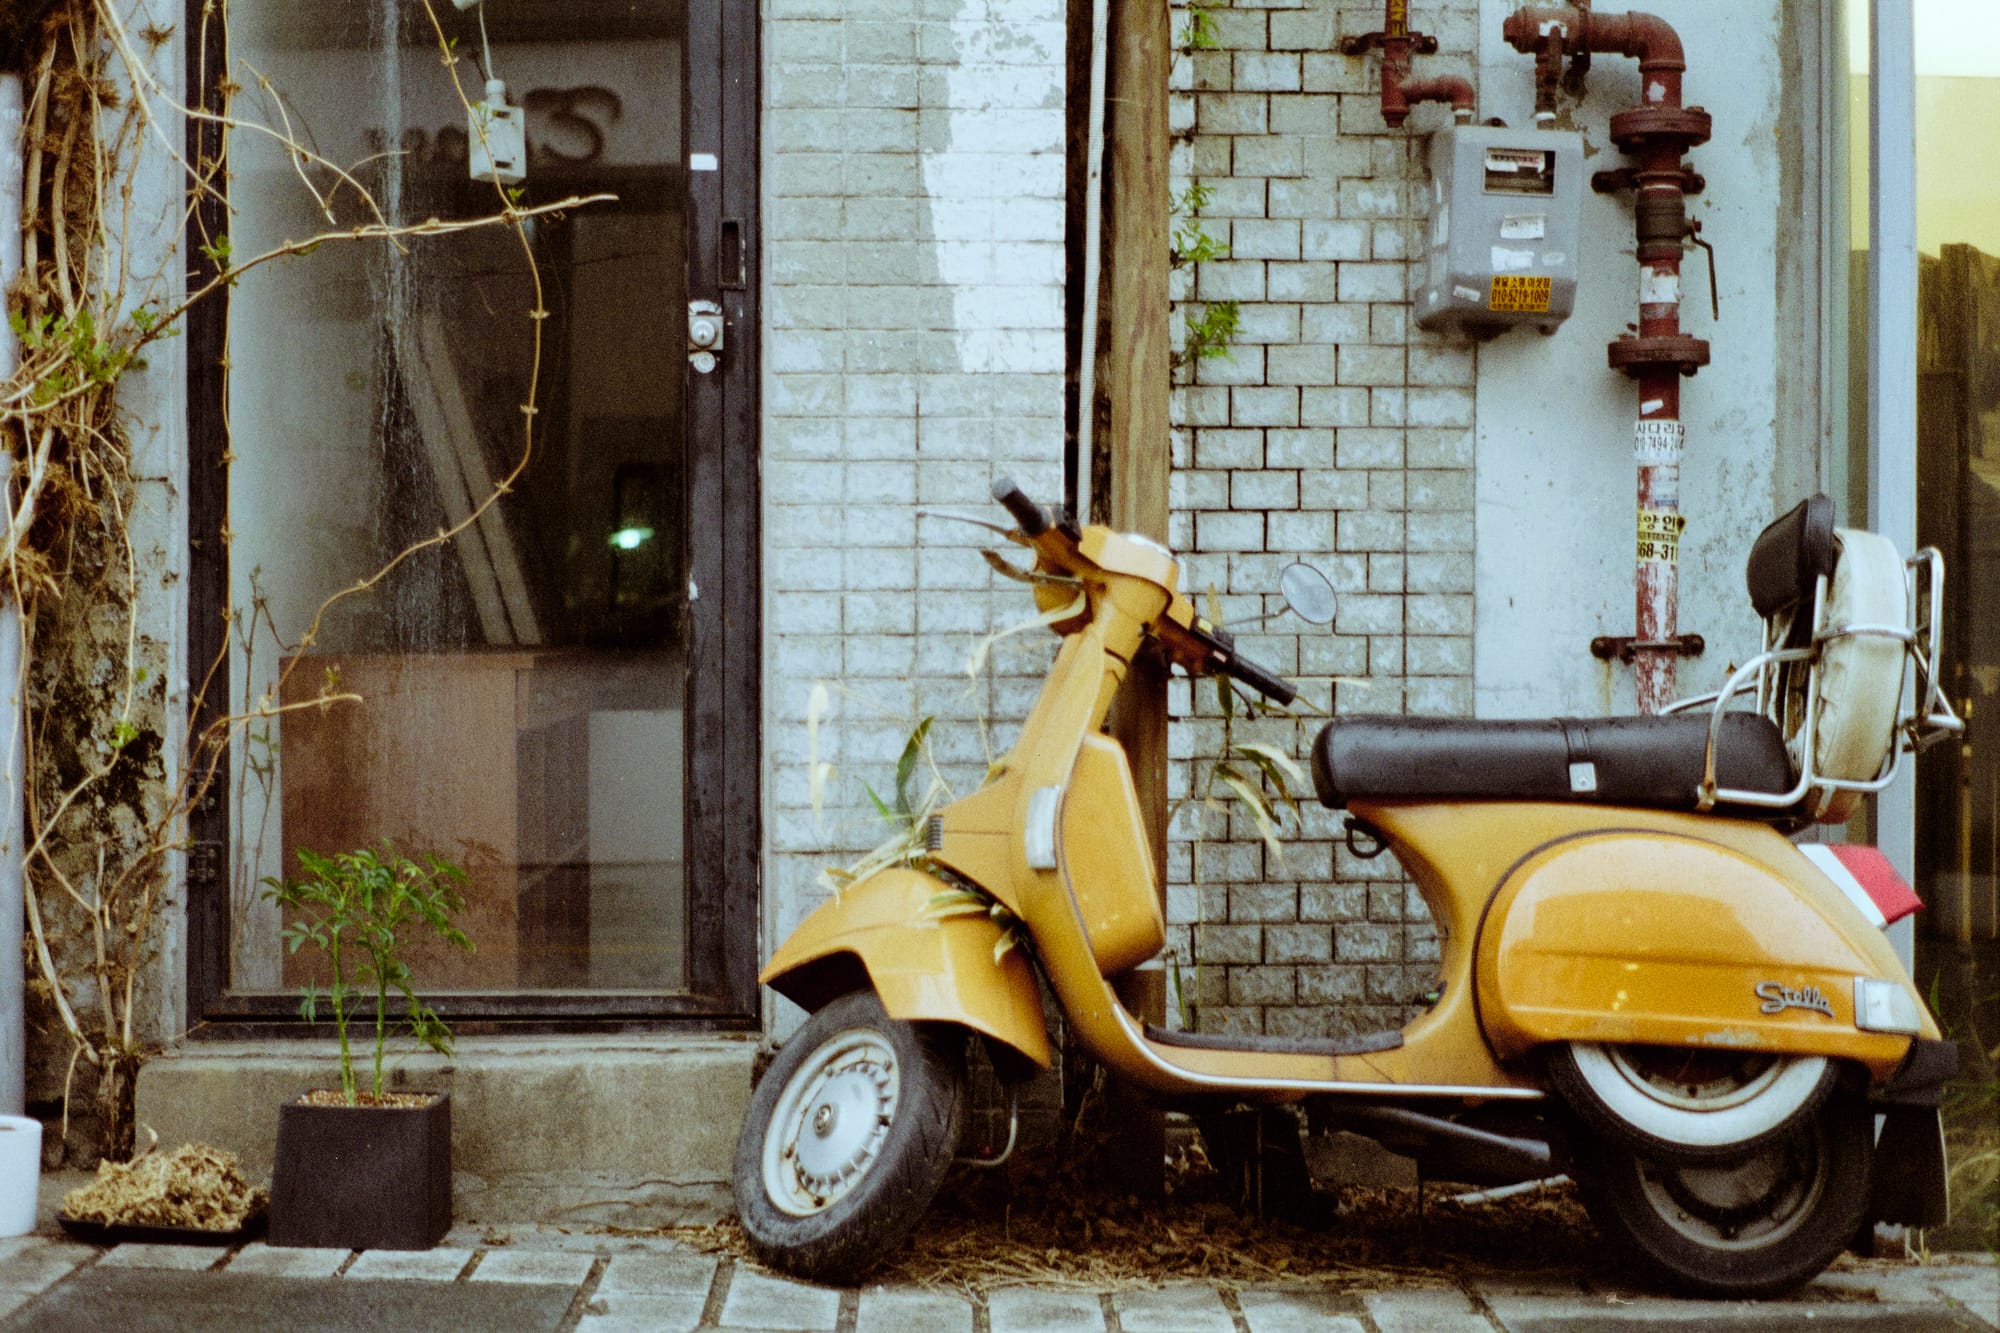
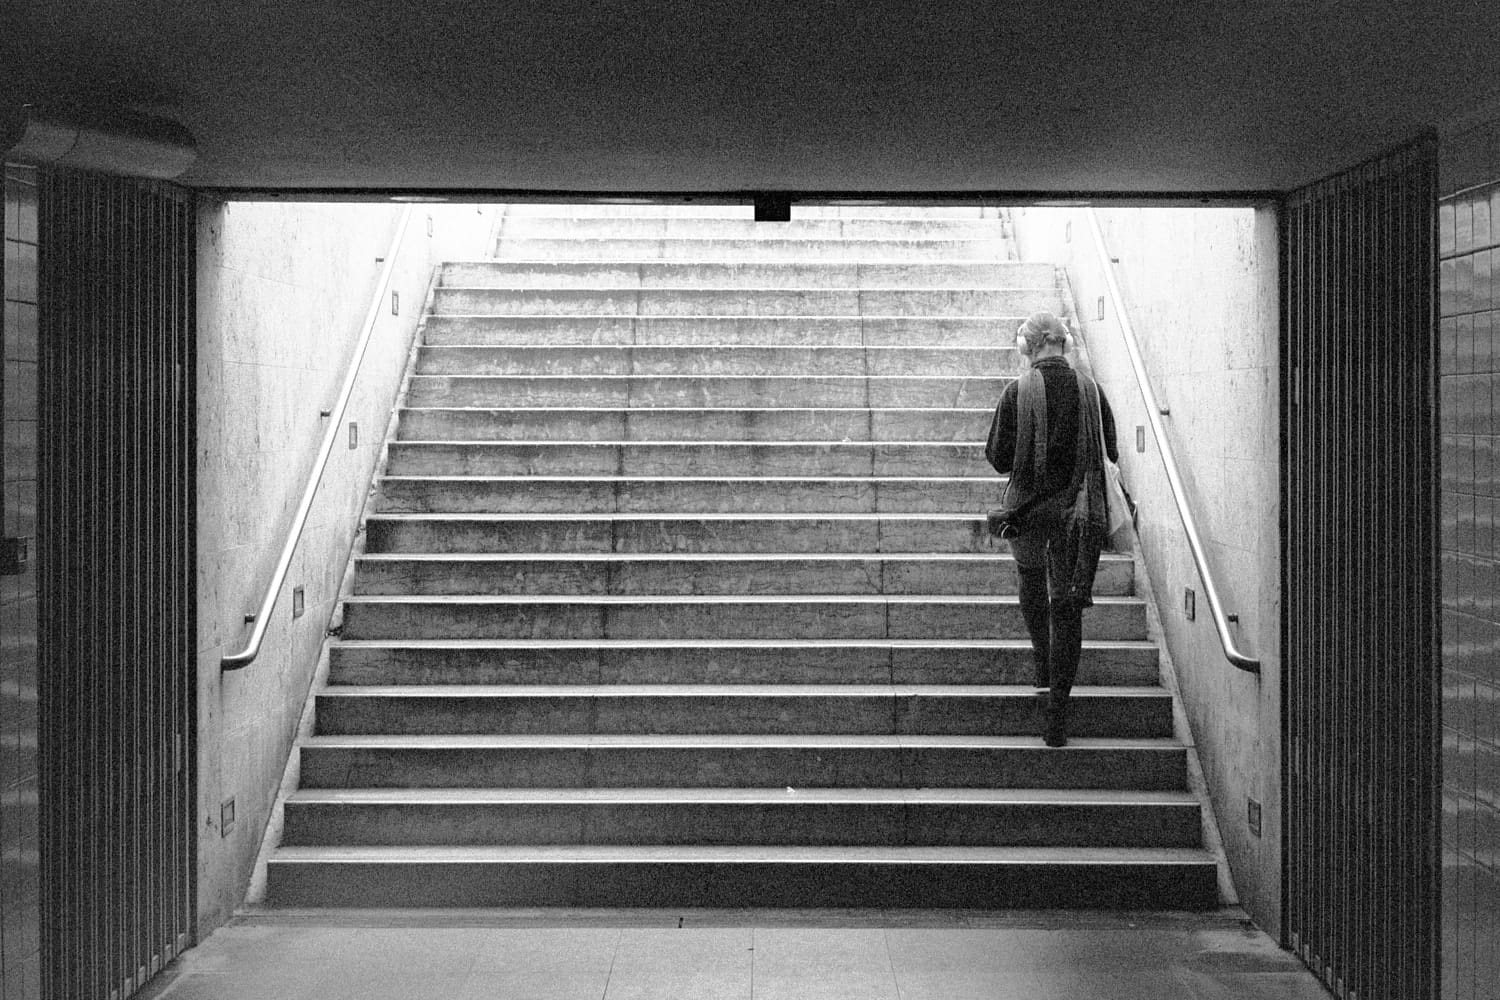
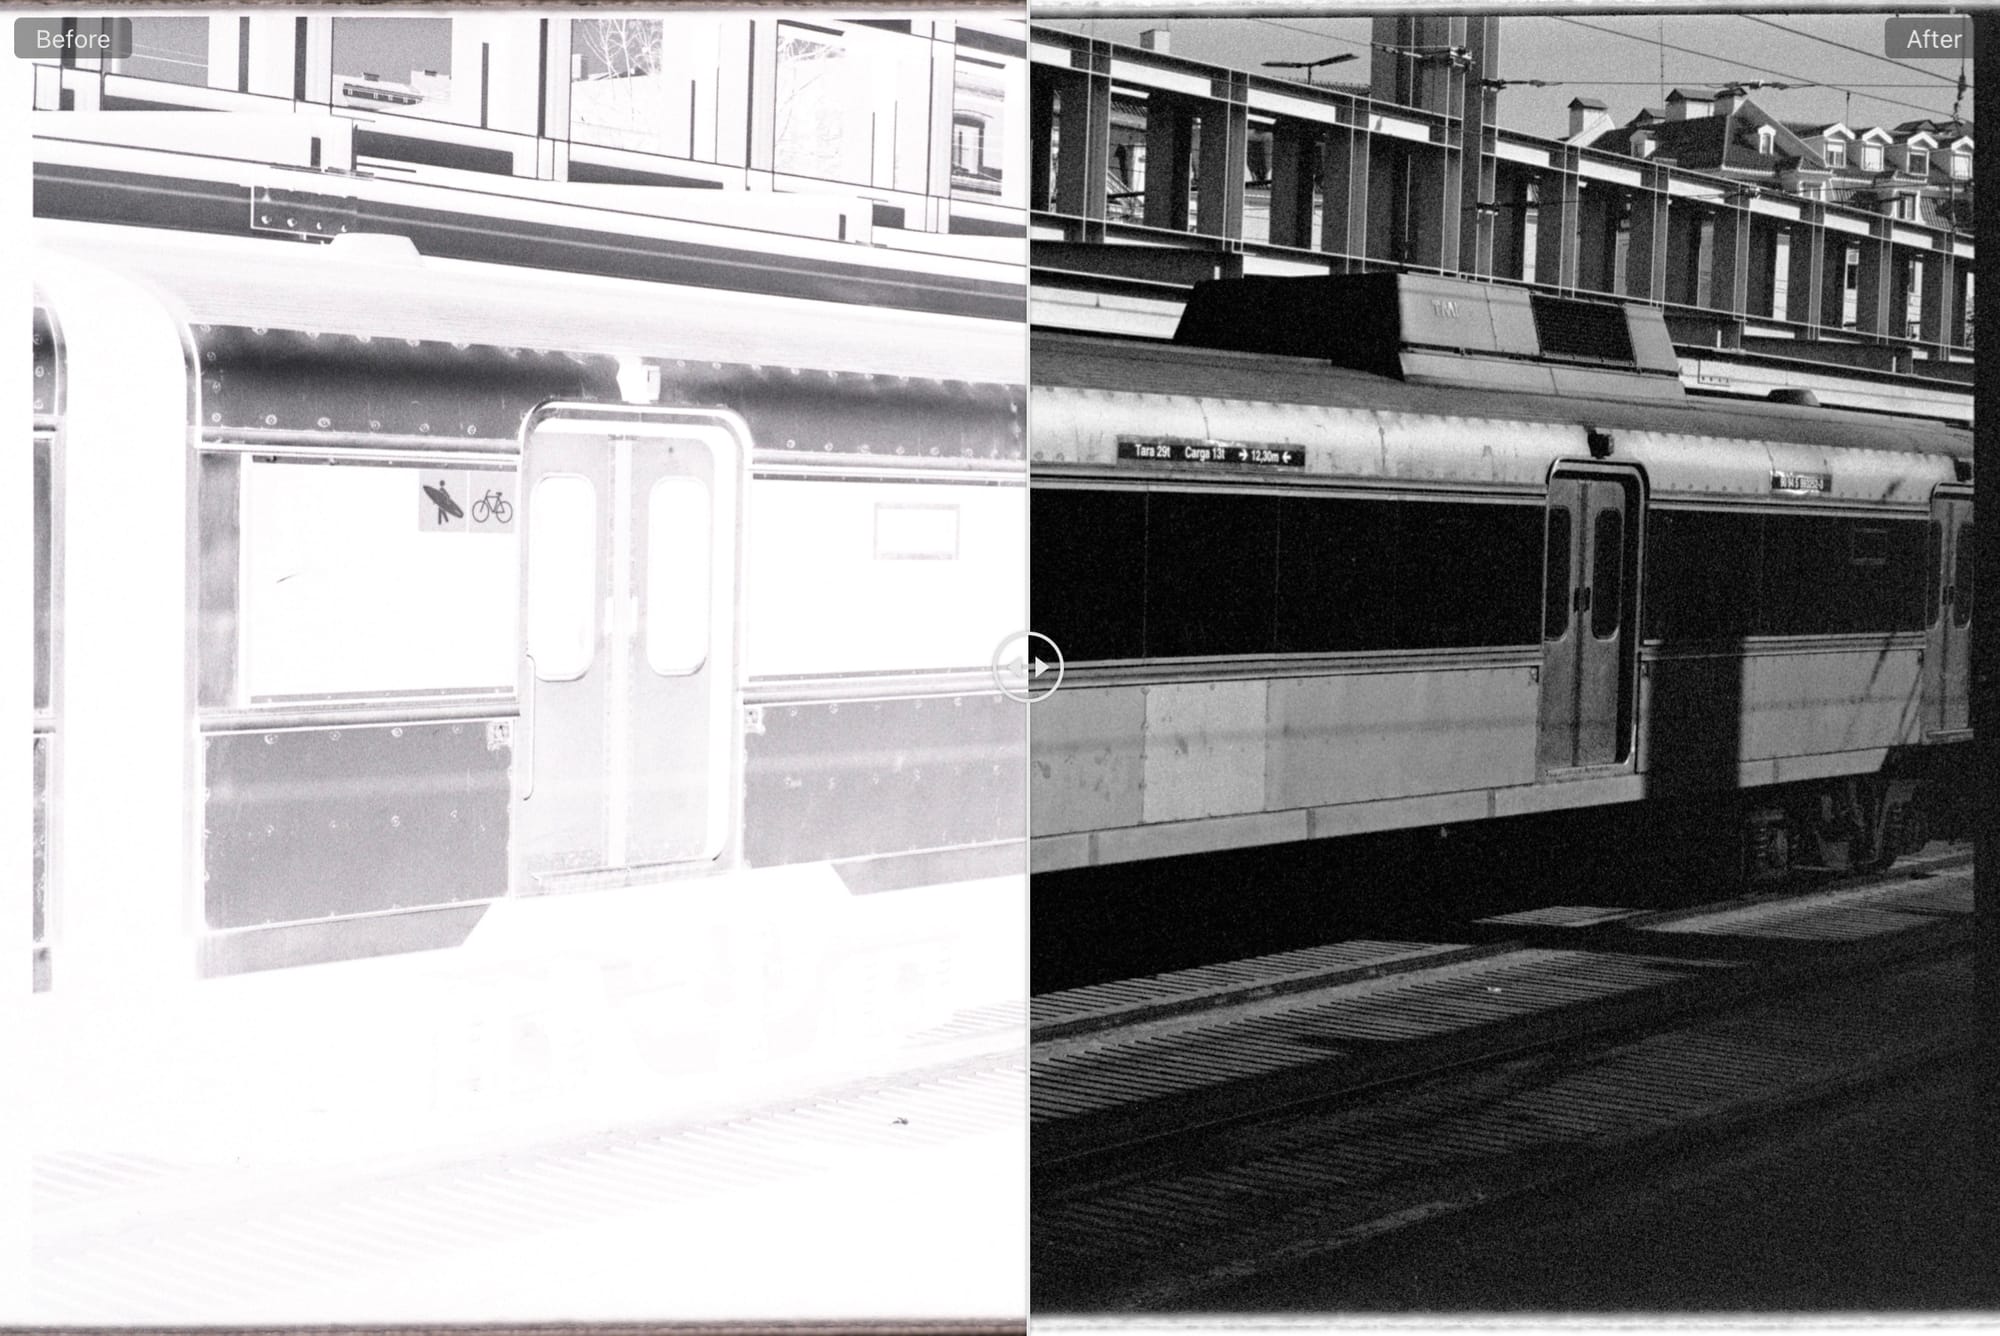
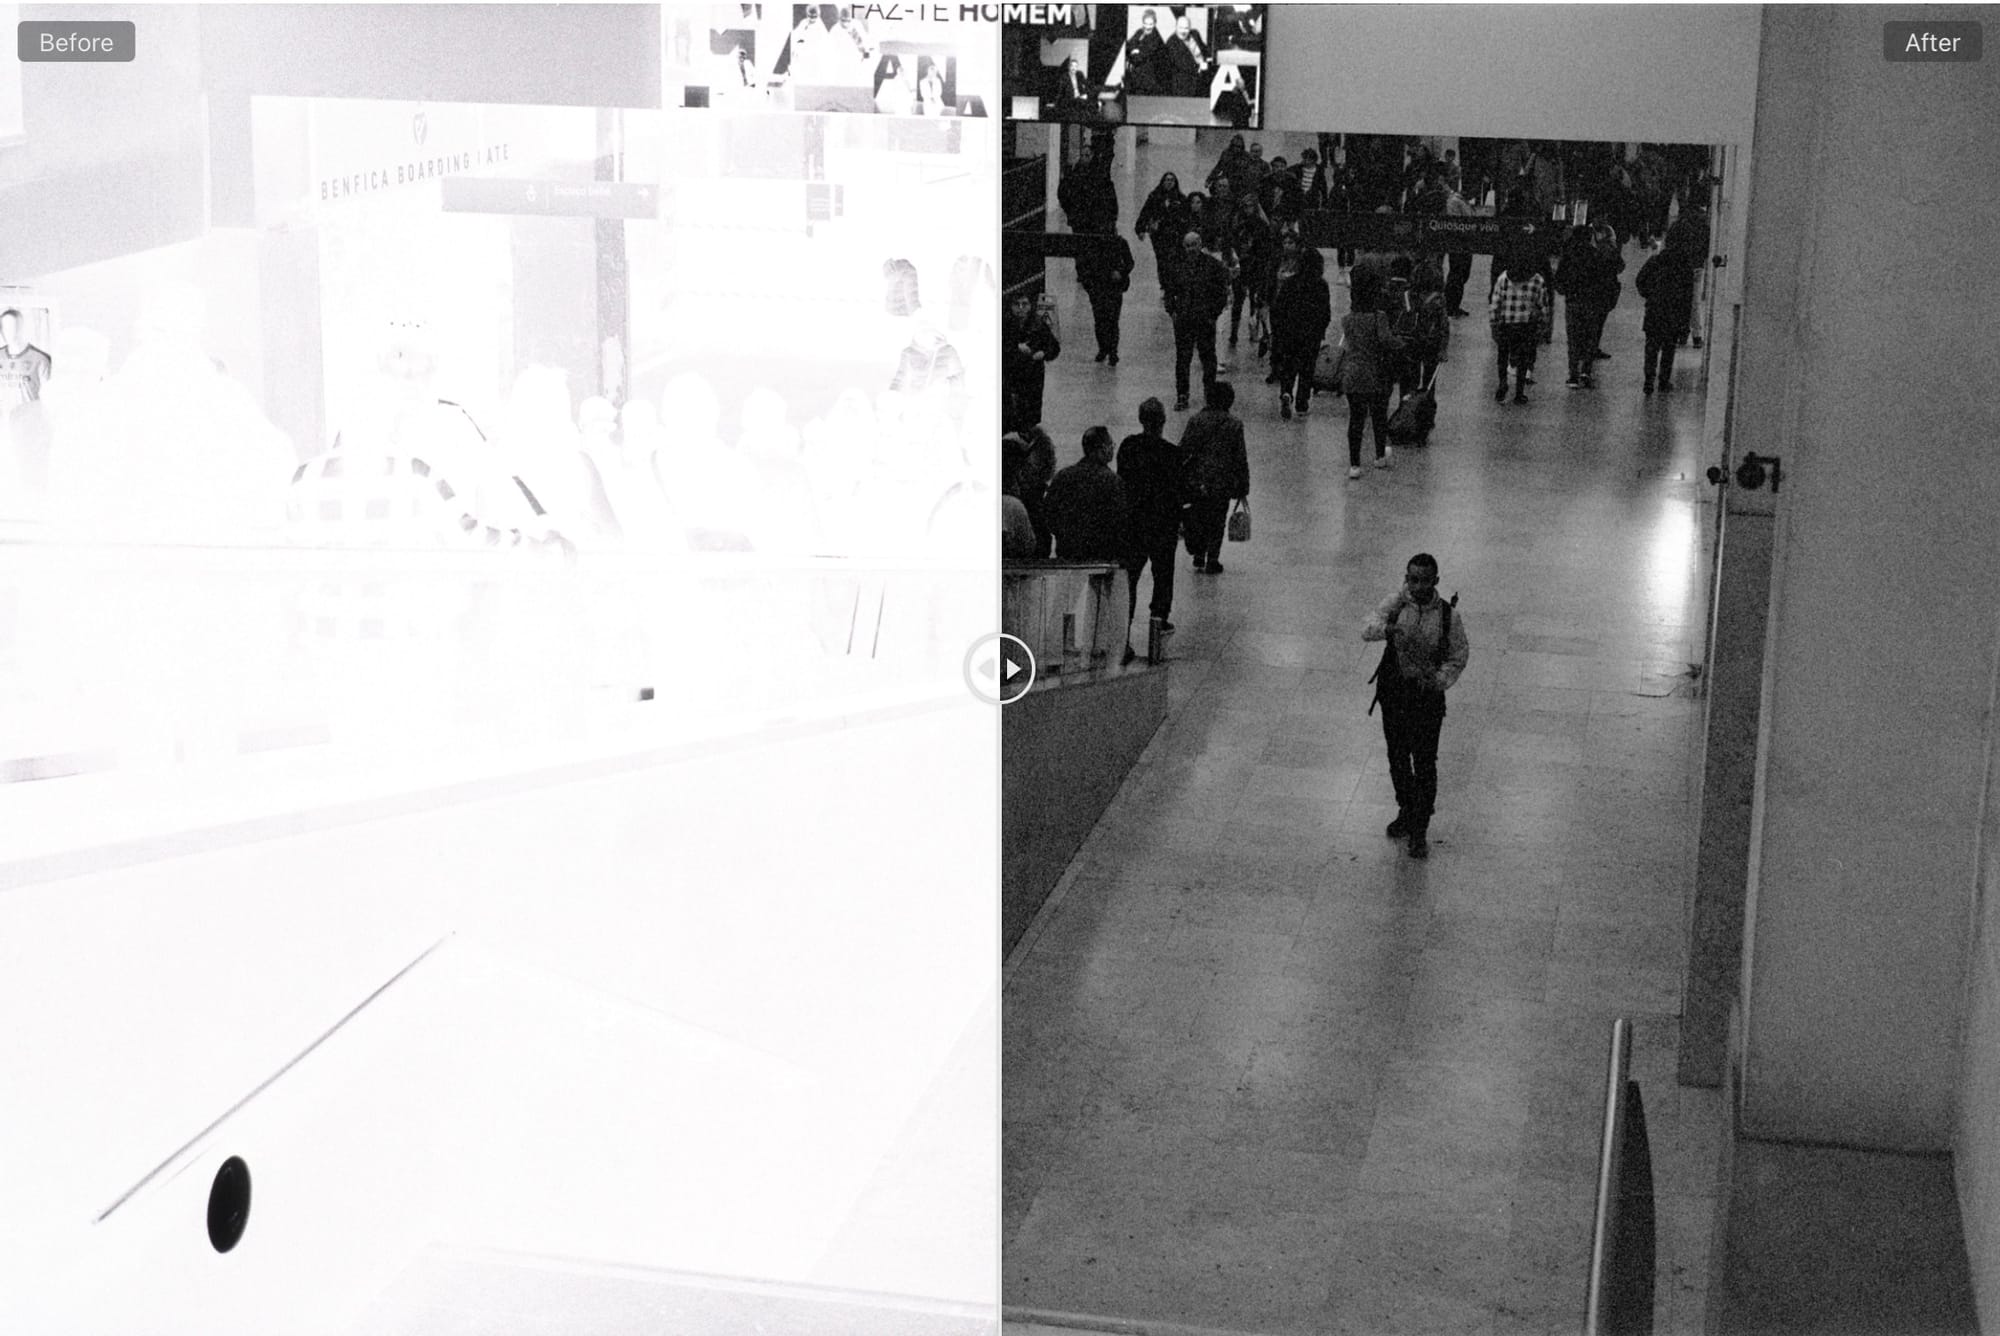
I took the roll out in my Pentax ME Super in a variety of dark, often high-contrast situations to see how the film fared, as well as some daylight scenes, then scanned it as above and applying the curves adjustment I obtained from the calibration target test shot.
Here are some of the best shots (in terms of exposure) from the roll.
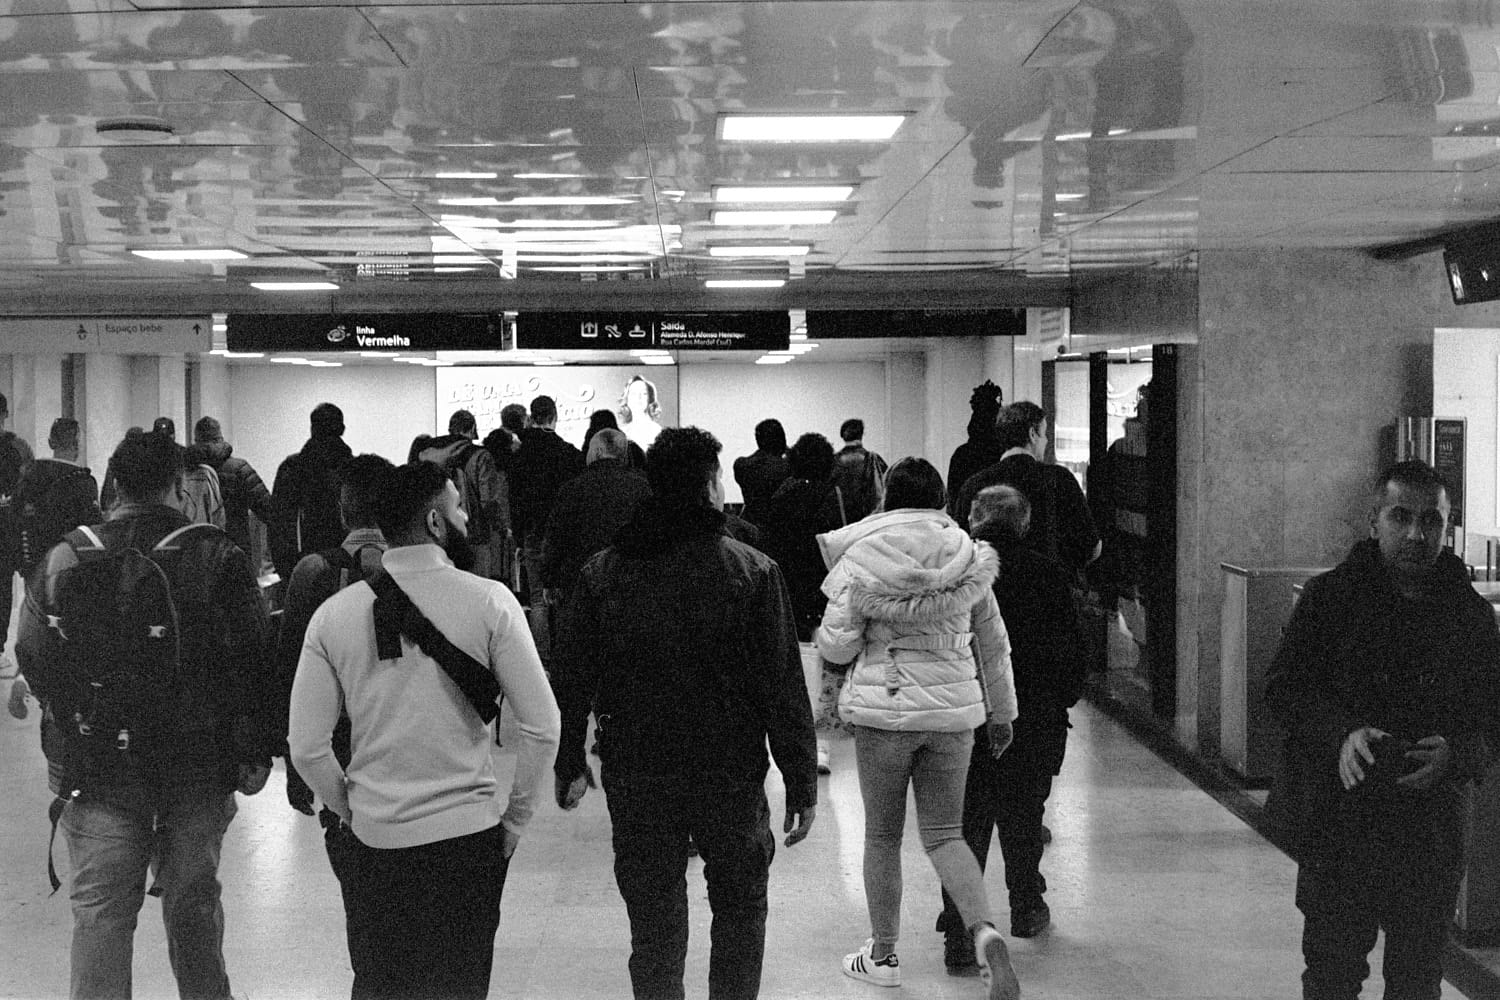
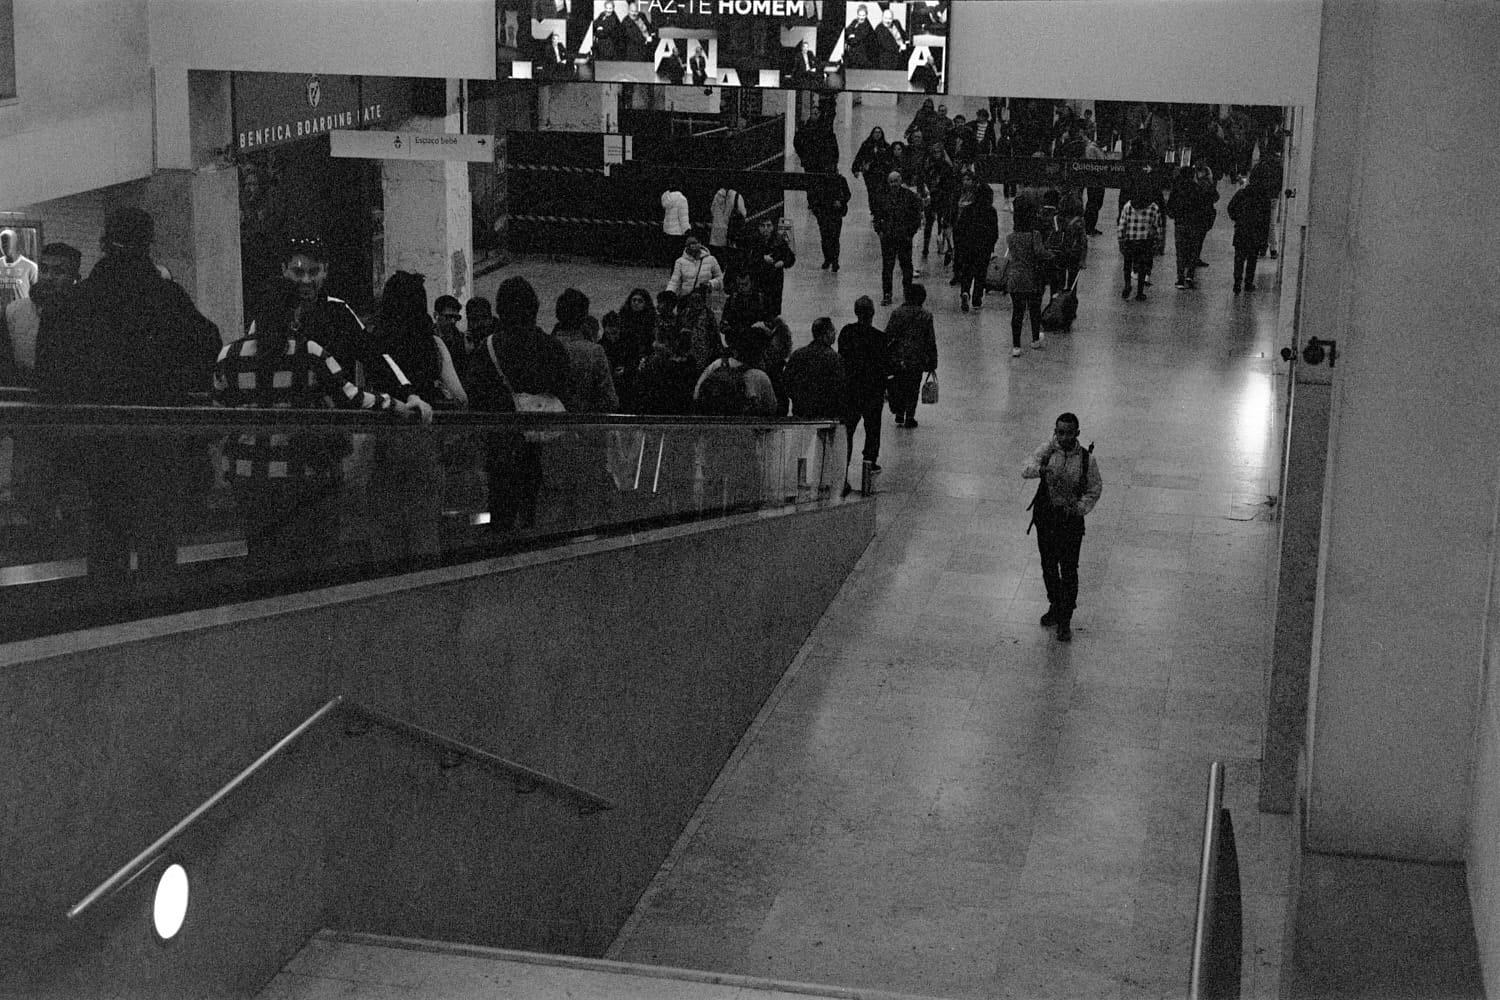


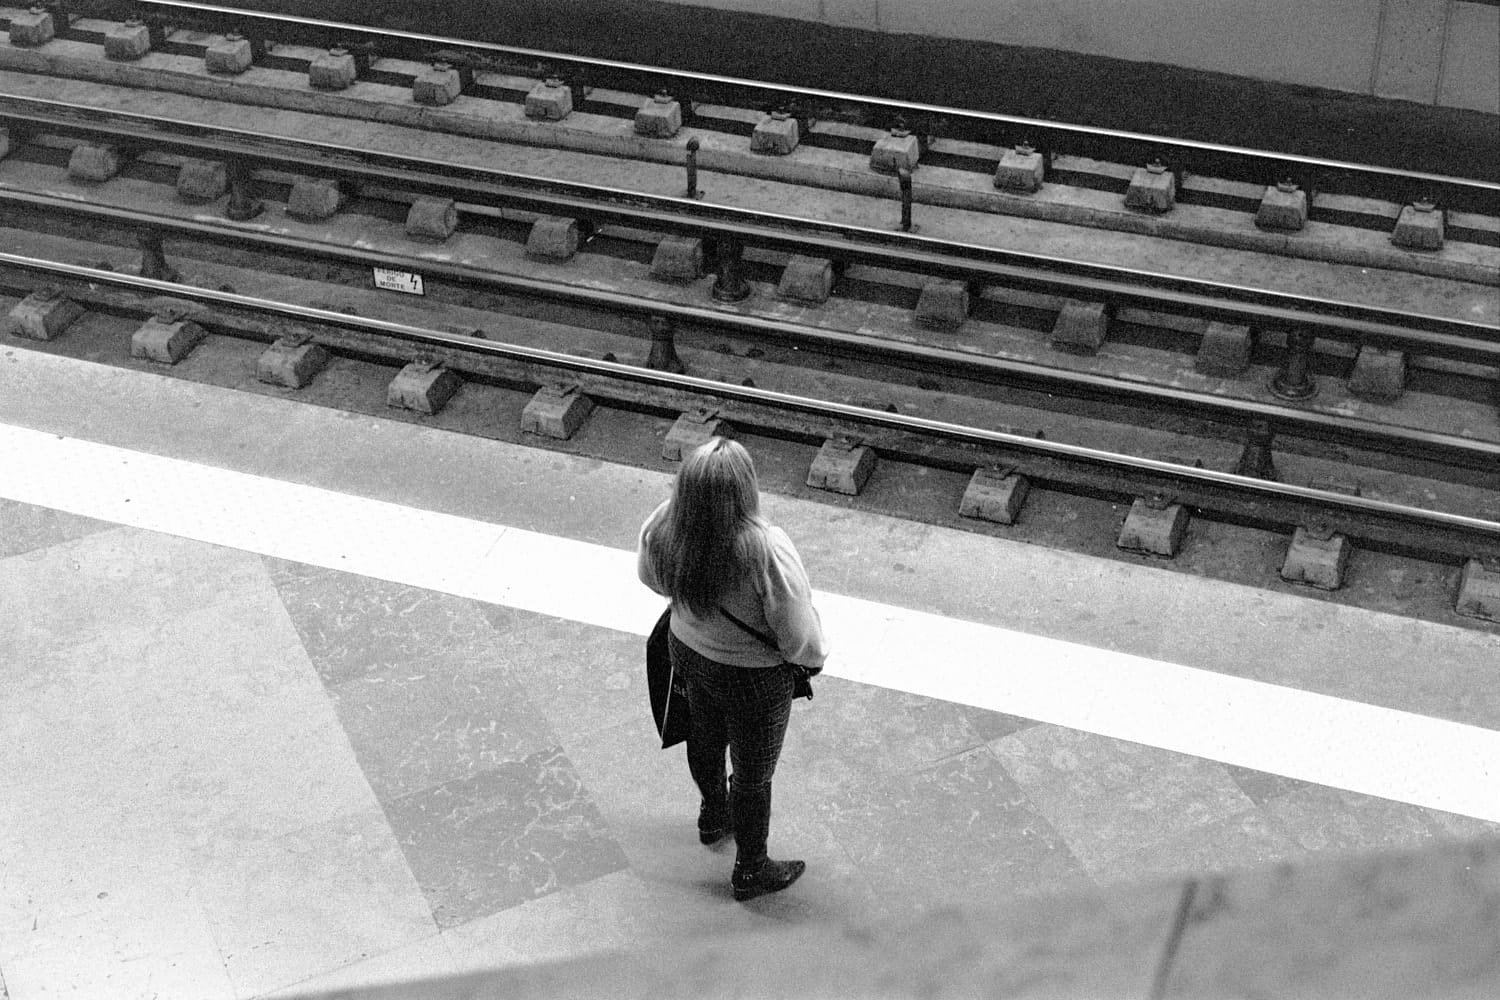
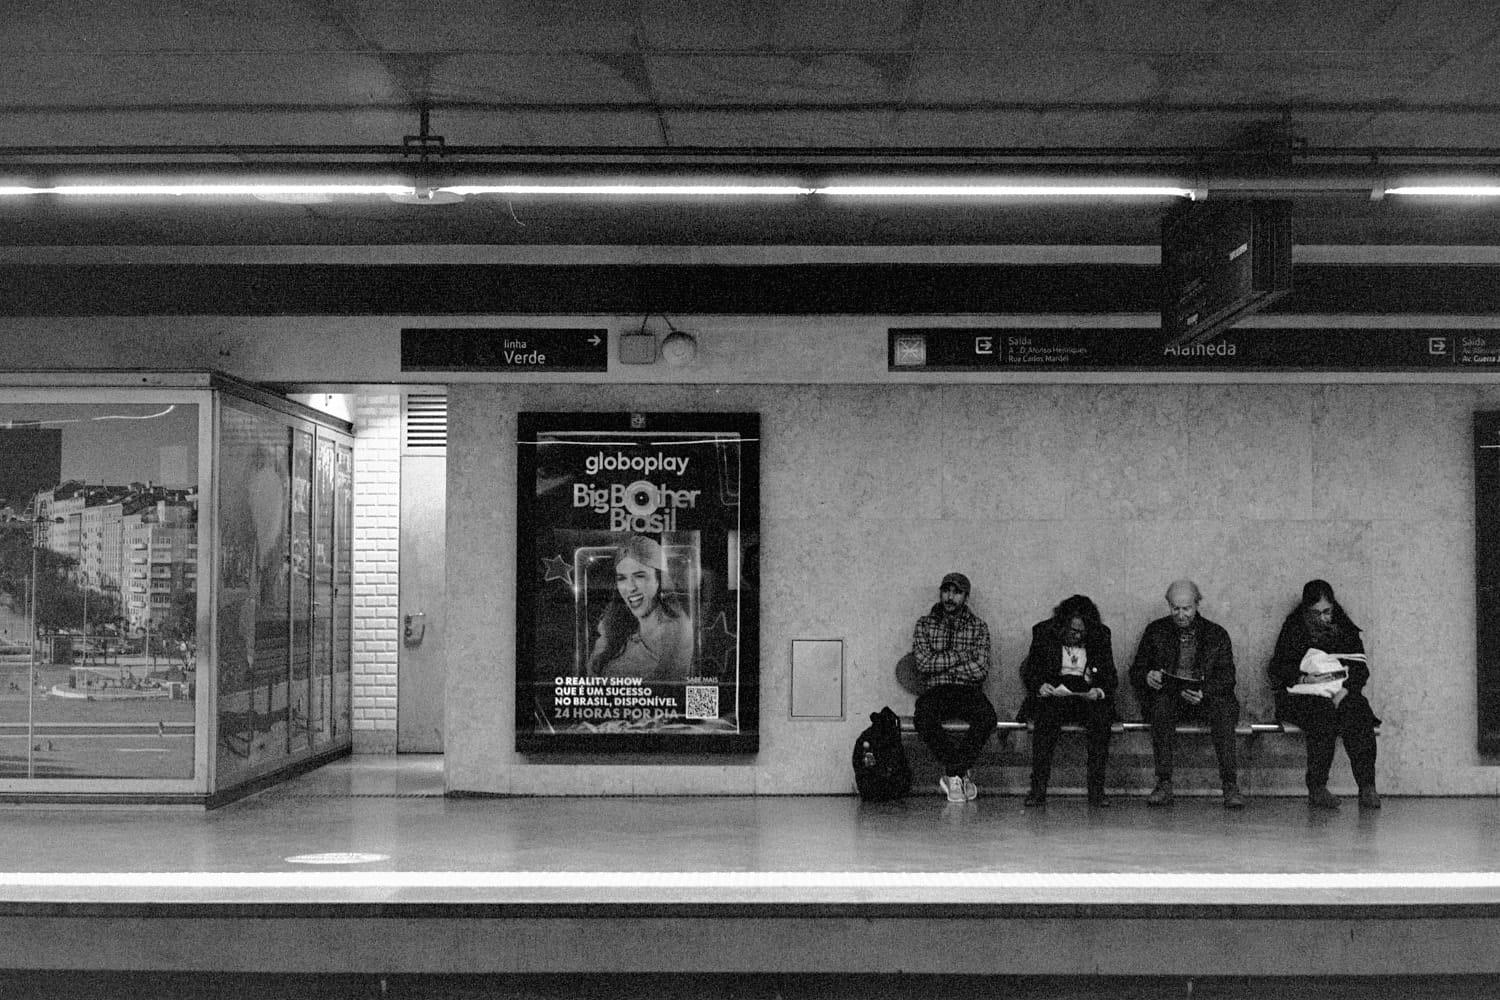
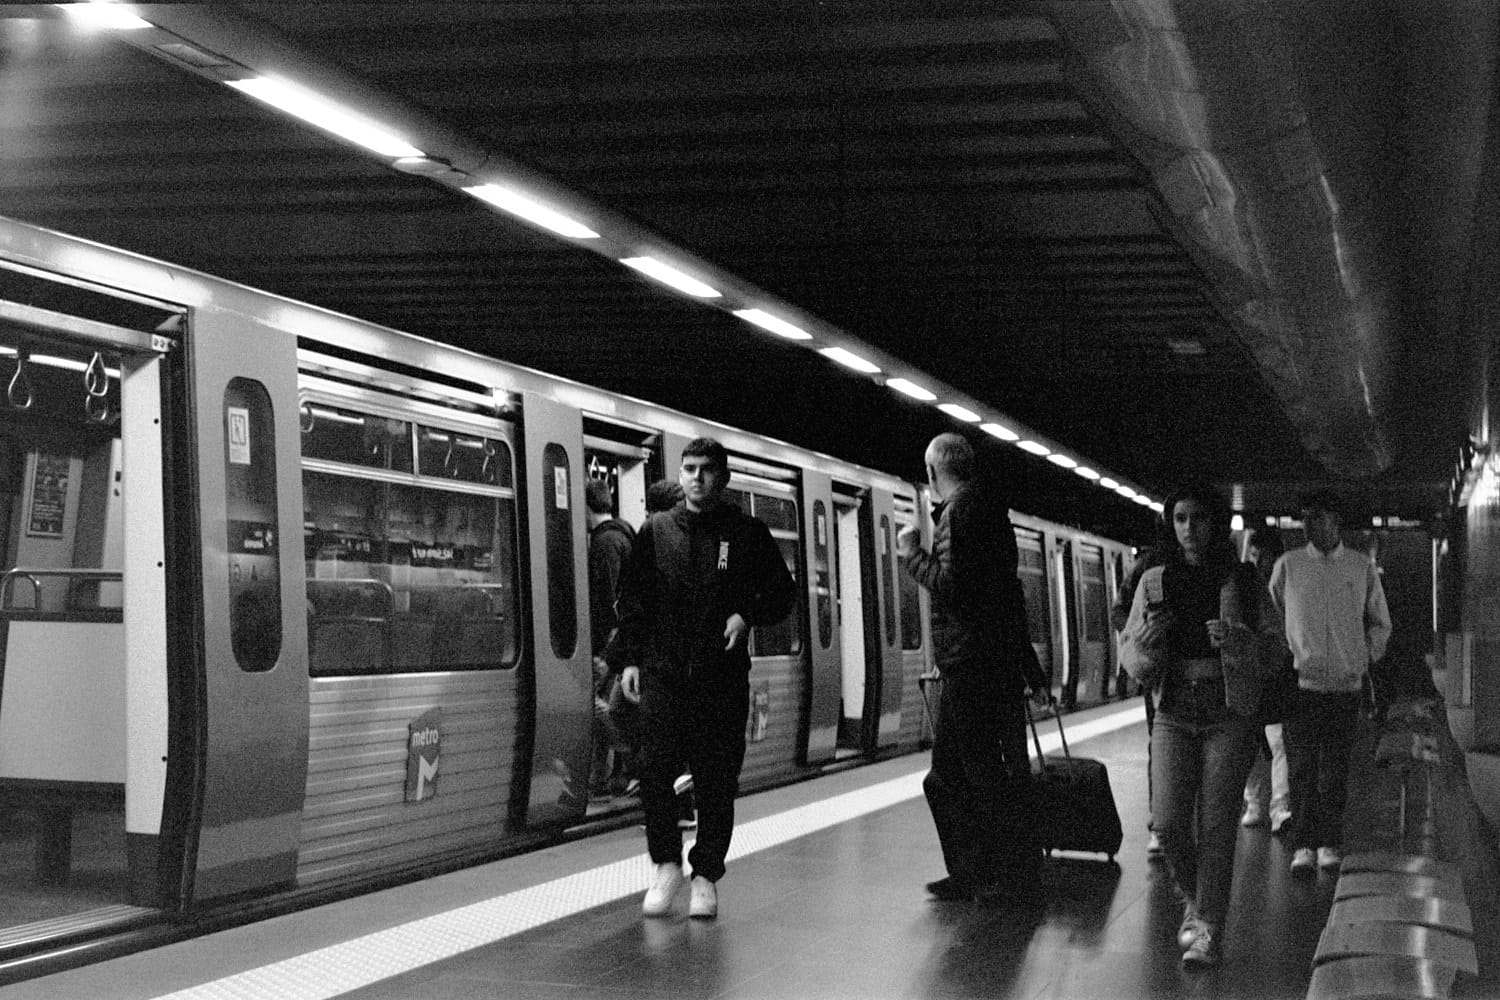
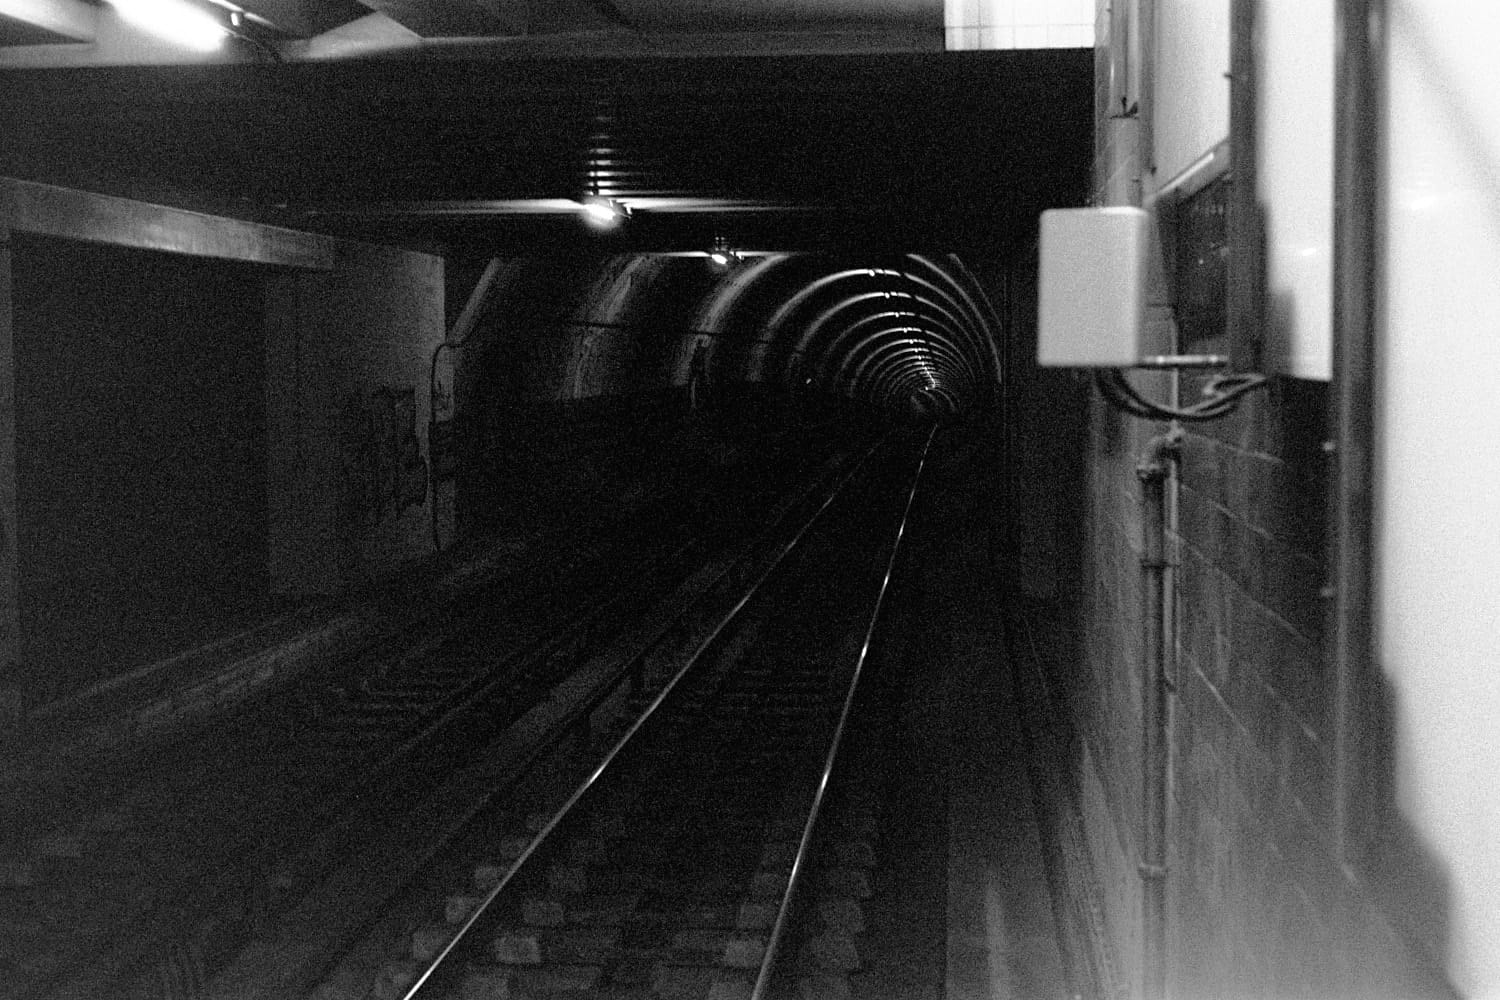

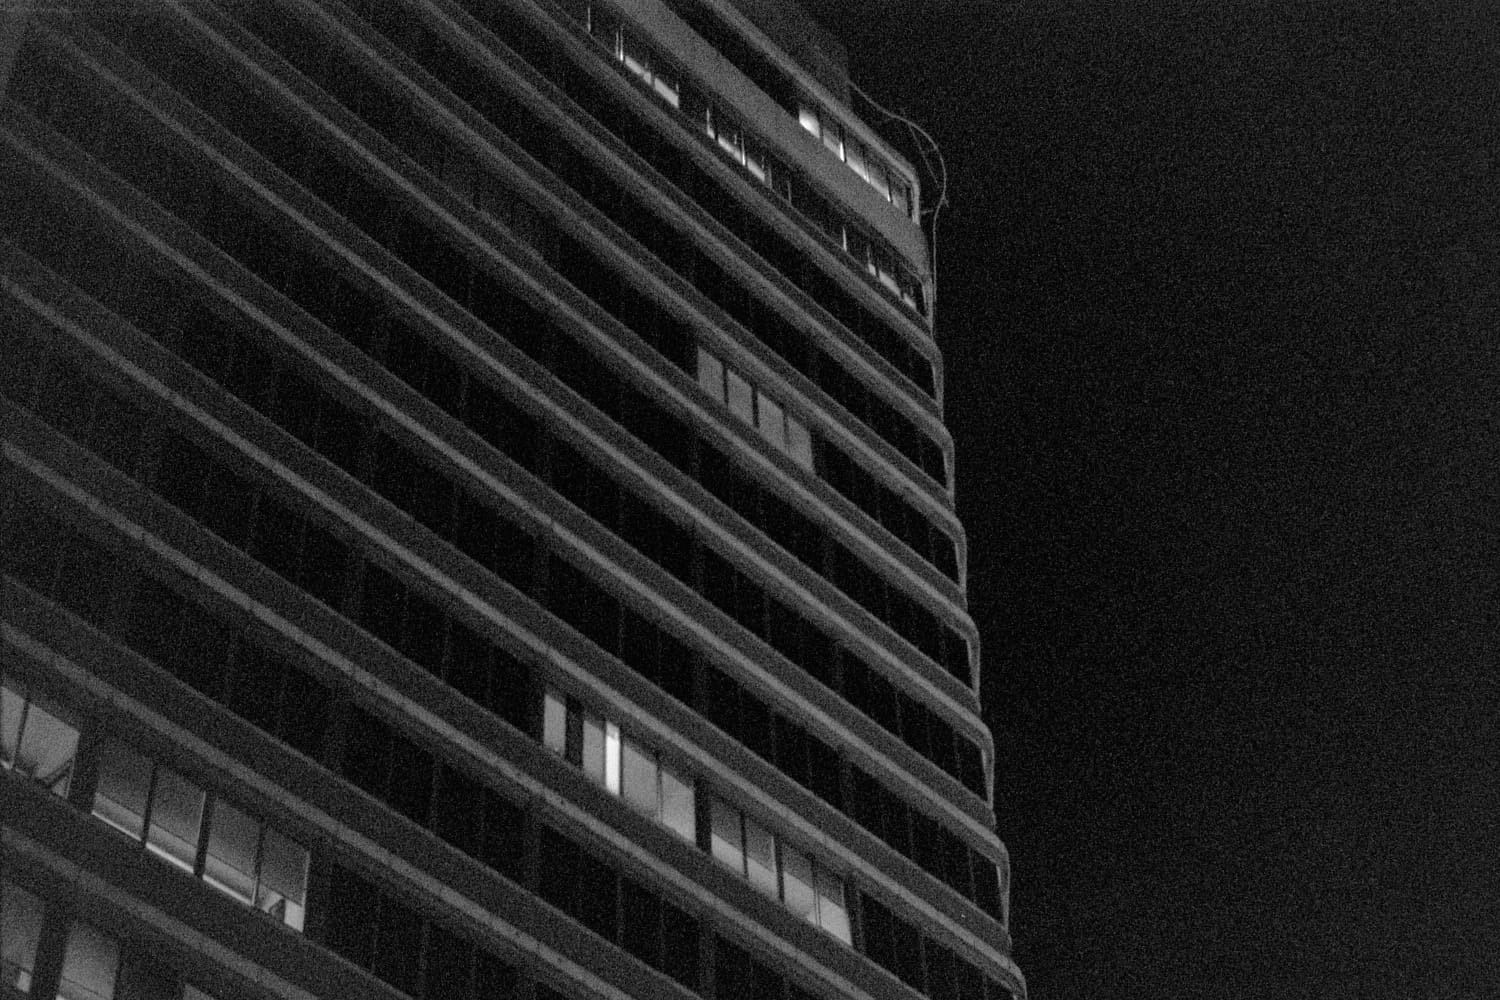

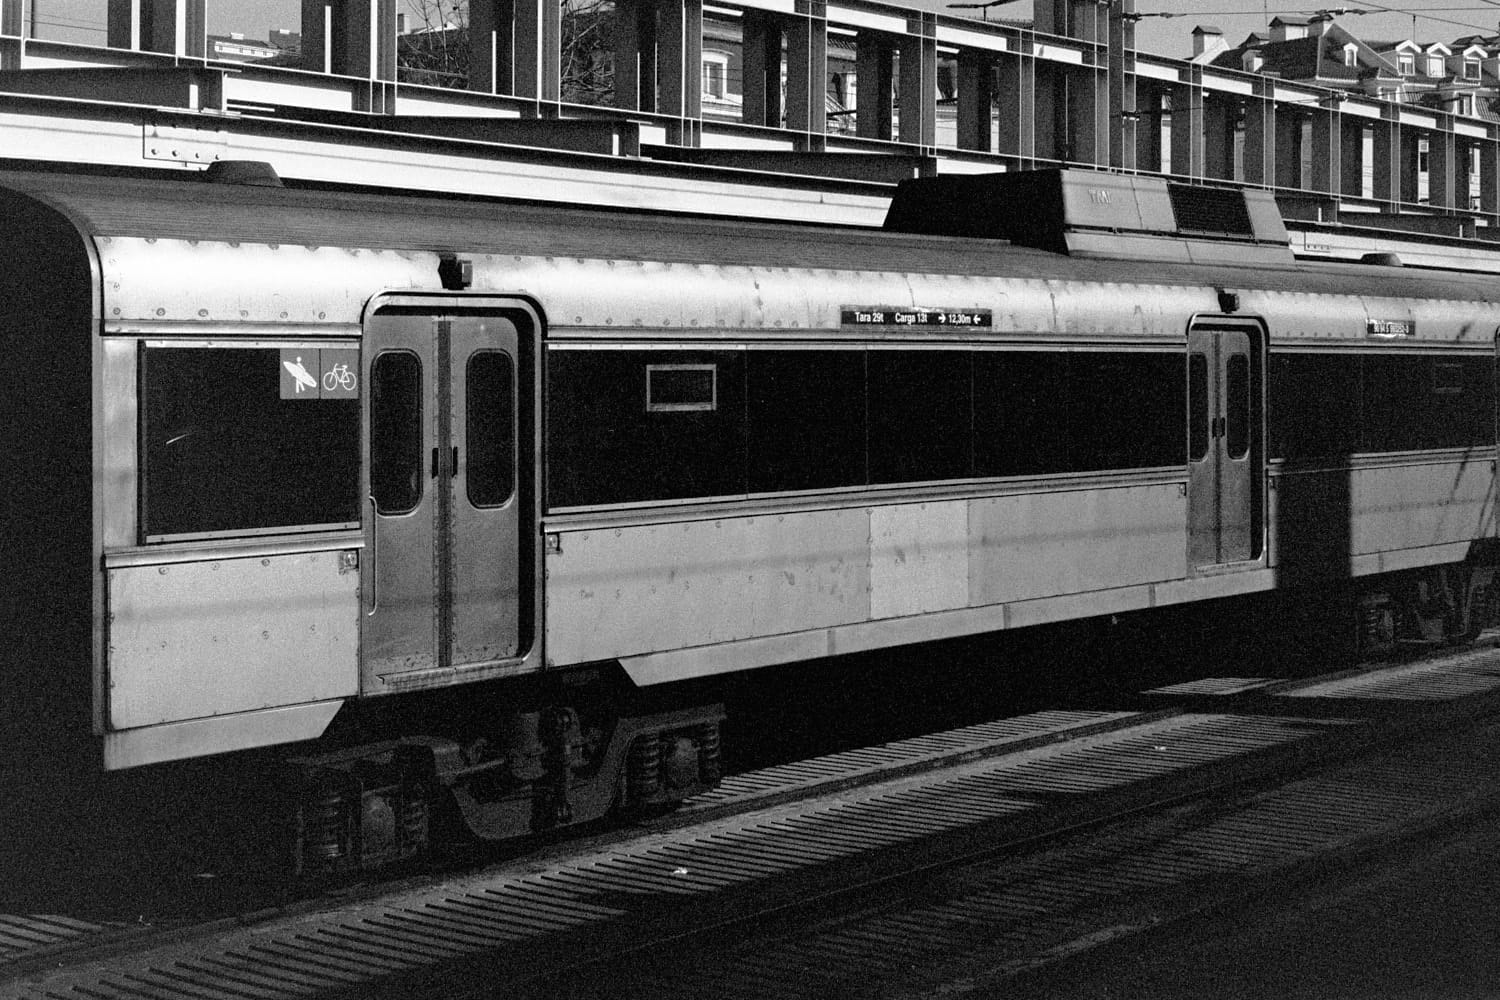


Many of the shots are usable—barely. Many are too thin to be useful at all, and any degree of underexposure results in absolutely unusable frames. (I did not share these frames here.)
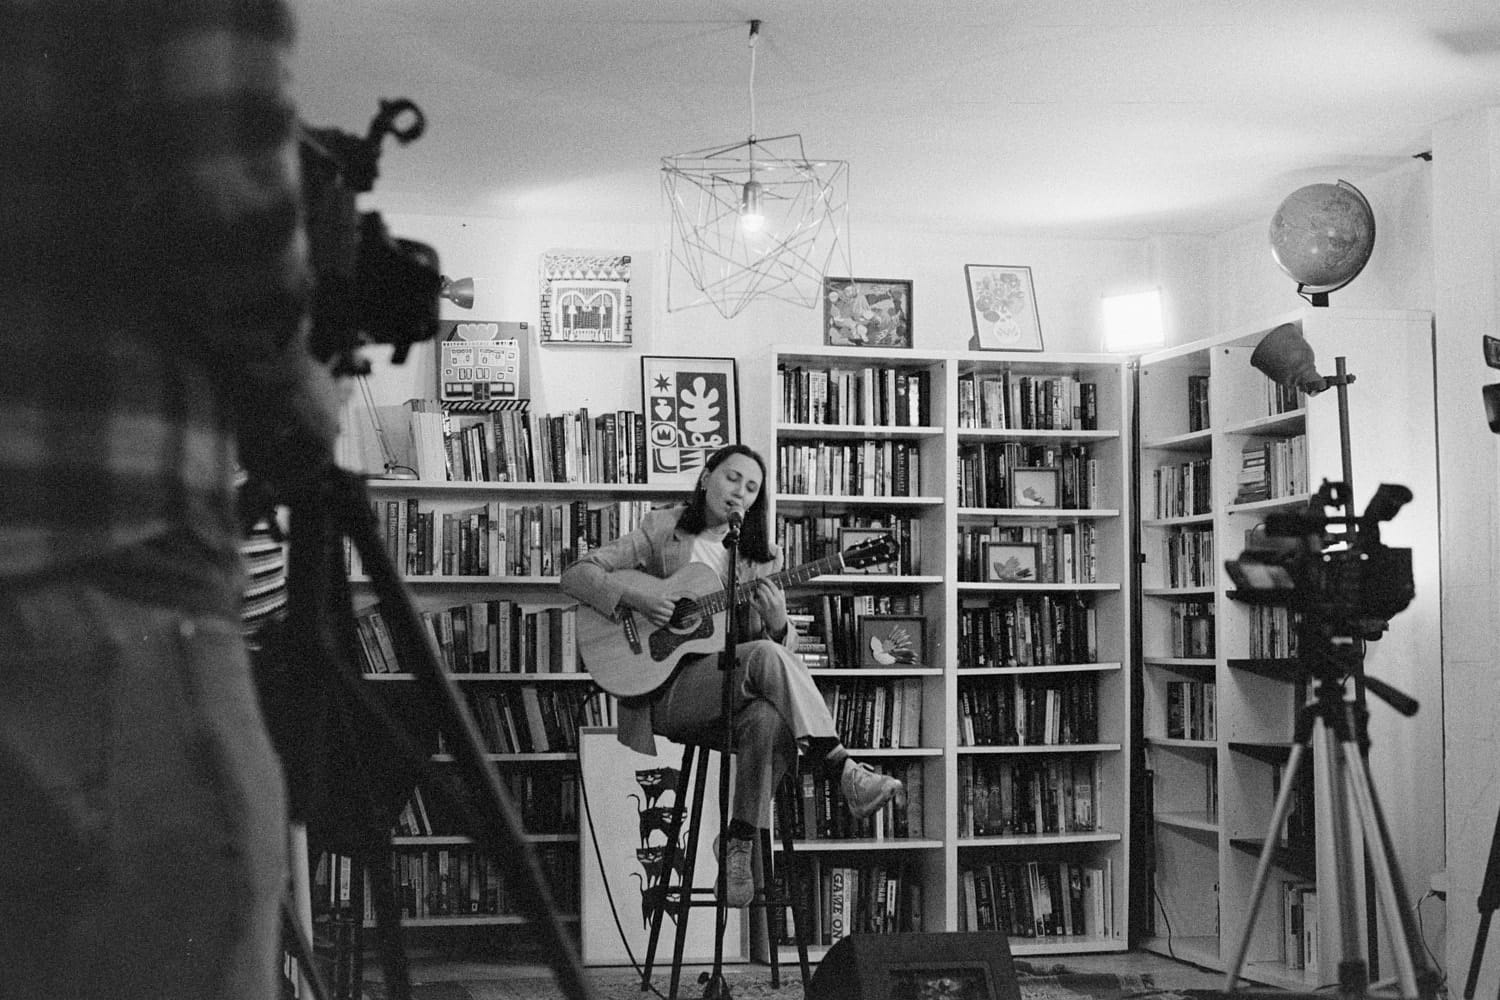
Shadow detail is lost except in the very best frame (the guitarist), and contrast is difficult to manage. The grain is getting pretty big, but that doesn’t really bother me at all, except in the underexposed shadows.
Conclusions
Based on this sample, I wouldn’t recommend pushing Ilford HP5 Plus to 6400 unless you really want that under-exposed look. But you don’t have to push to underexpose! Which means you also don’t need to stand around agitating your development tank for nearly half an hour either.
But, although I found these results to be underwhelming, I believe that we can get better results at 6400. As mentioned, there are a couple of variables we can play with: Development dilution and time, and camera.
So, next time: Let’s try again, reverting to the Canon P (but not without comparison shots in the Pentax!), and trying a more vigorous development. And maybe we can achieve better results at 6400? Spoiler alert: It gets better.
Support this blog
If you enjoy reading this blog, I encourage you to consider purchasing a book or print to show your support. And if you're into analog photography, check out my new mobile app Crown + Flint.