Extreme Film Pushing: Ilford HP5 Plus @ 6400 (Pt. 2)
Trying once again to push Ilford HP5 plus to 6400, I find more agreeable results. But is it good enough? Spoiler alert: It depends.


1: Ilford HP5 Plus @ 3200
2: Ilford HP5 Plus @ 6400 (Pt. 1)
3: Ilford HP5 Plus @ 6400 (Pt. 2) 👈🏼
I love shooting at ISO 6400. Or, anyway, I love the idea of shooting at ISO 6400. Shooting high ISO film opens up so many possibilities—night photography, handheld shooting in dim indoor spaces, using zone focus with very small apertures. It's great.
But shooting fast film means either spending money on Ilford Delta 3200, spending lots of money on Kodak T-Max P3200, or pushing cheaper film. I love T-Max P3200, but I also like money.
So, for the first time, having gotten a color calibration target for Christmas, I thought I should be methodical about my testing. So I bought some Ilford HP5 Plus, hearing that it pushes well, and set about shooting some photos.
Of course, HP5 Plus is rated for ISO 400, but the datasheet provides development times for up to 3200. And indeed, my early experiments shooting at 3200 went really well. Encouraged, I figured I could try 6400. That didn’t go as well. But never daunted by failure, I tried something different.
Can we get get HP5 Plus to work for us at 6400? Yes, depending on how you define “work”. Cutting to the punchline, I was able to get denser negatives, and acceptable results. But I think we’ve hit the limit of what’s possible with HP5 Plus if we’re looking for stellar image quality. But you can nevertheless achieve good enough images at 6400, and maybe higher.
Methodology
To rule out camera issues (a possible source of the thin negatives in my last experiment), I took a test photo of a Datacolor Spyder Checkr 24 using a Pentax ME Super with a SMC Pentax 55mm f/1.8 lens and another with a Canon P with Canon 50mm f/1.4 lens. Both were shot in reasonably uniform lighting in my home office. I rated the film 6400, metered the scene with the Crown + Flint app on my iPhone which yielded an EV100 of 5.0, and I shot the frame at f/4 and 1/125s.
The film was developed according to the one recipe I found in the Massive Dev Chart: in Adox XT-3 at full working strength at 24º for for 17:30, with continuous agitation for the first two minutes, then agitating at the top of every minute thereafter. Getting the developer to 24º required warming it in a water bath, and I worked to keep that temperature across all development steps I figure, someone else had success
I then scanned the film using my usual process—an iPad mini as the backlight, a Negative Supply 135 film holder, and a Valoi copy stand to hold the camera. The scans were made with a Fujifilm X-Pro3 fitted with a Laowa 65mm f/2.8 2x Ultra Macro APO lens. Shots were made at ISO 160, f/5.6, and 1/2.5s.
Scans were captured using Capture One, and editing with the linear film profile, in monochrome mode.
Initial Observations
At this point, I can already diagnose what went wrong in Part 1: It was the development. Do not use the development times and process I documented in the previous article. They clearly don’t work. I’ll update the earlier article to reflect this new understanding.
The first tell that the problem is the development process is that the negatives show no clear difference in density between the Pentax and the Canon, indicating that the problem was not an unreliable shutter in the Pentax.
The second tell is that the negative density is largely acceptable, a little thin but not too thin. When pushing you expect thin negatives of course, so there is probably an upper limit to how much I will be able to improve the density. I think we’re somewhere acceptable. But I’d prefer not to have to mess around with temperatures, and using XT-3 at full strength for one-shot developing is more expensive than I would prefer. So I might fiddle around with the development process some more.
Test Shots
The goal here is to achieve something approximating what could be measured with a densitometer. I don’t have a densitometer, but I do have a Datacolor Spyder Checkr 24 calibration target, and a willingness to experiment. The results below are a bit half-assed, but as we’ll see they get the job done well enough.
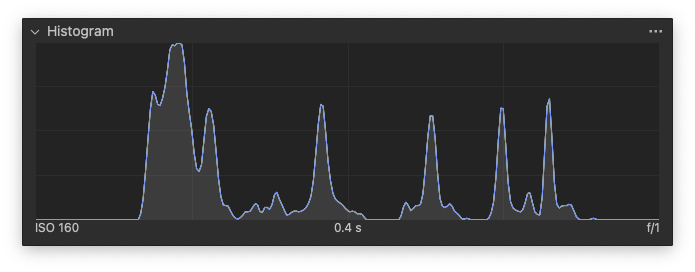
Here is the monochrome portion of my calibration target, as scanned without any processing or inversion. All shots are from the Canon P.
First, we can see that this negative is not as thin. Looking at the left squares, which are the shadows, we can see differentiation between the darkest two, and the target frame (which sits somewhere between the two in tonality). These squares (being lighter because this is a negative image) correspond to the rightmost spikes in the histogram. We see three spikes, overlapping for sure, but with distinct peaks. That's great. But the large middle peak (corresponding to the target frame) has almost swallowed the black target square, so we can predict a lot of grain in the shadows.


As scanned
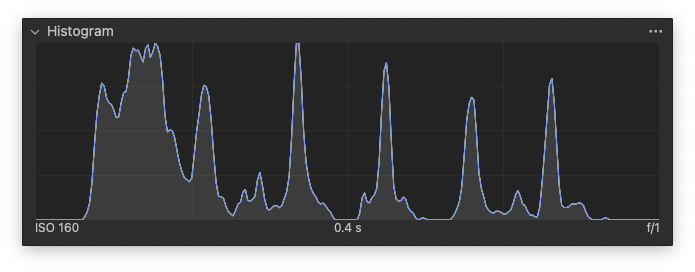
Then we invert the levels in Capture One. As before, we can see another issue. The tones should be more or less evenly spaced out, but there is once again too much separation in the midtones, and not enough in the highlights. Notice the gap between the spikes on the left, and the three spikes on the right. Notice also that the spikes on the right are a little bunched up, indicating a slight loss of contrast in the highlights.
None of this is surprising—pushing film increases overall contrast, and loses shadow detail, and that is precisely what we are seeing here. We can correct this.

Levels inverted. The loss of shadow and highlight detail becomes more evident.
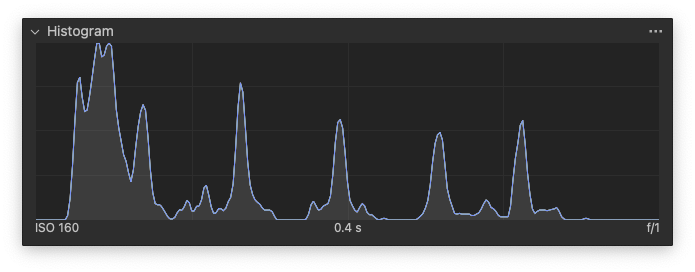
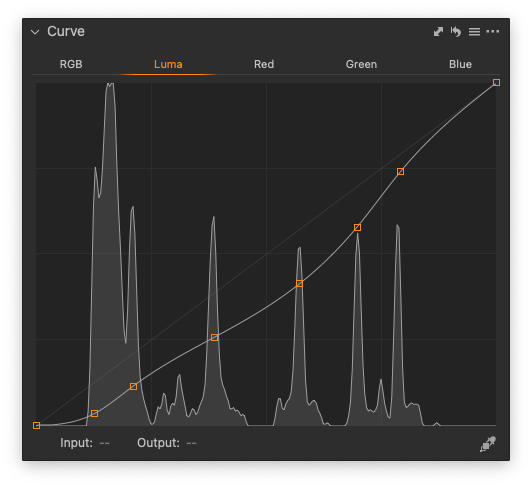
So now we use the curves tool to space out the spikes as best we can. We take a reading on each of the targets, and adjust those points on the curve to evenly space them out. The highlights look much better, but (unsurprisingly) there’s still a lot of noise in the shadows. I won’t bother showing you, but photos with this curve applied look too noisy to be acceptable. But we can fix this too! We just have to abandon mathematical perfection, and tap into our creative side.


Here is our final adjustment to the curve. This new curve was designed on the basis of examining actual photos, and not just the test target. Ultimately, our goal is to make beautiful photos, and theory will only take us so far. We shouldn’t feel bad about deviating from it if the result isn’t acceptable (and there is obviously room for improvement.
I’ve done three things to this curve. As a constraint on the editing, I aim to keep the progression of values in the test target linear in progression. First, I have relaxed the shadows, ceding some loss of detail in exchange for decreasing the graininess; this has resulted in the shadow tones moving closer to black as well. Second, I have used the additional space this created in the lower end to increase the overall gamma (using a steeper curve) to increase the contrast in the midtones a tad. You’ll see the spikes in the middle are a little bit more spaced out, and a little flatter and thicker, than above. Third, I have moved the highlights down. The white target square is nowhere near as bright as a streetlight in a high-contrast night scene, so I needed my adjusted curve to leave room for extreme highlight details.

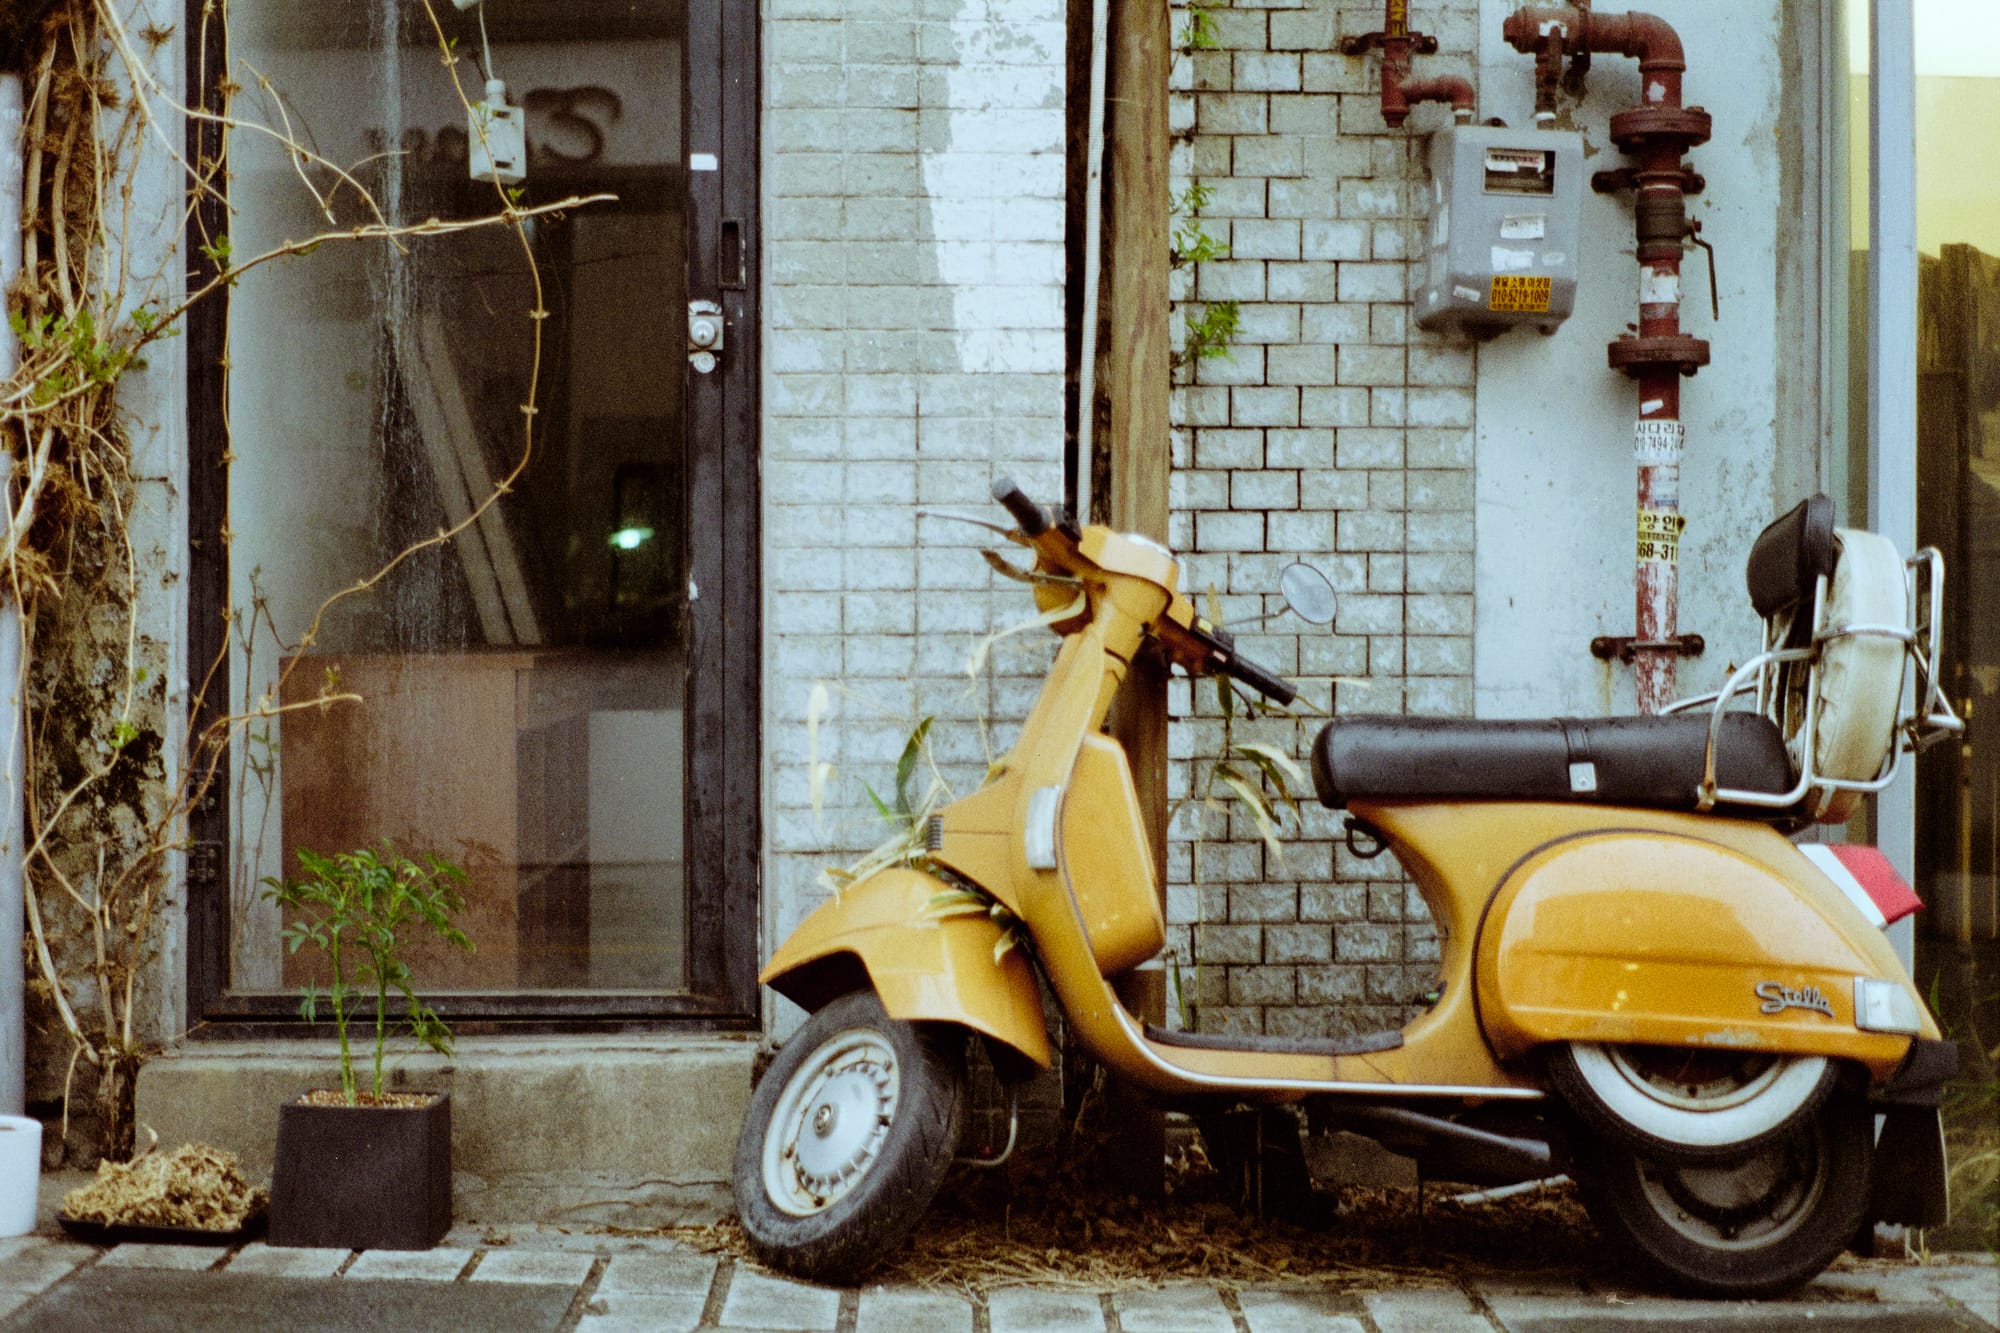
Real World Results
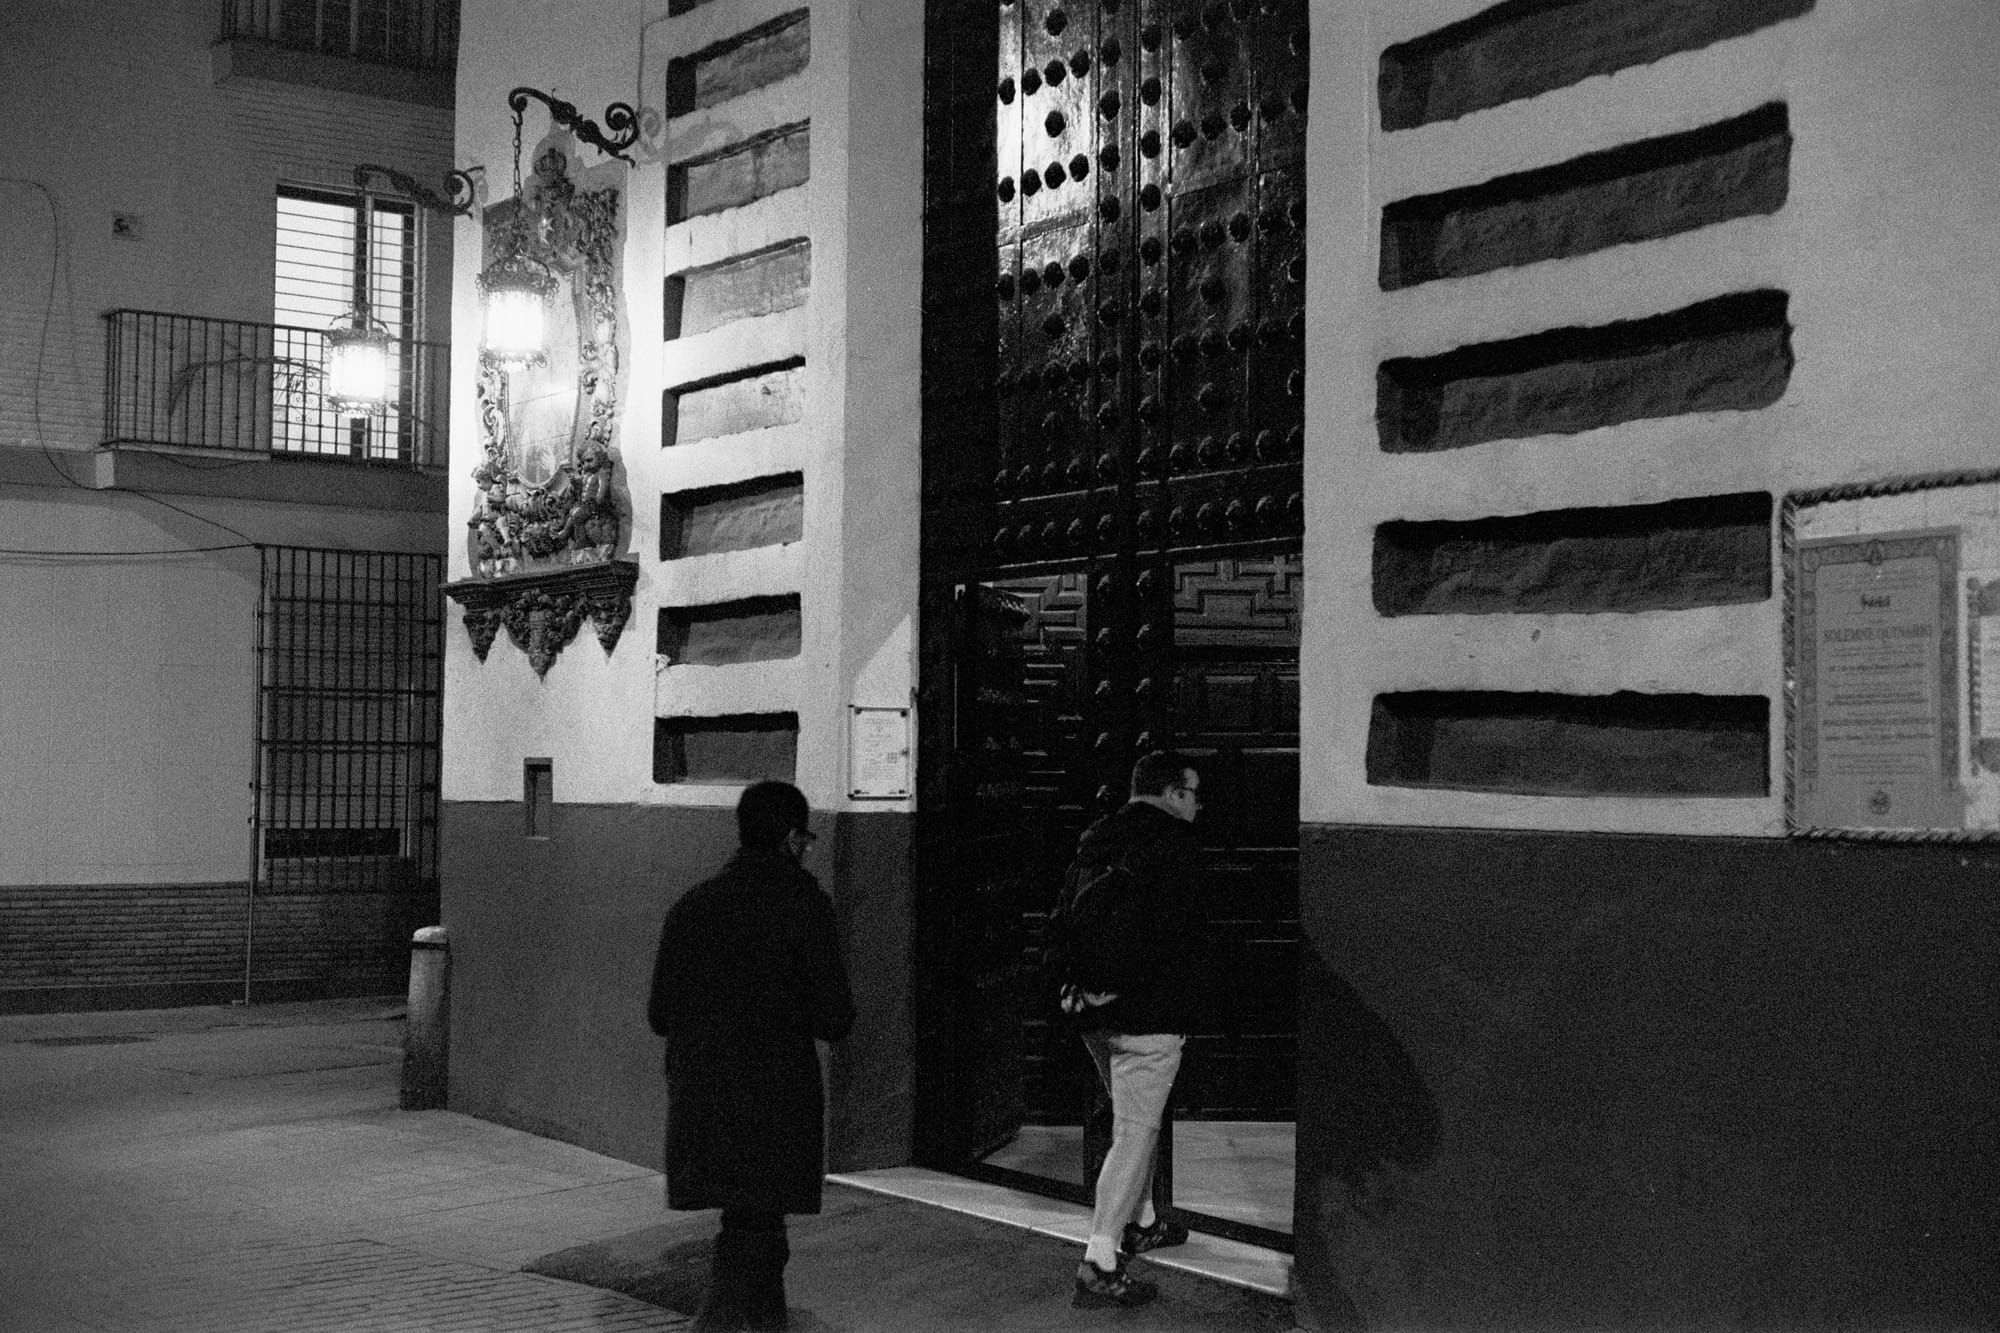
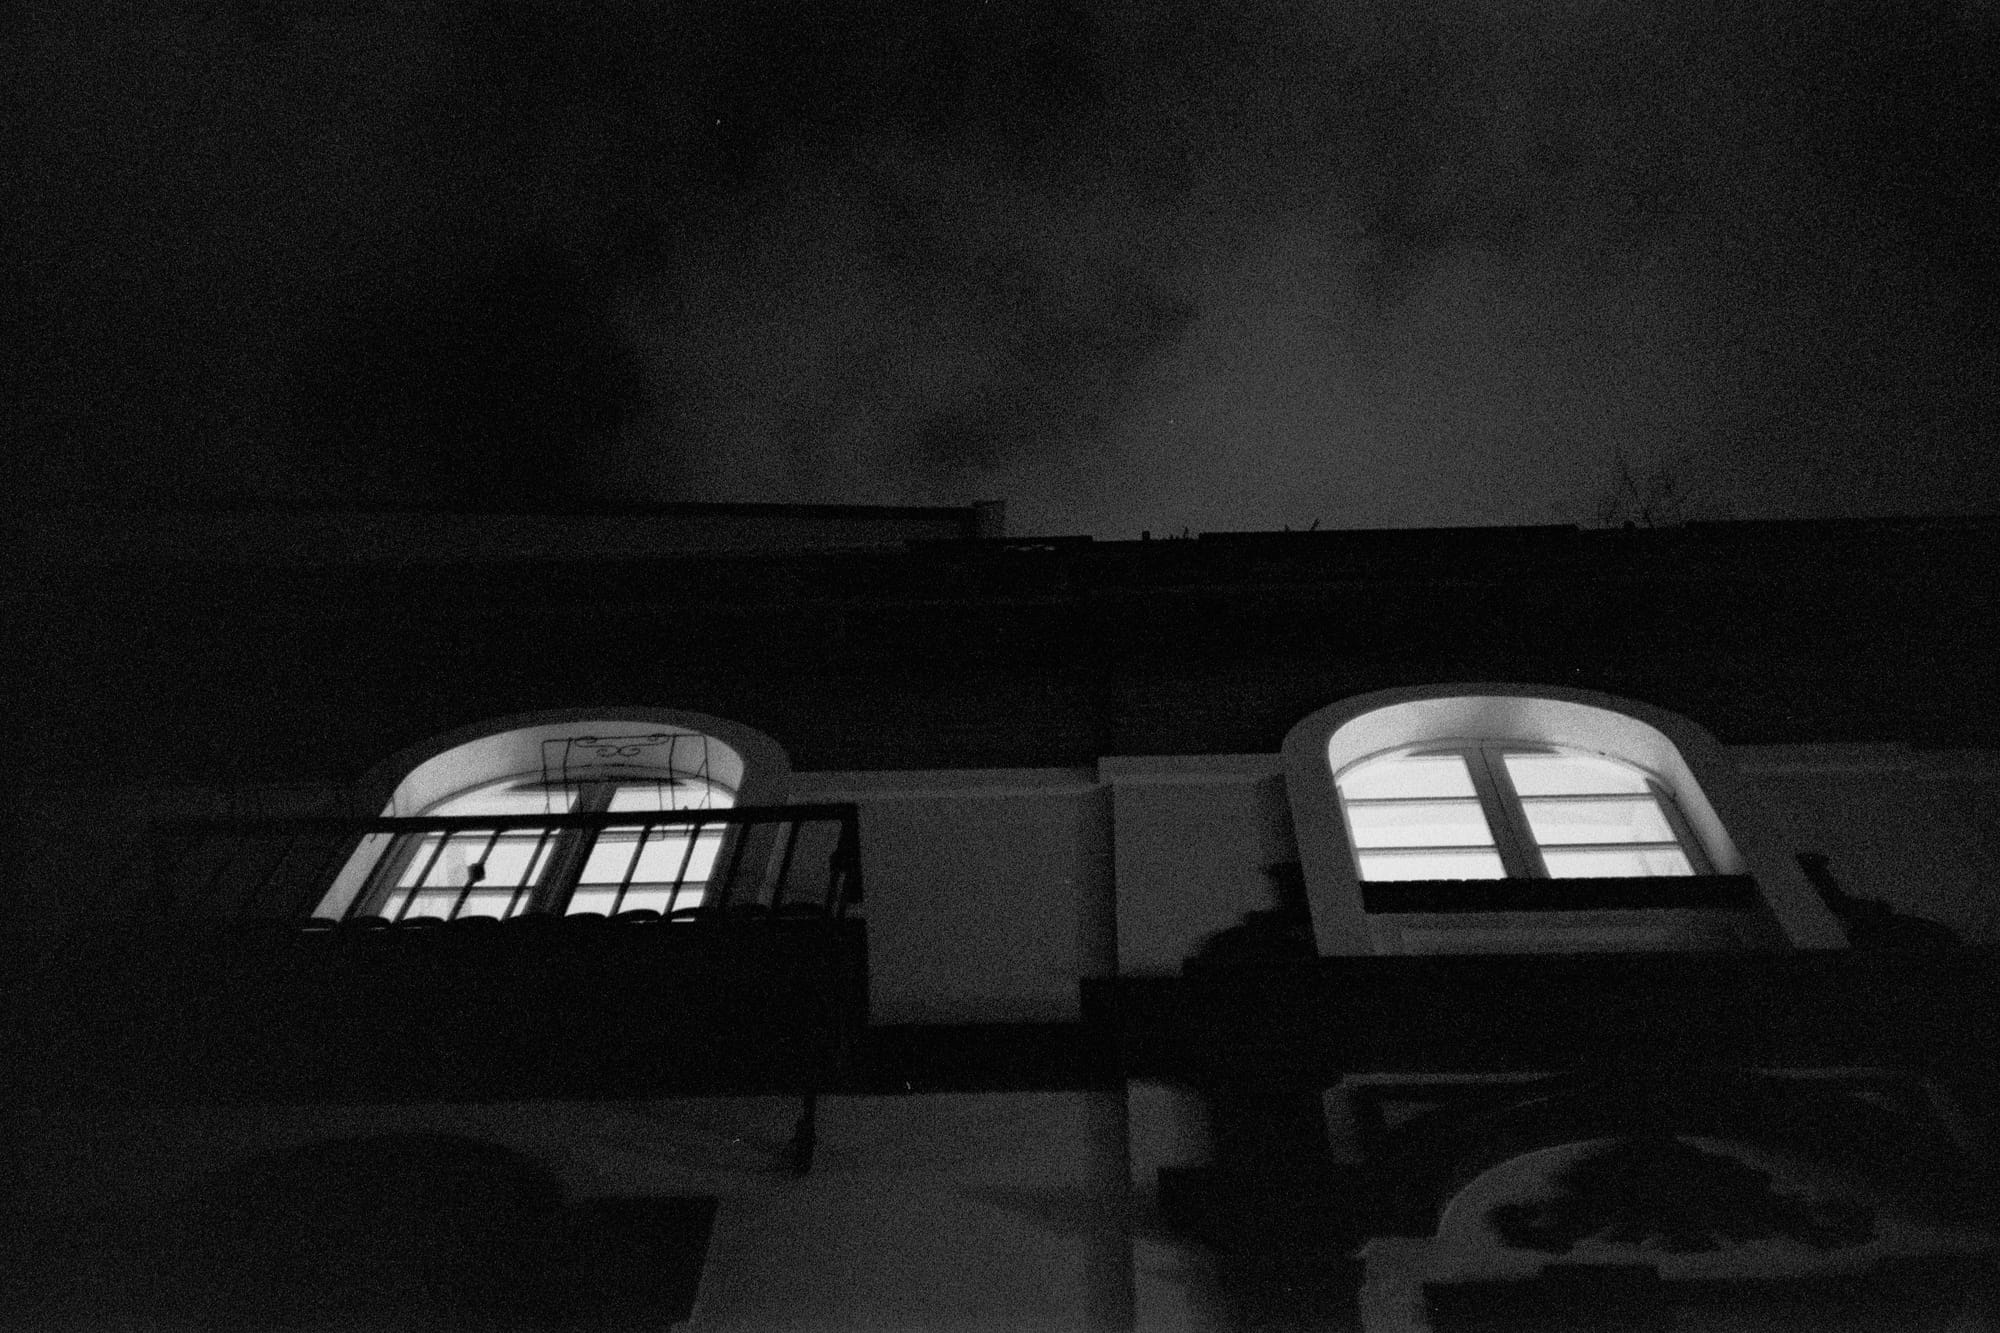
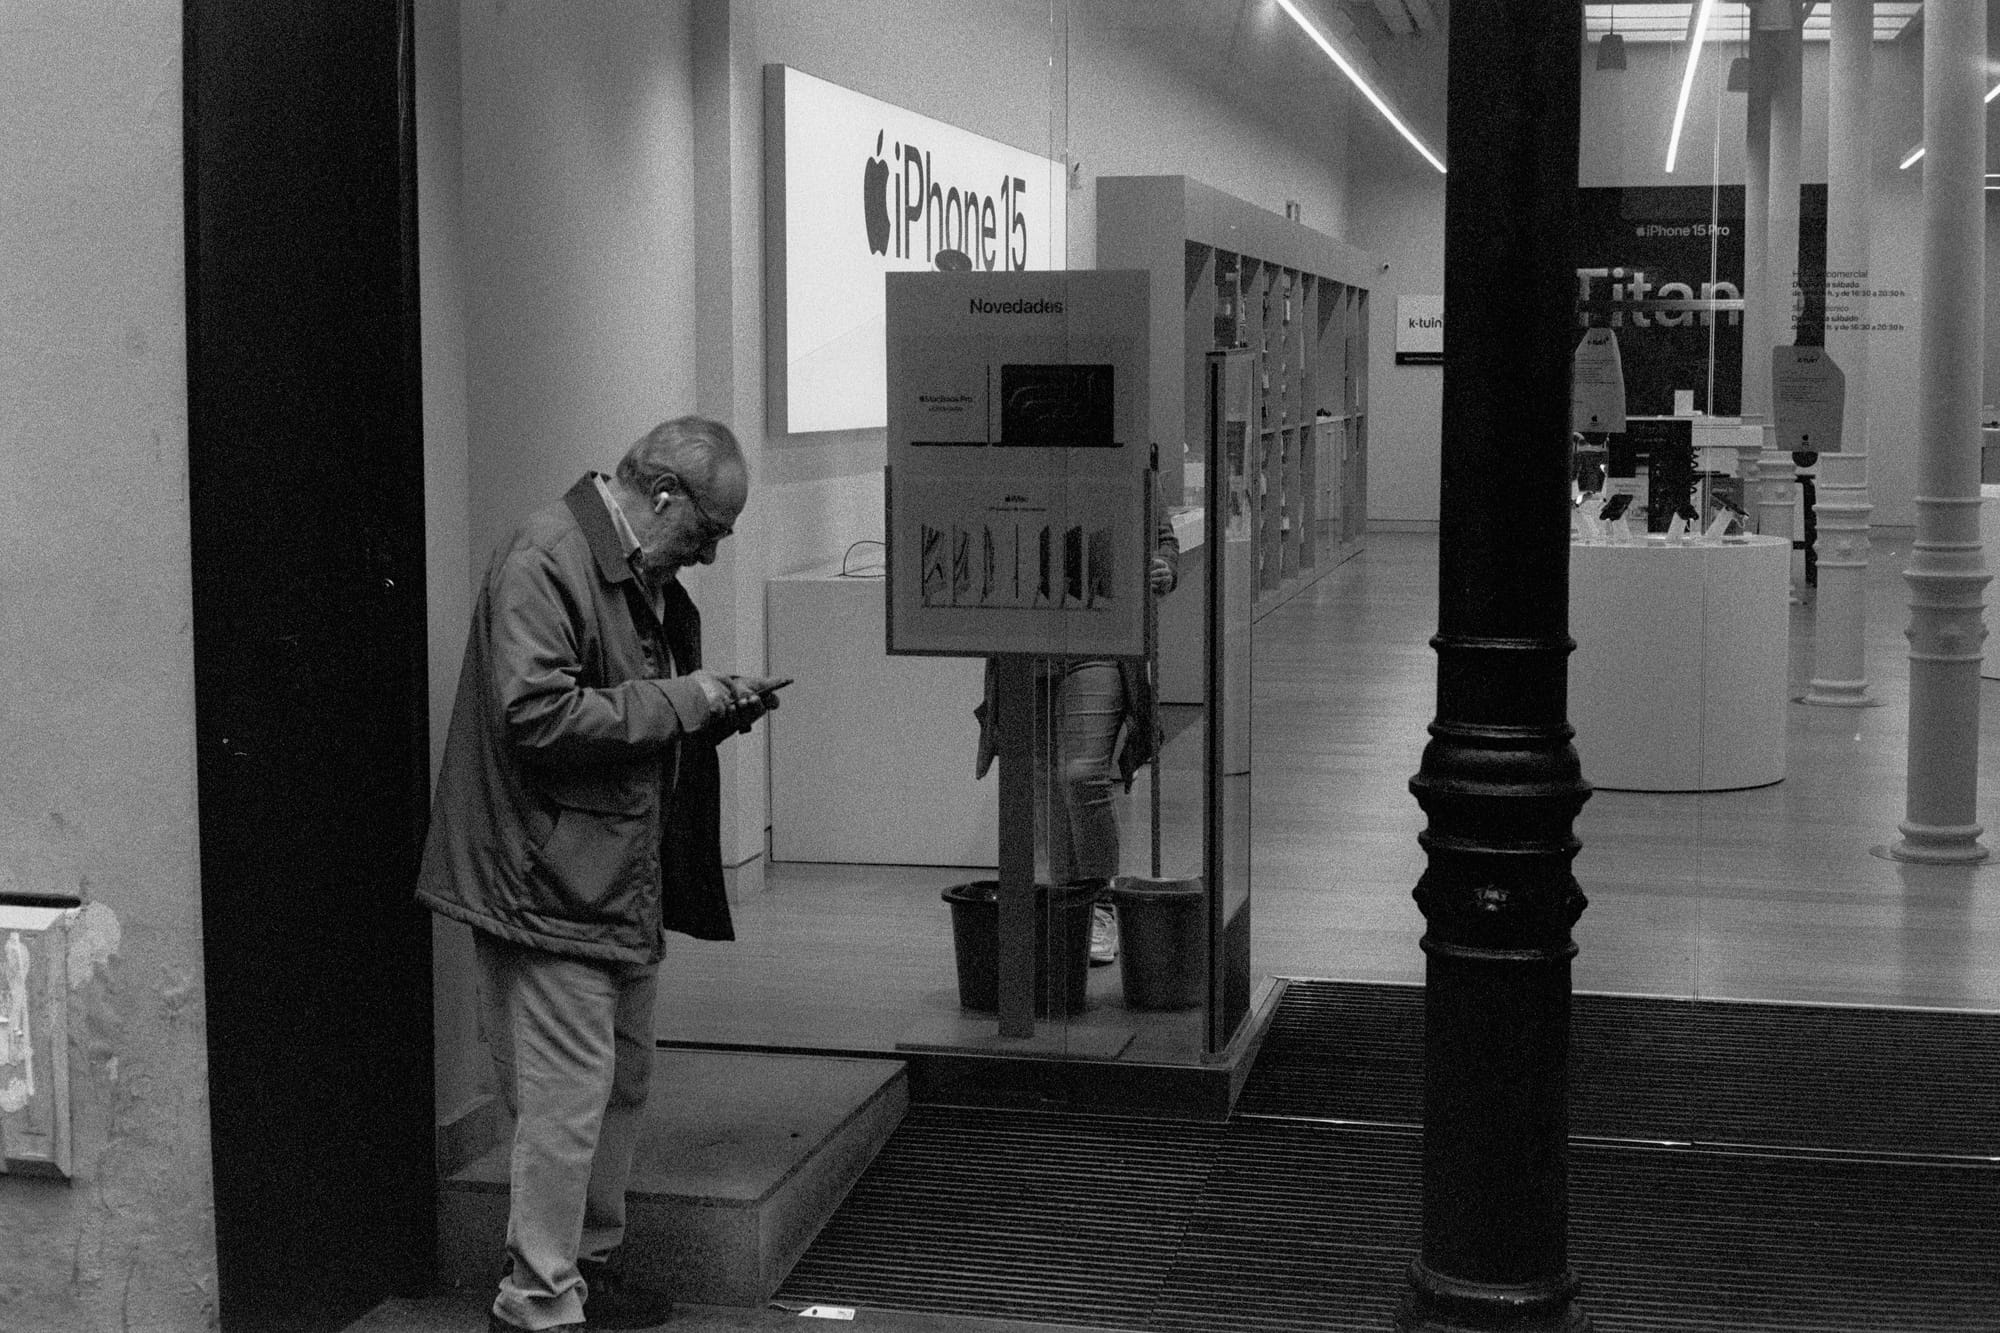
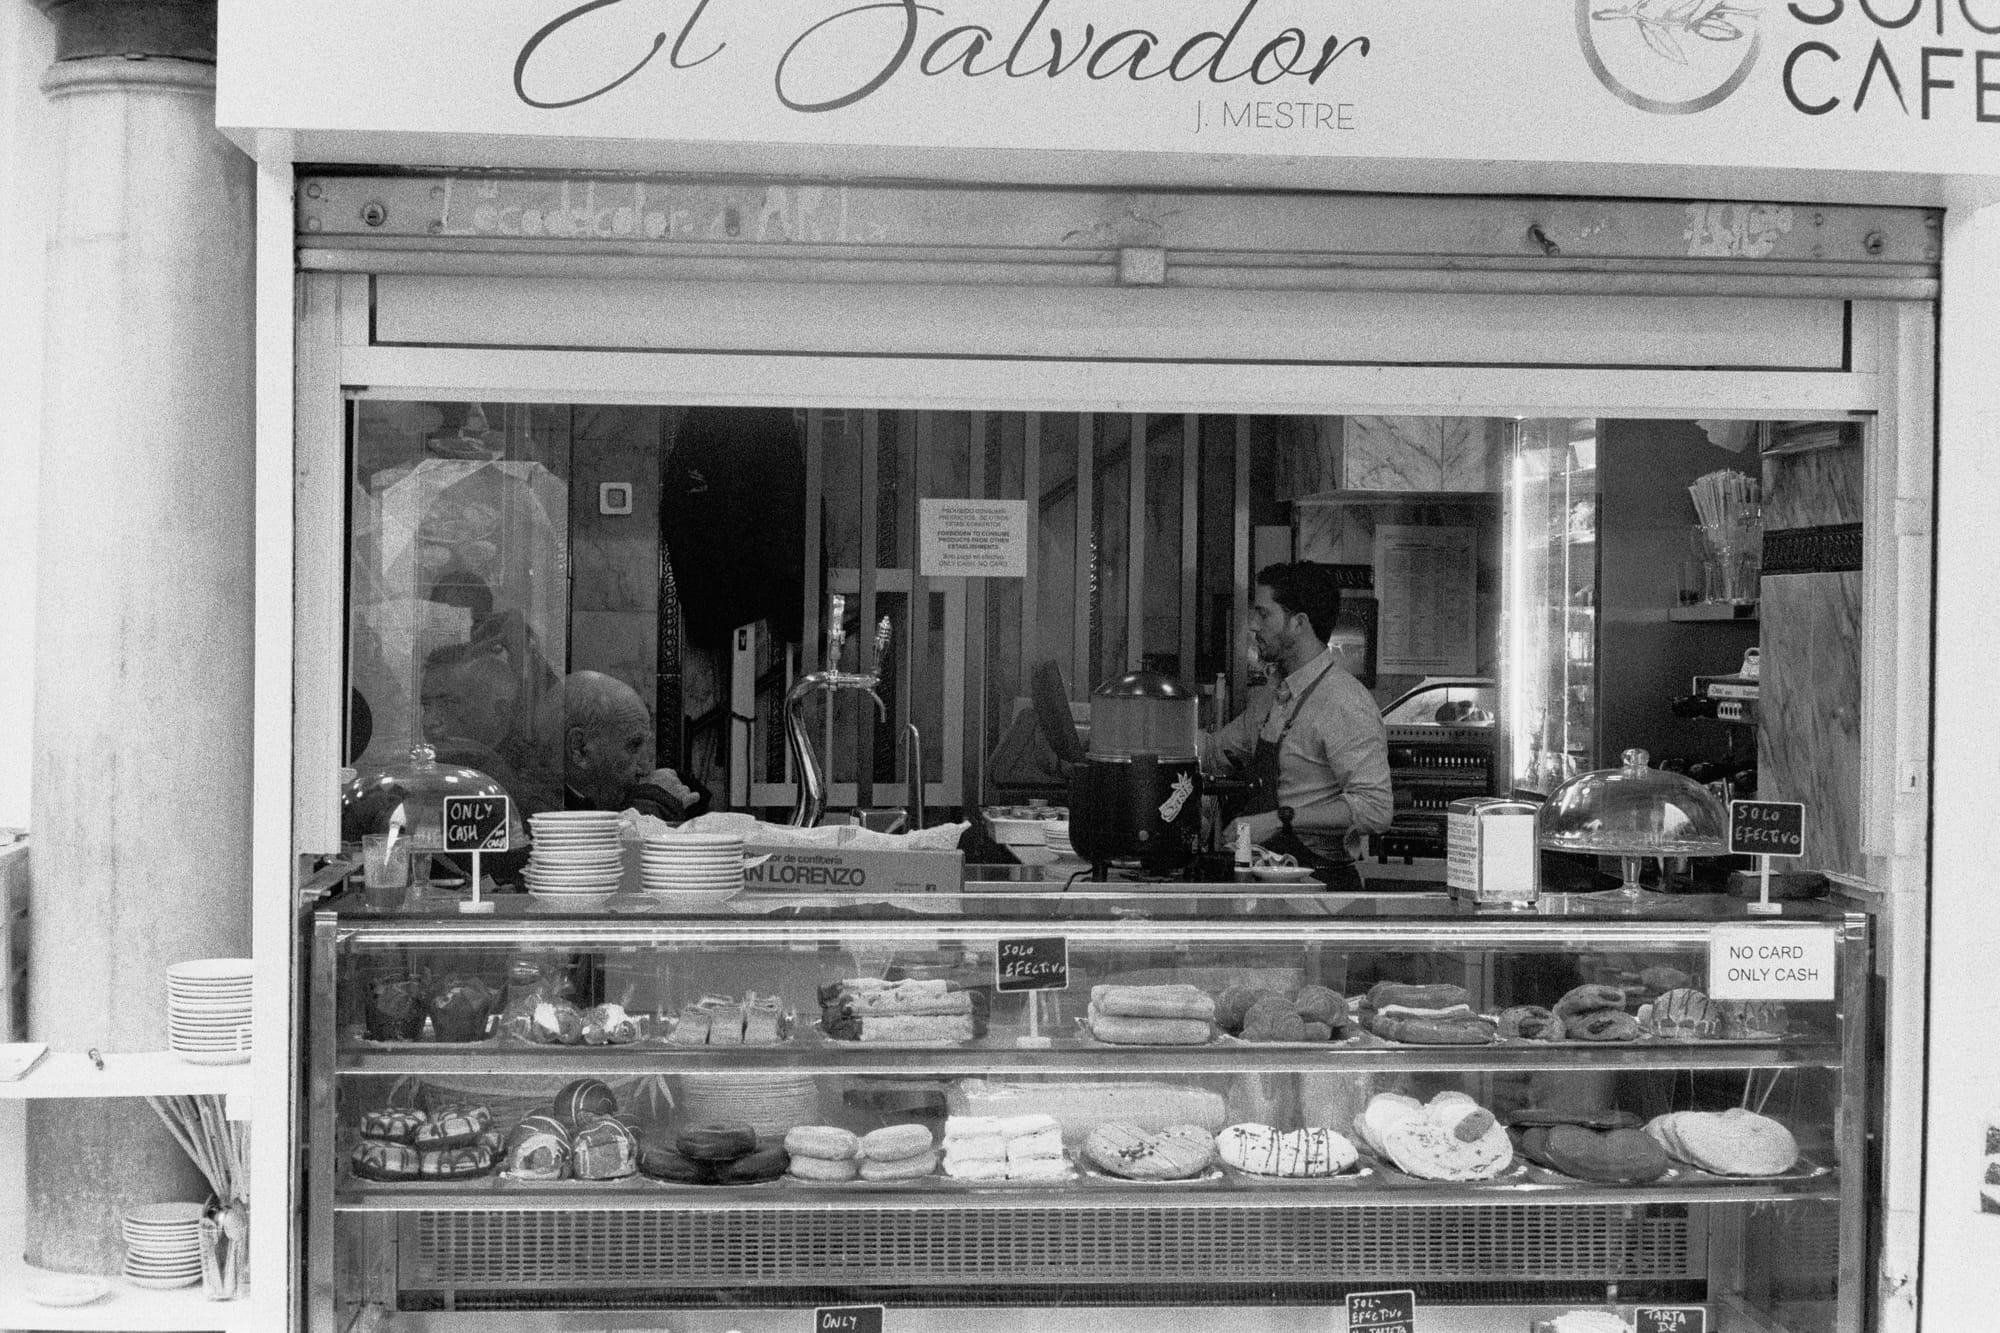
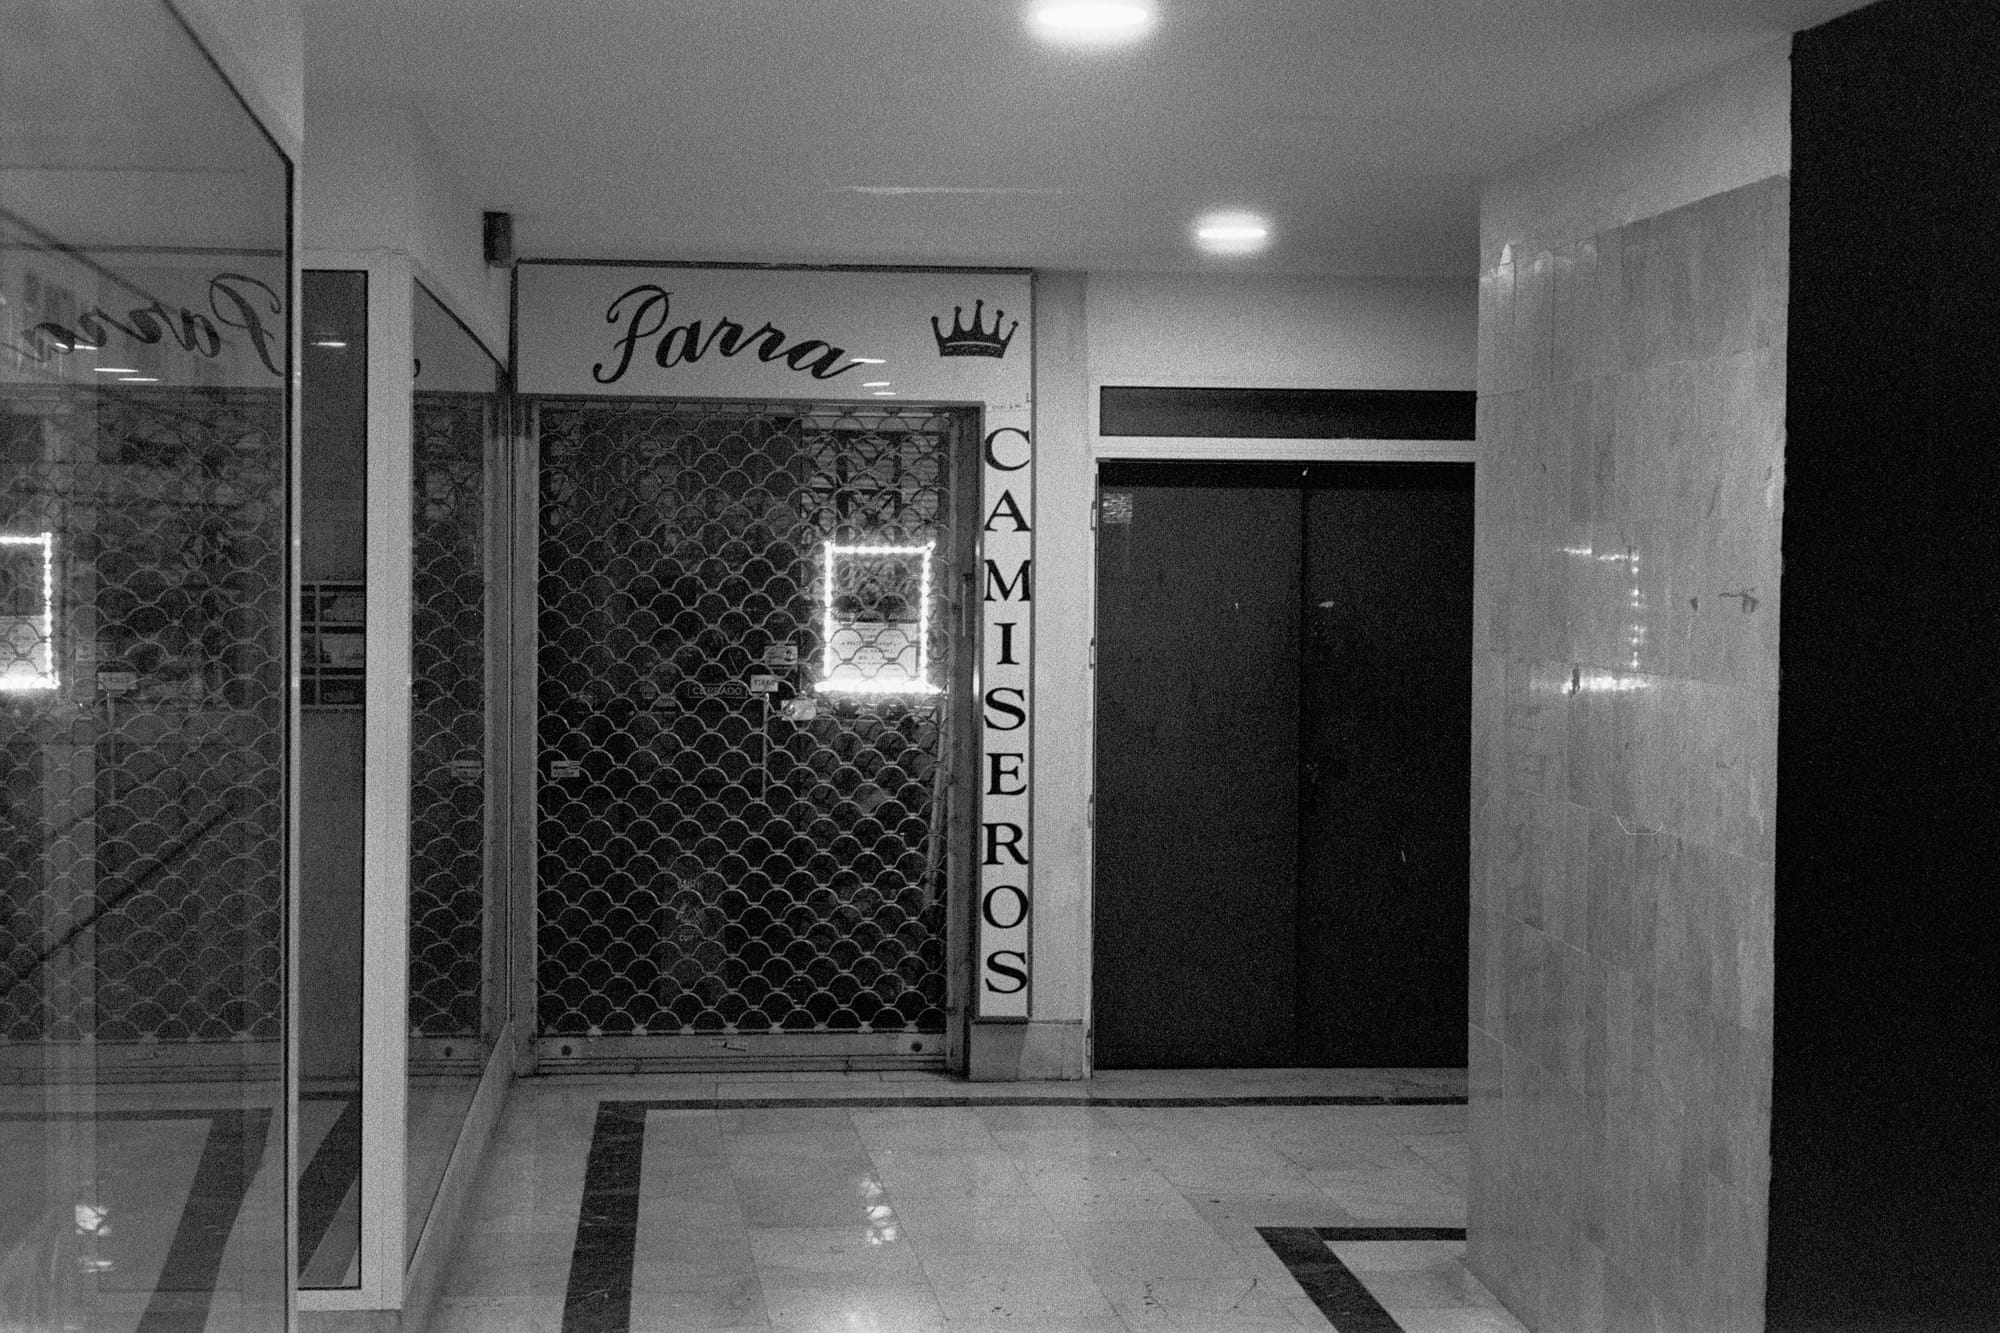
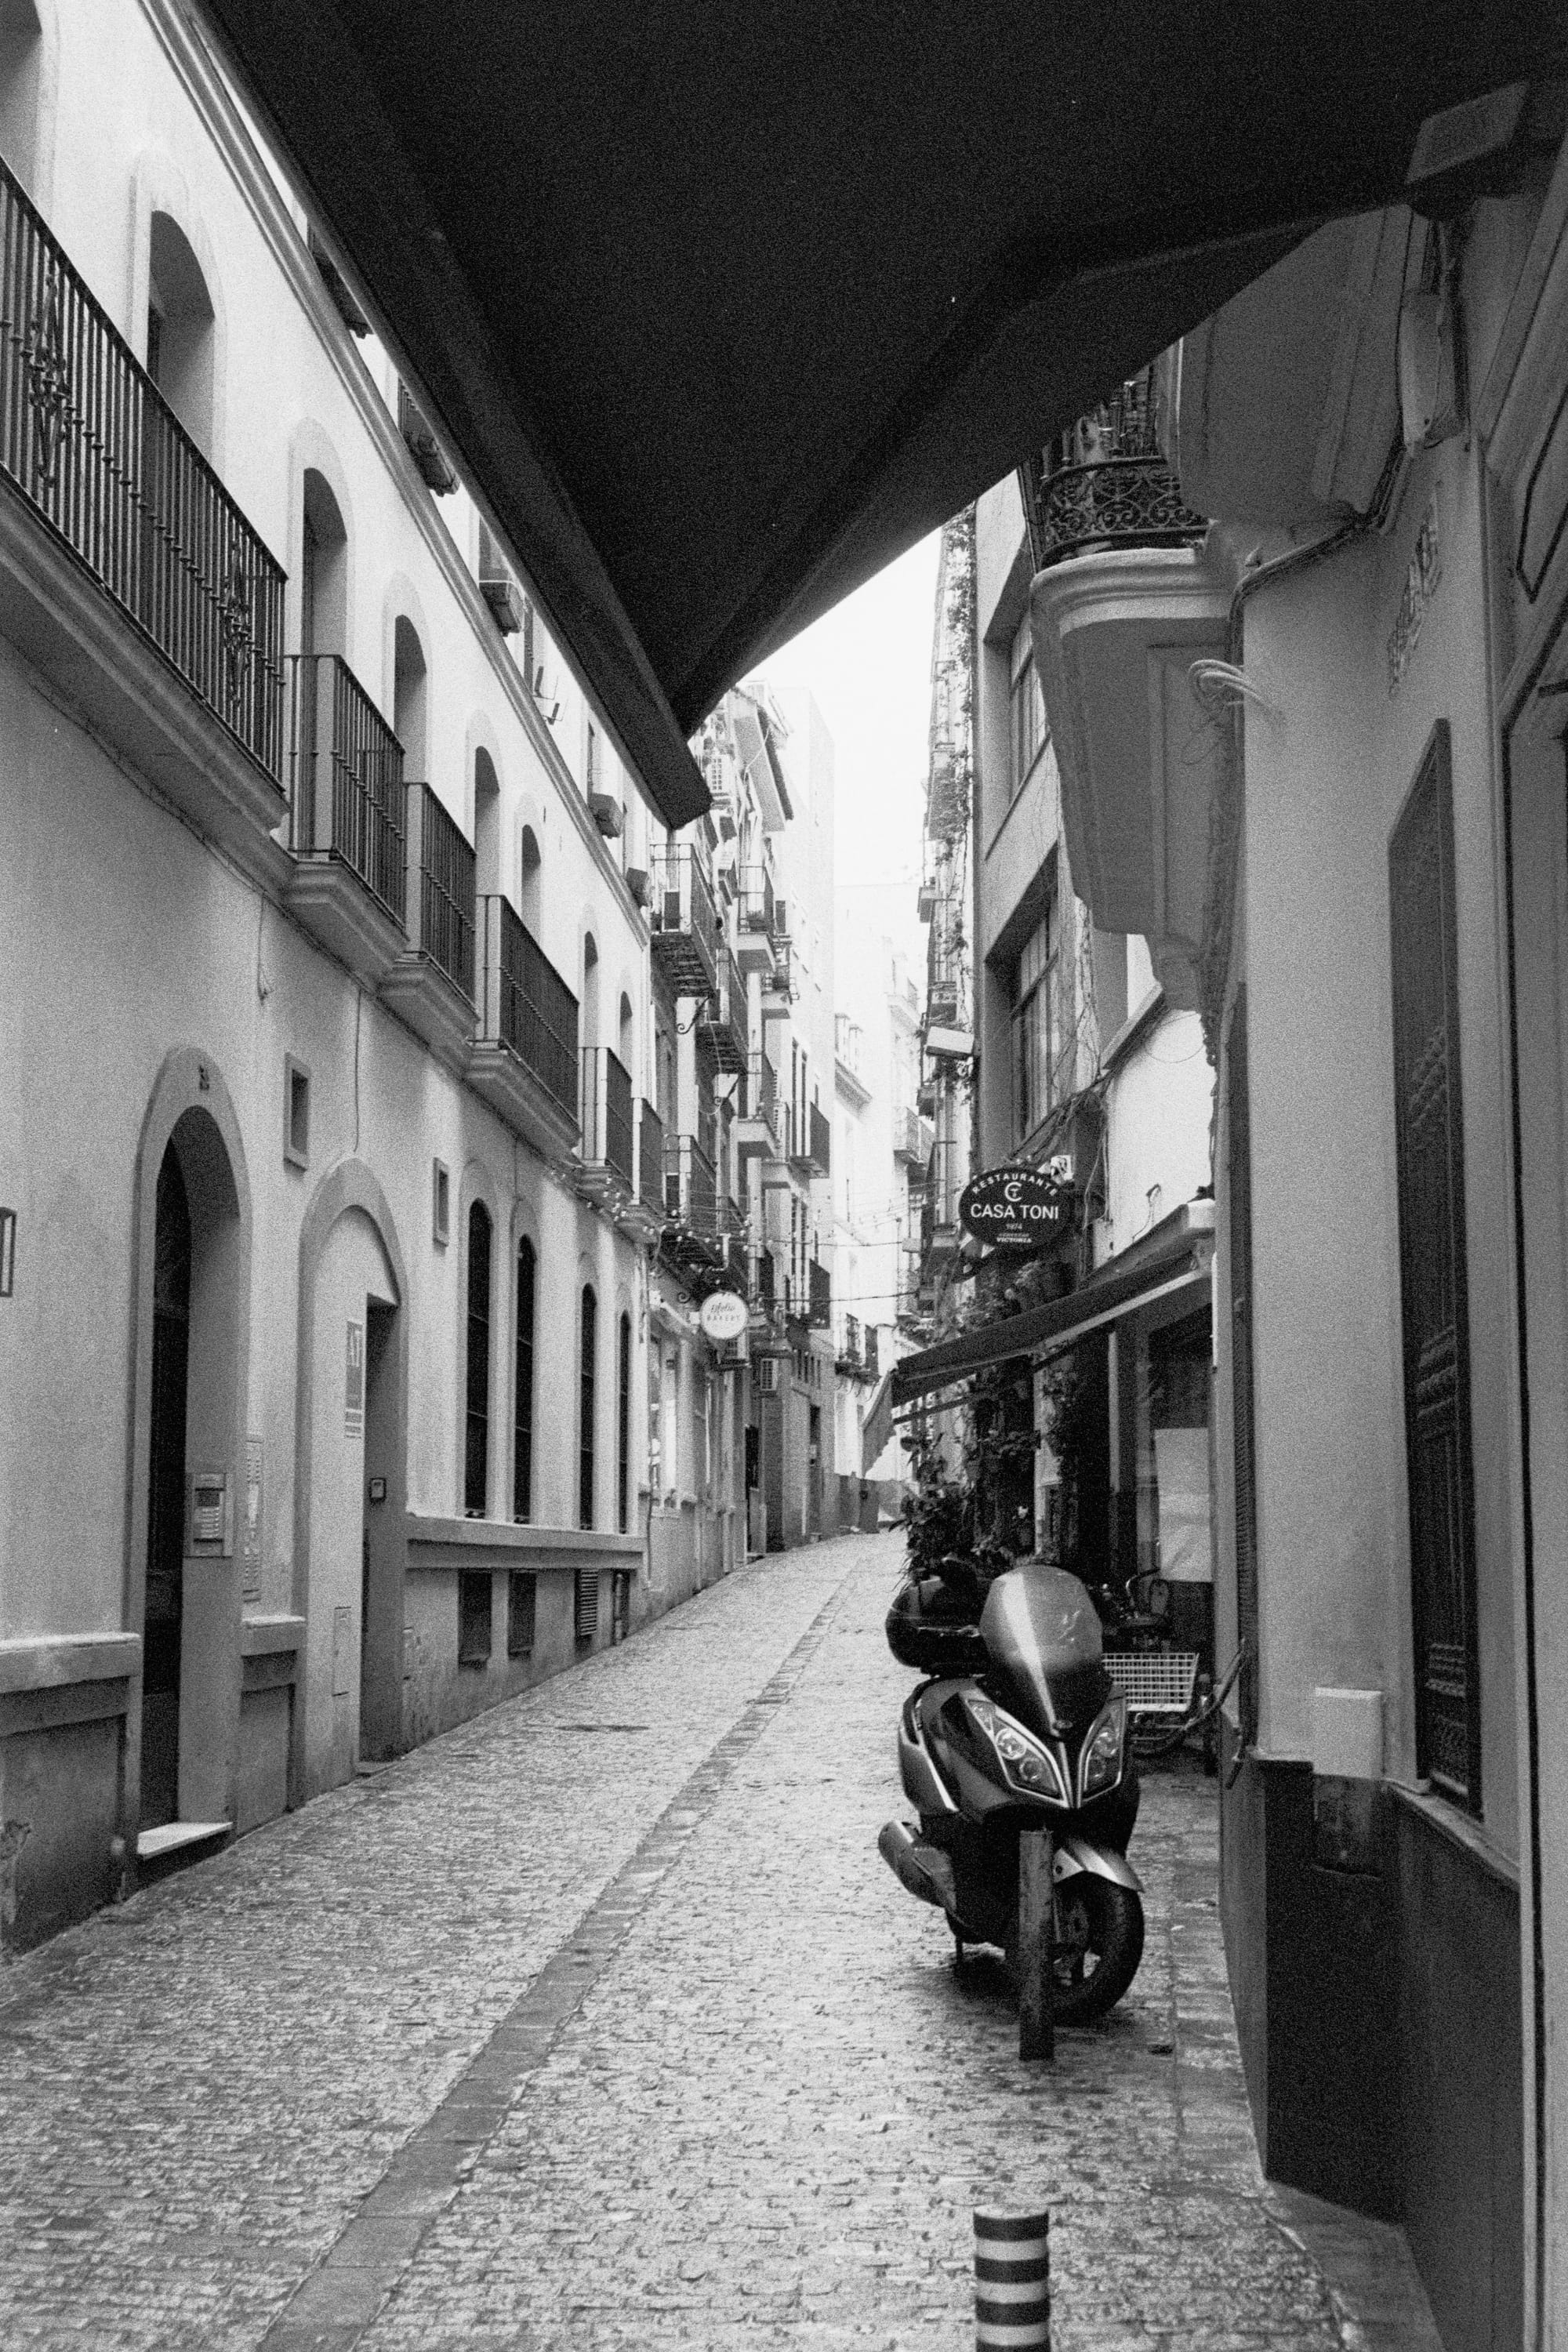
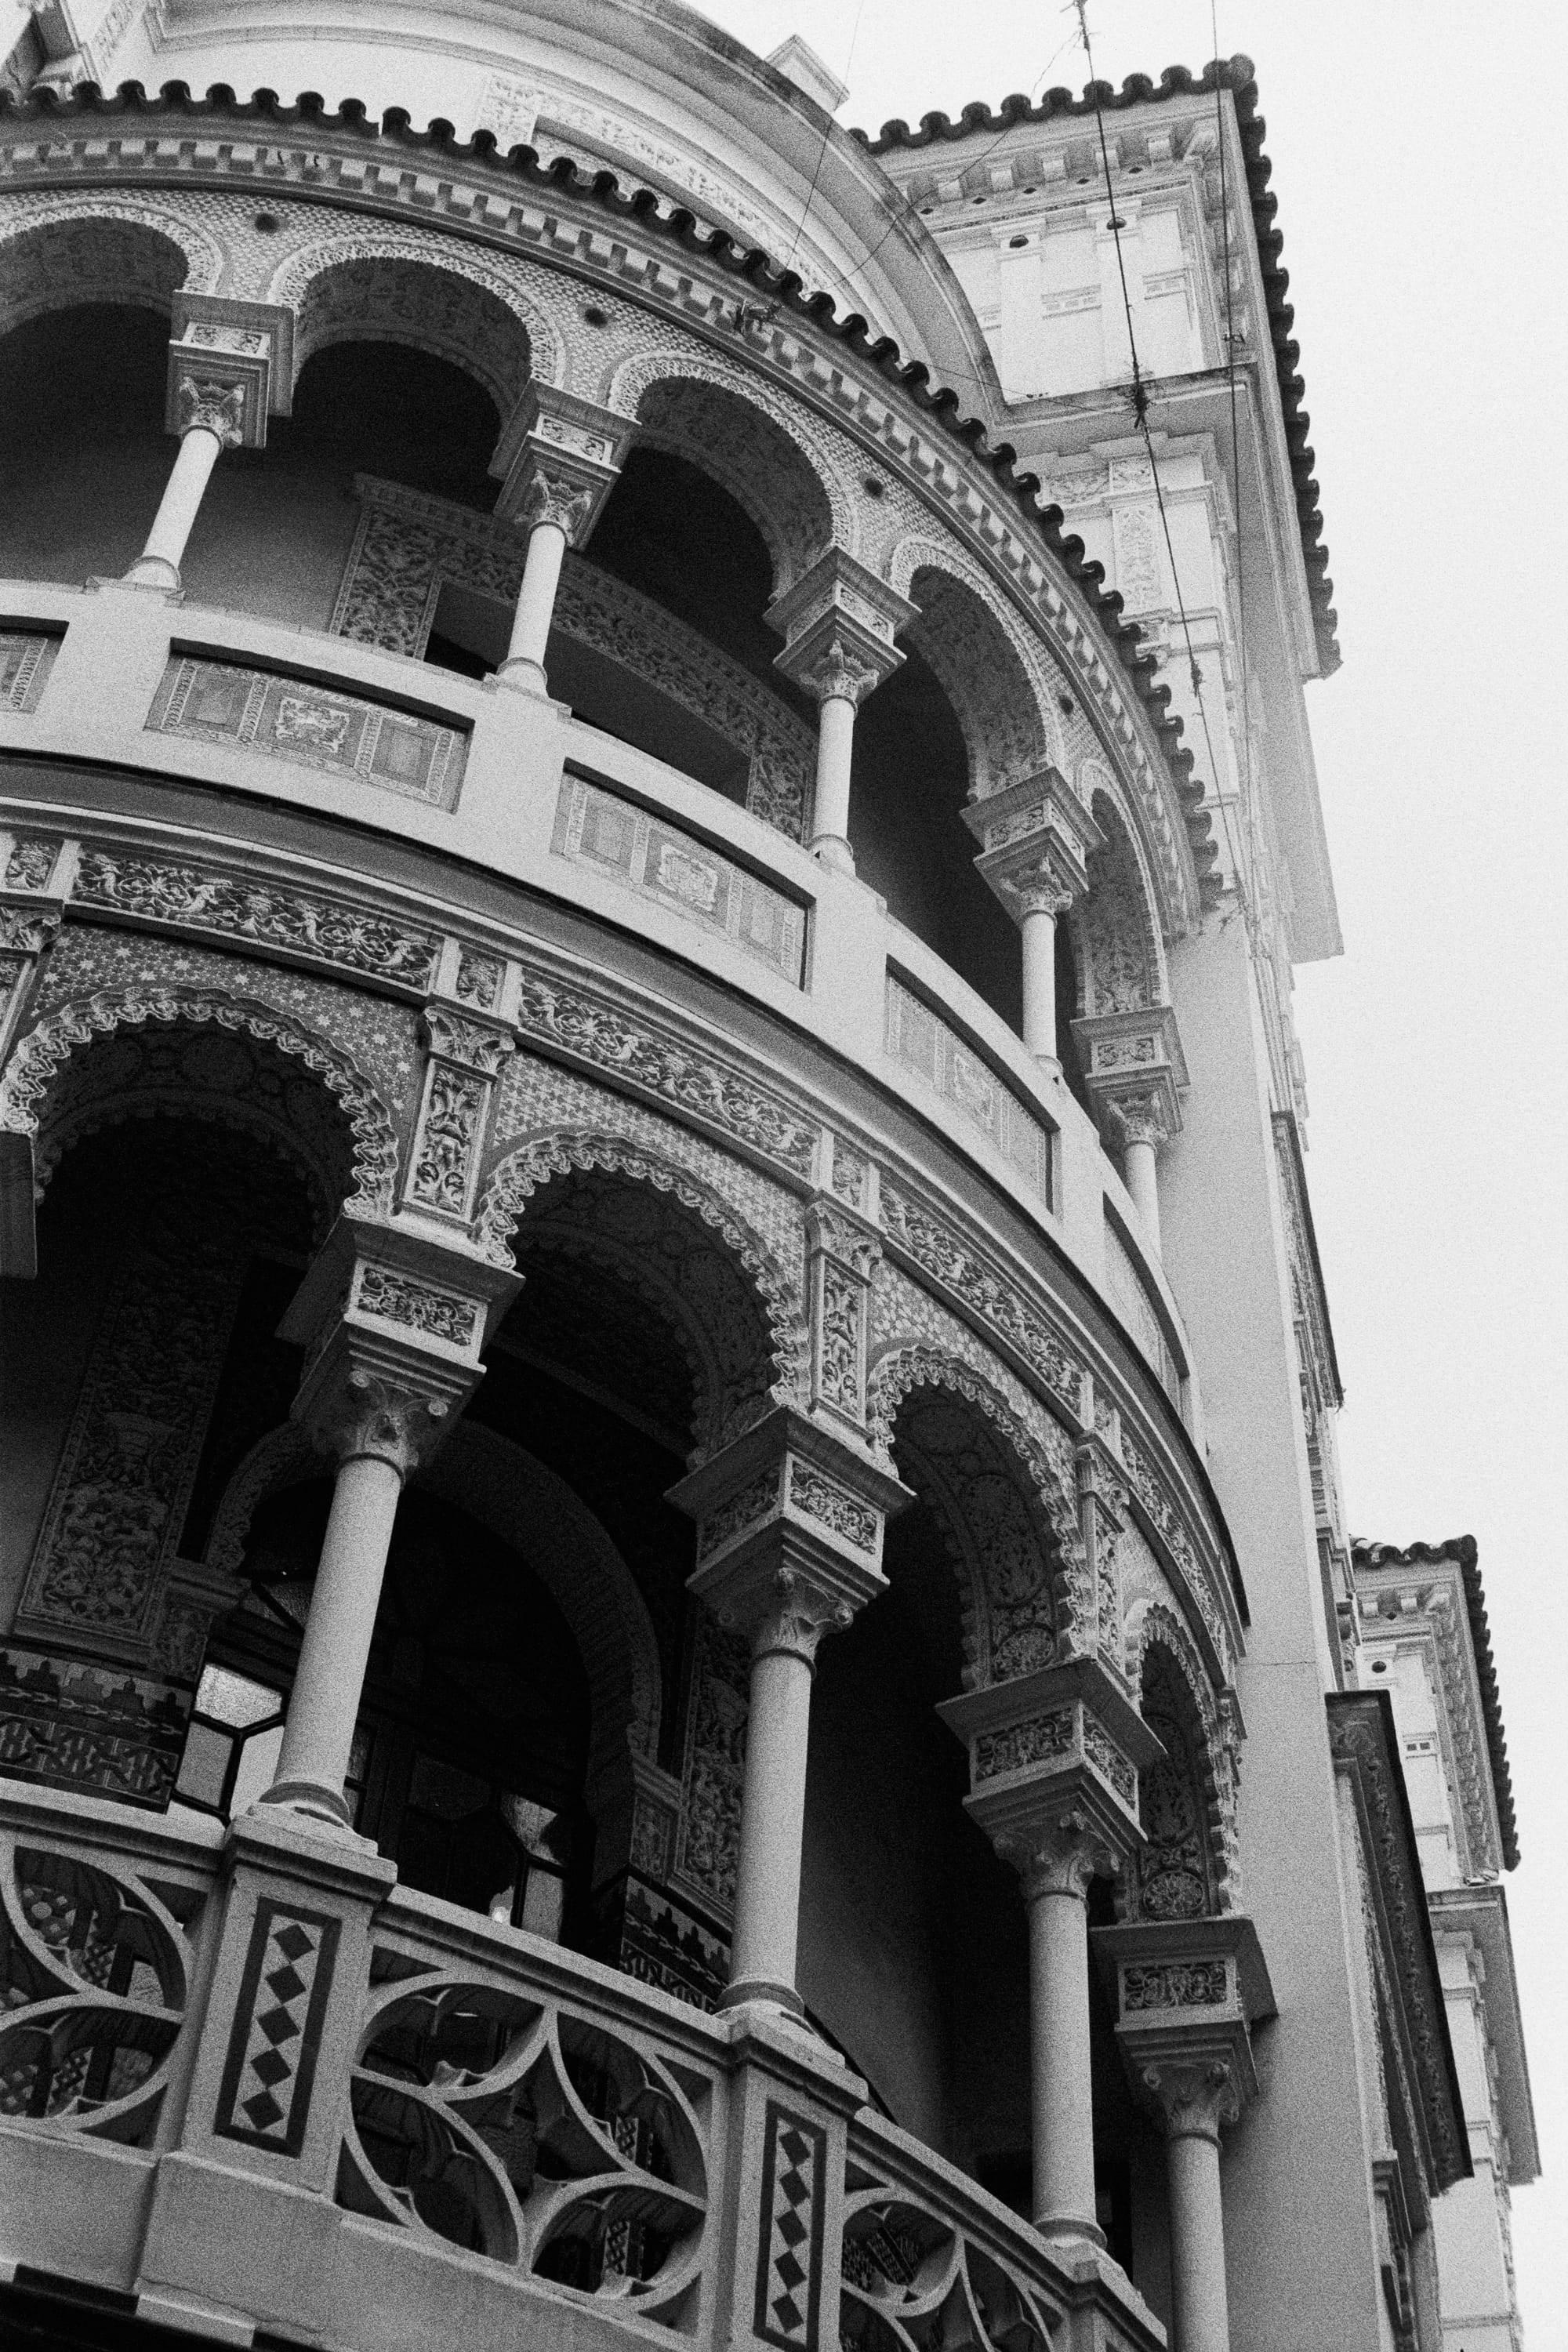
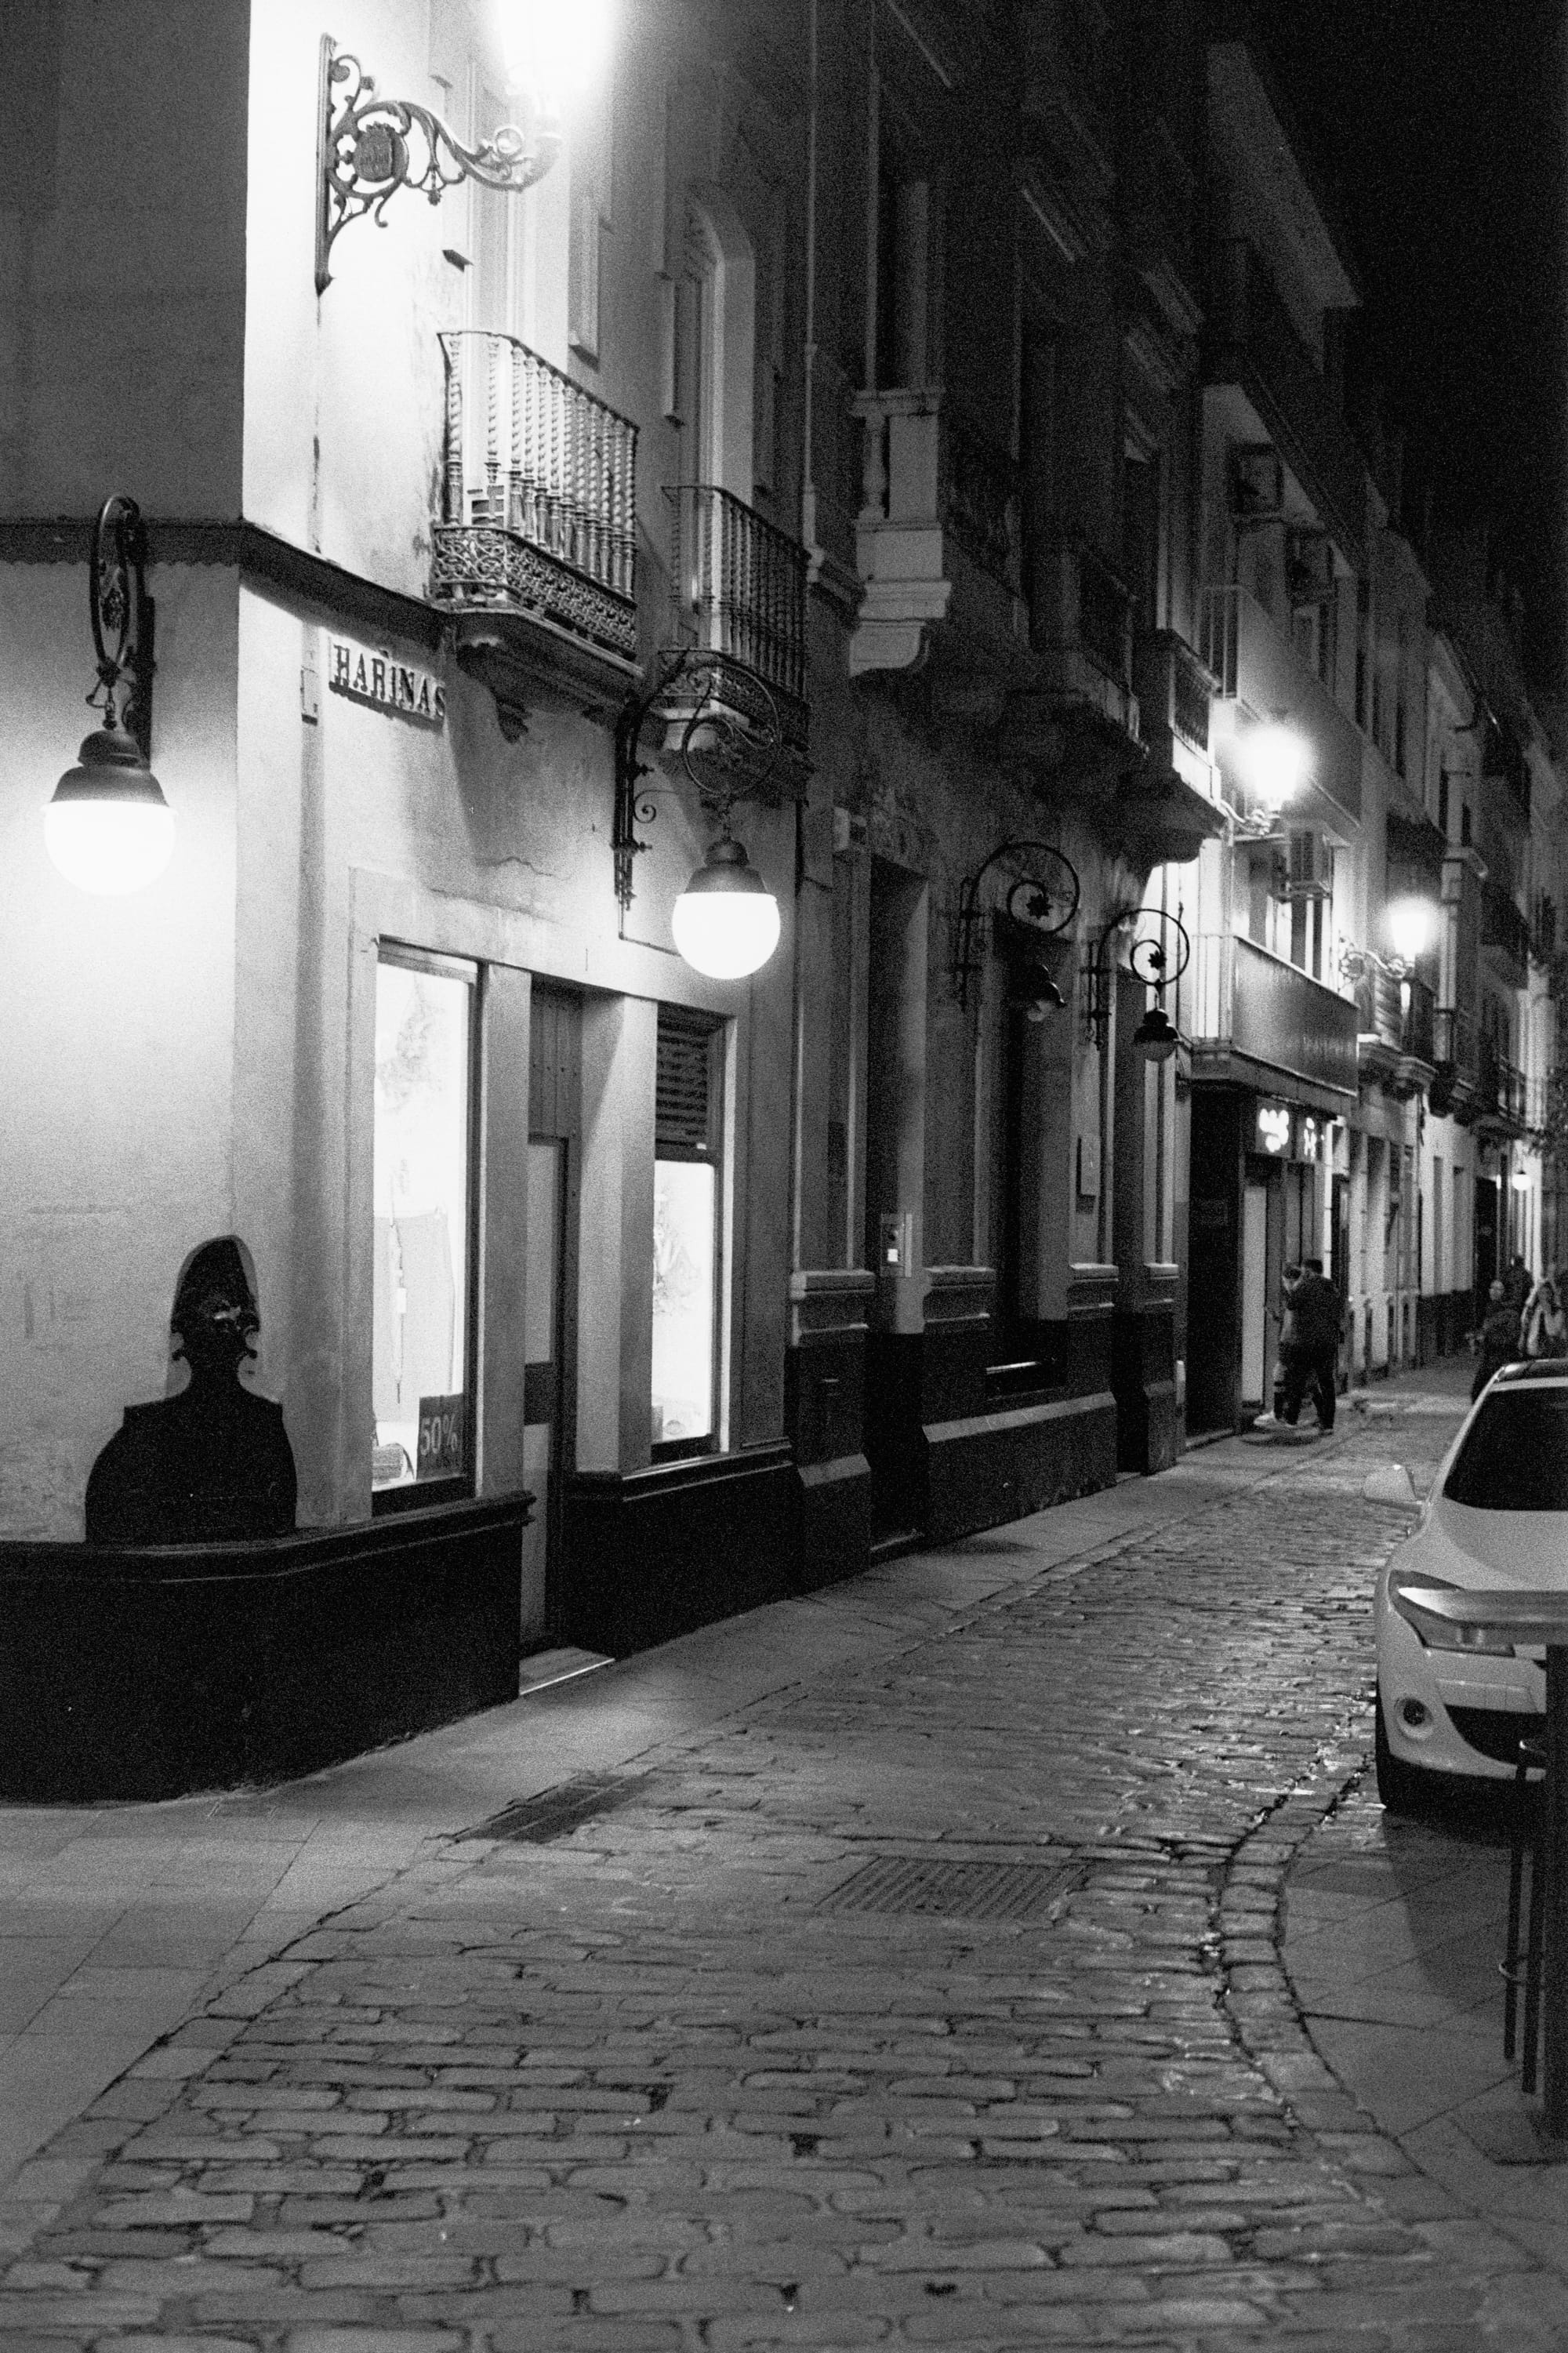
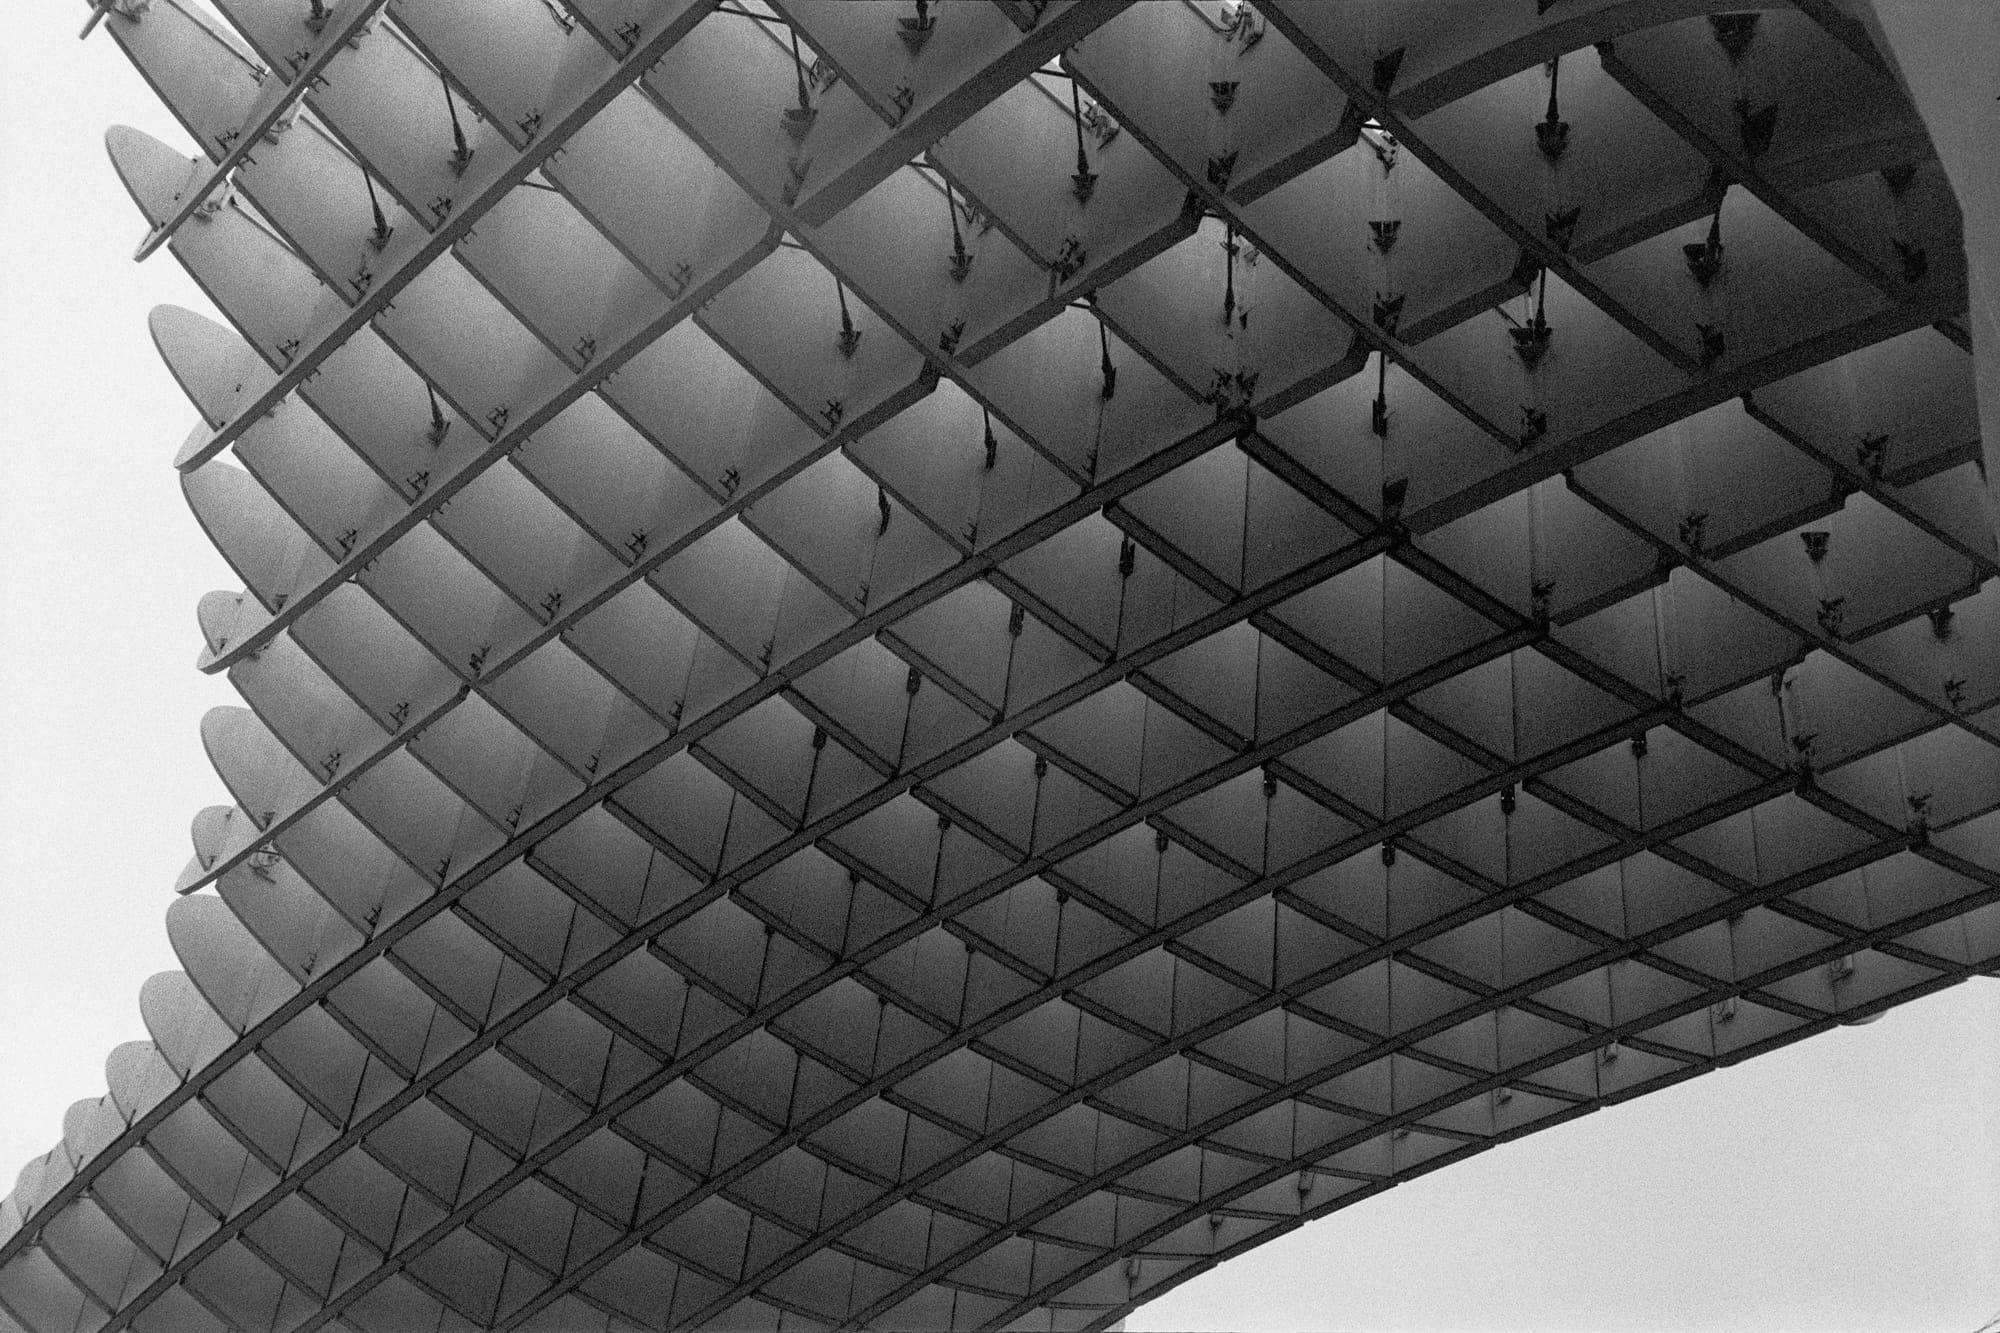
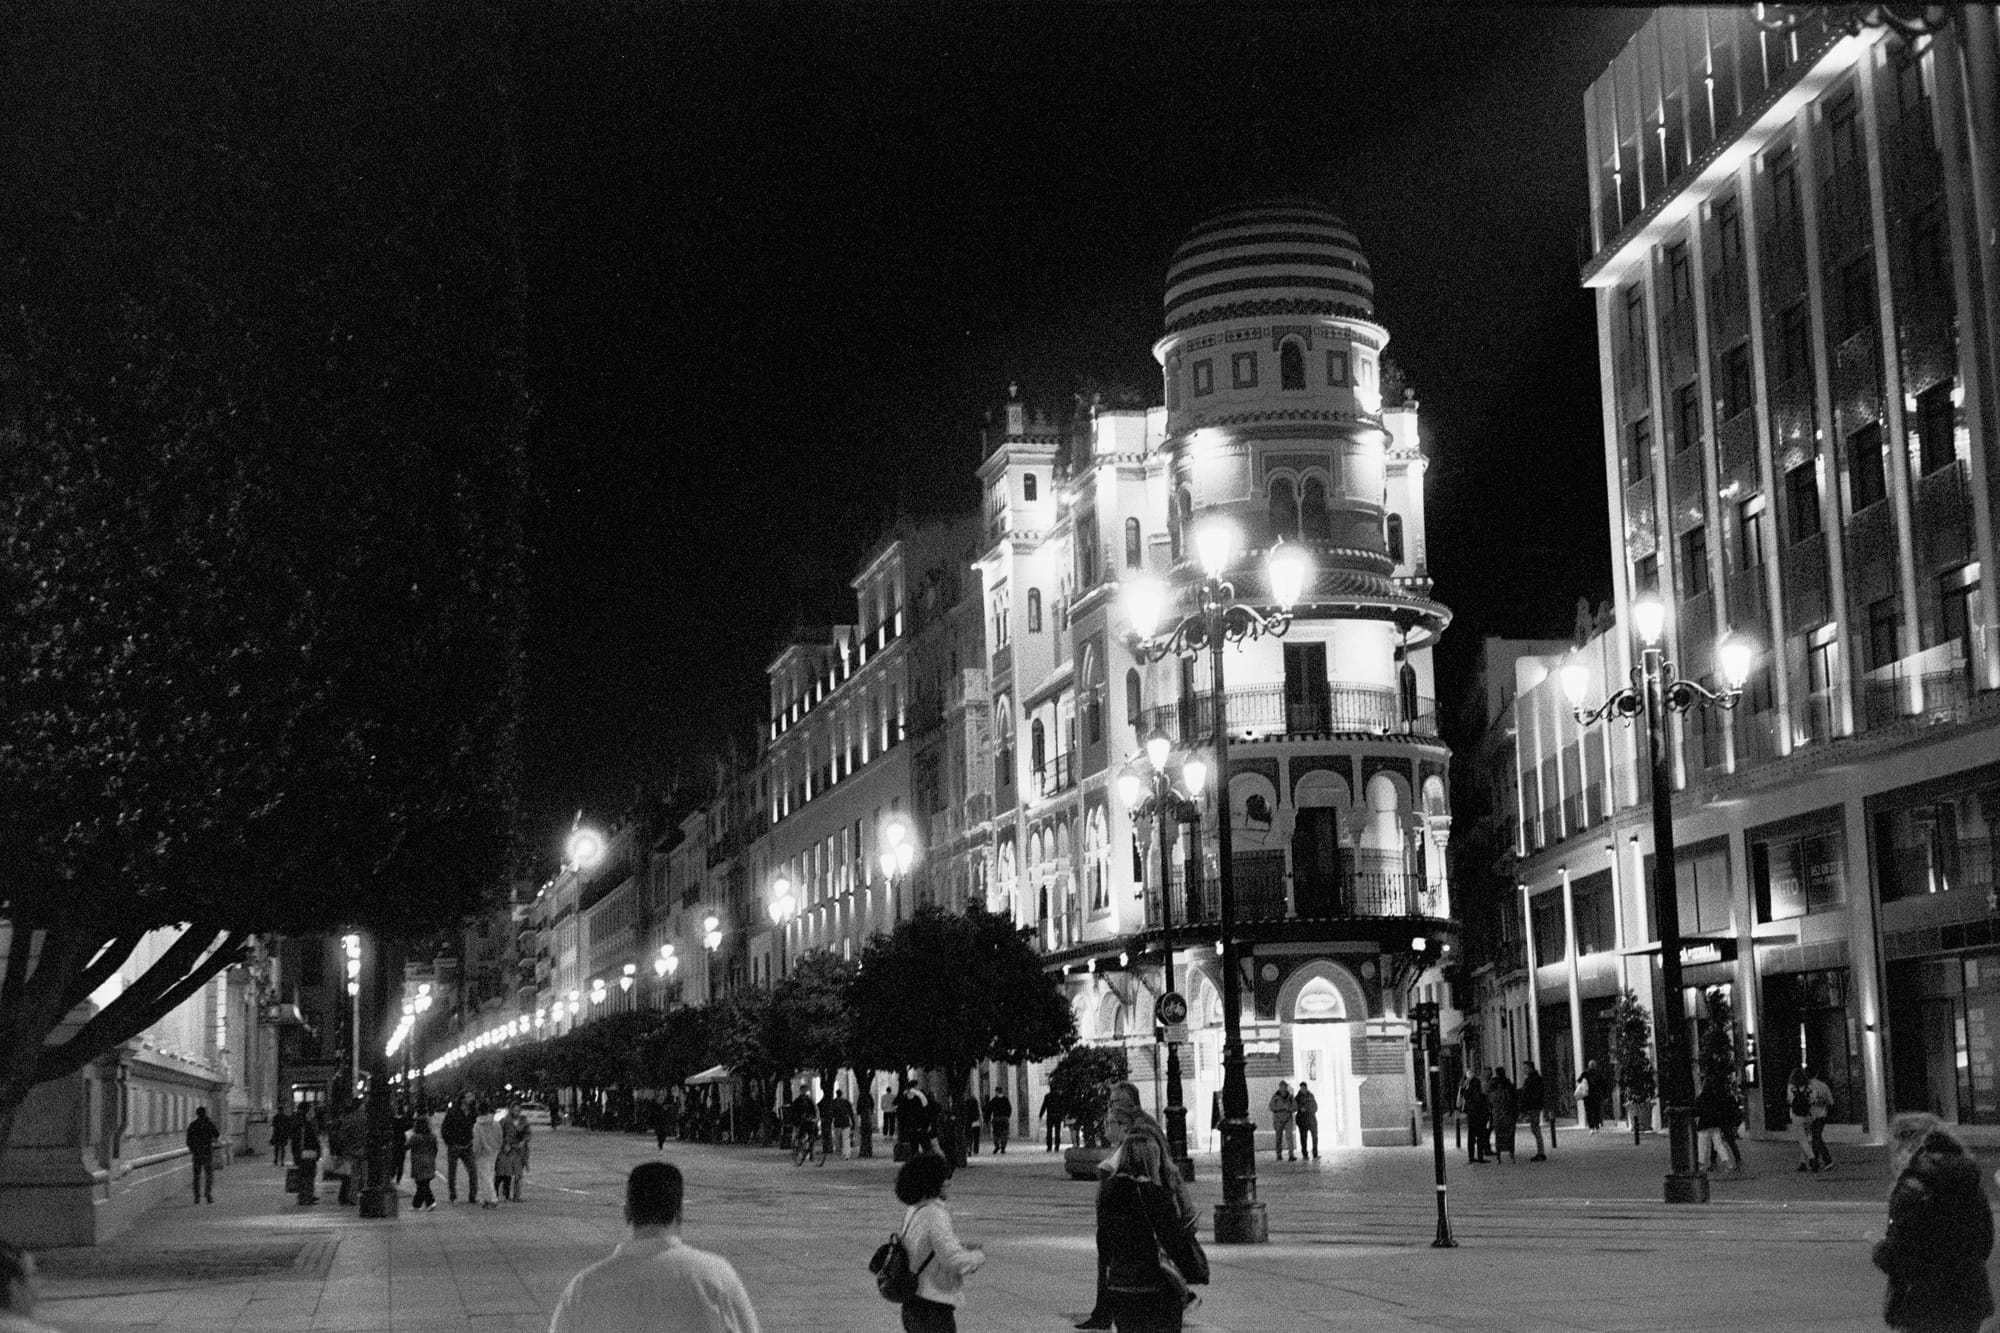
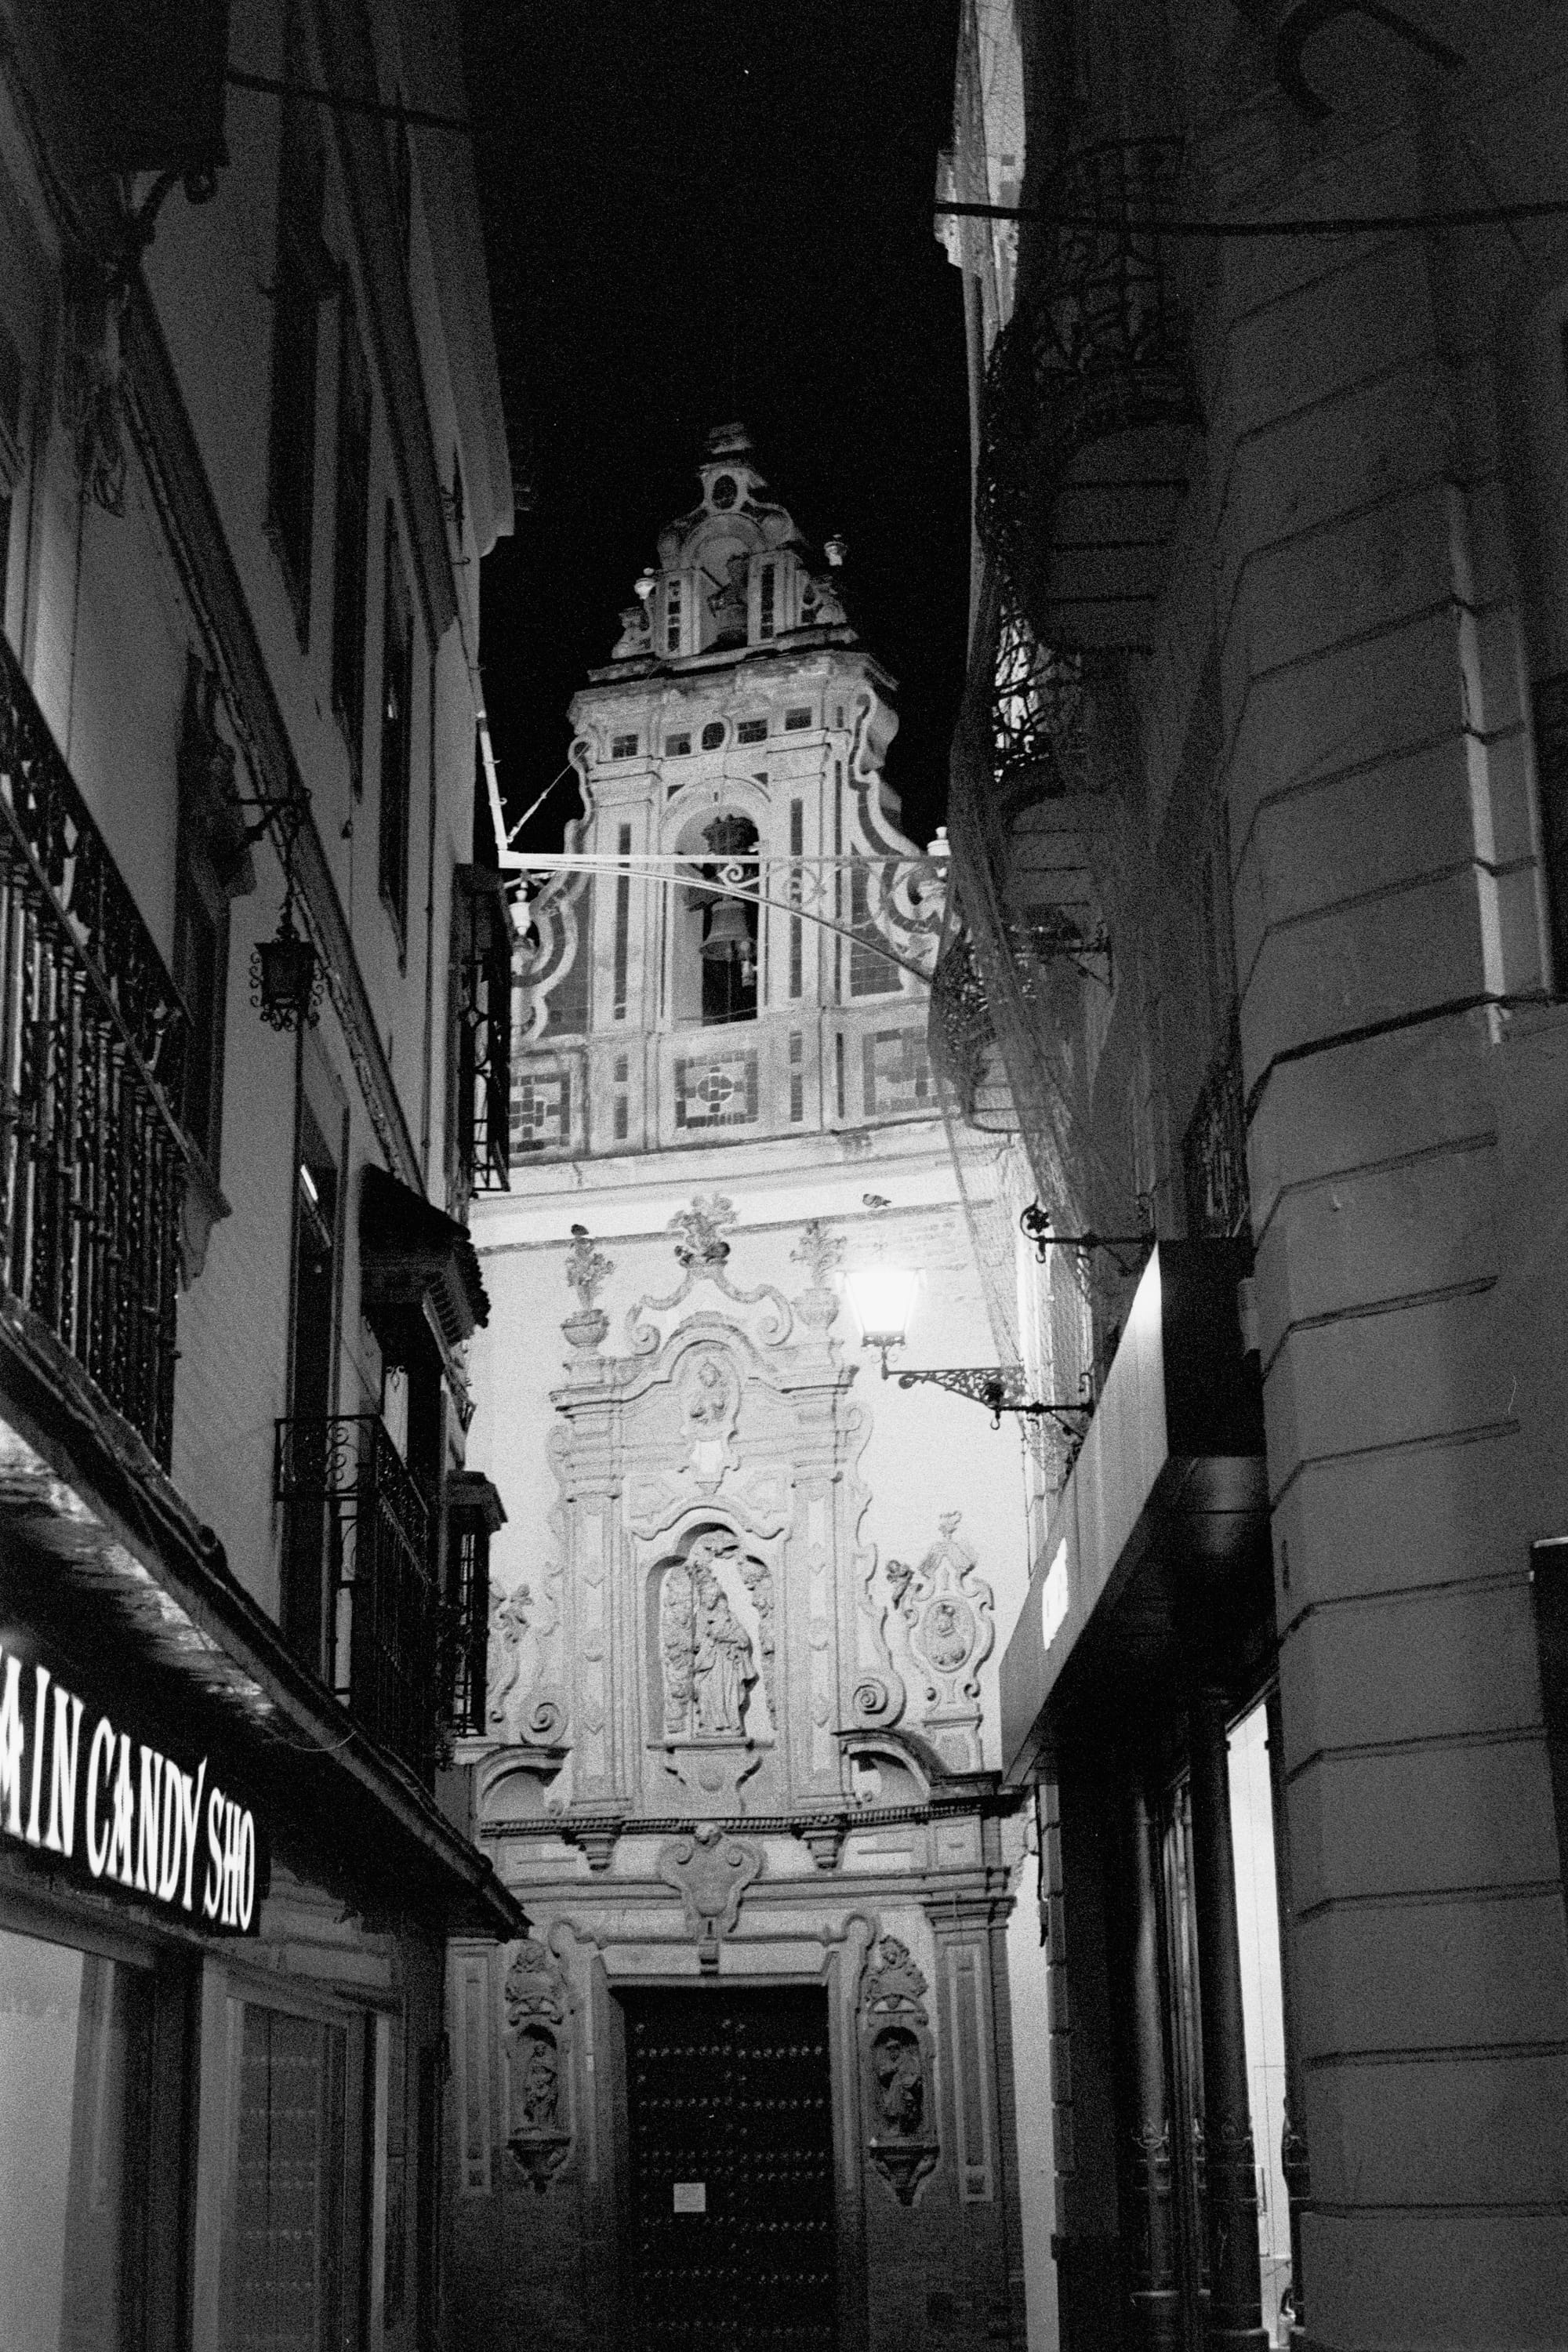
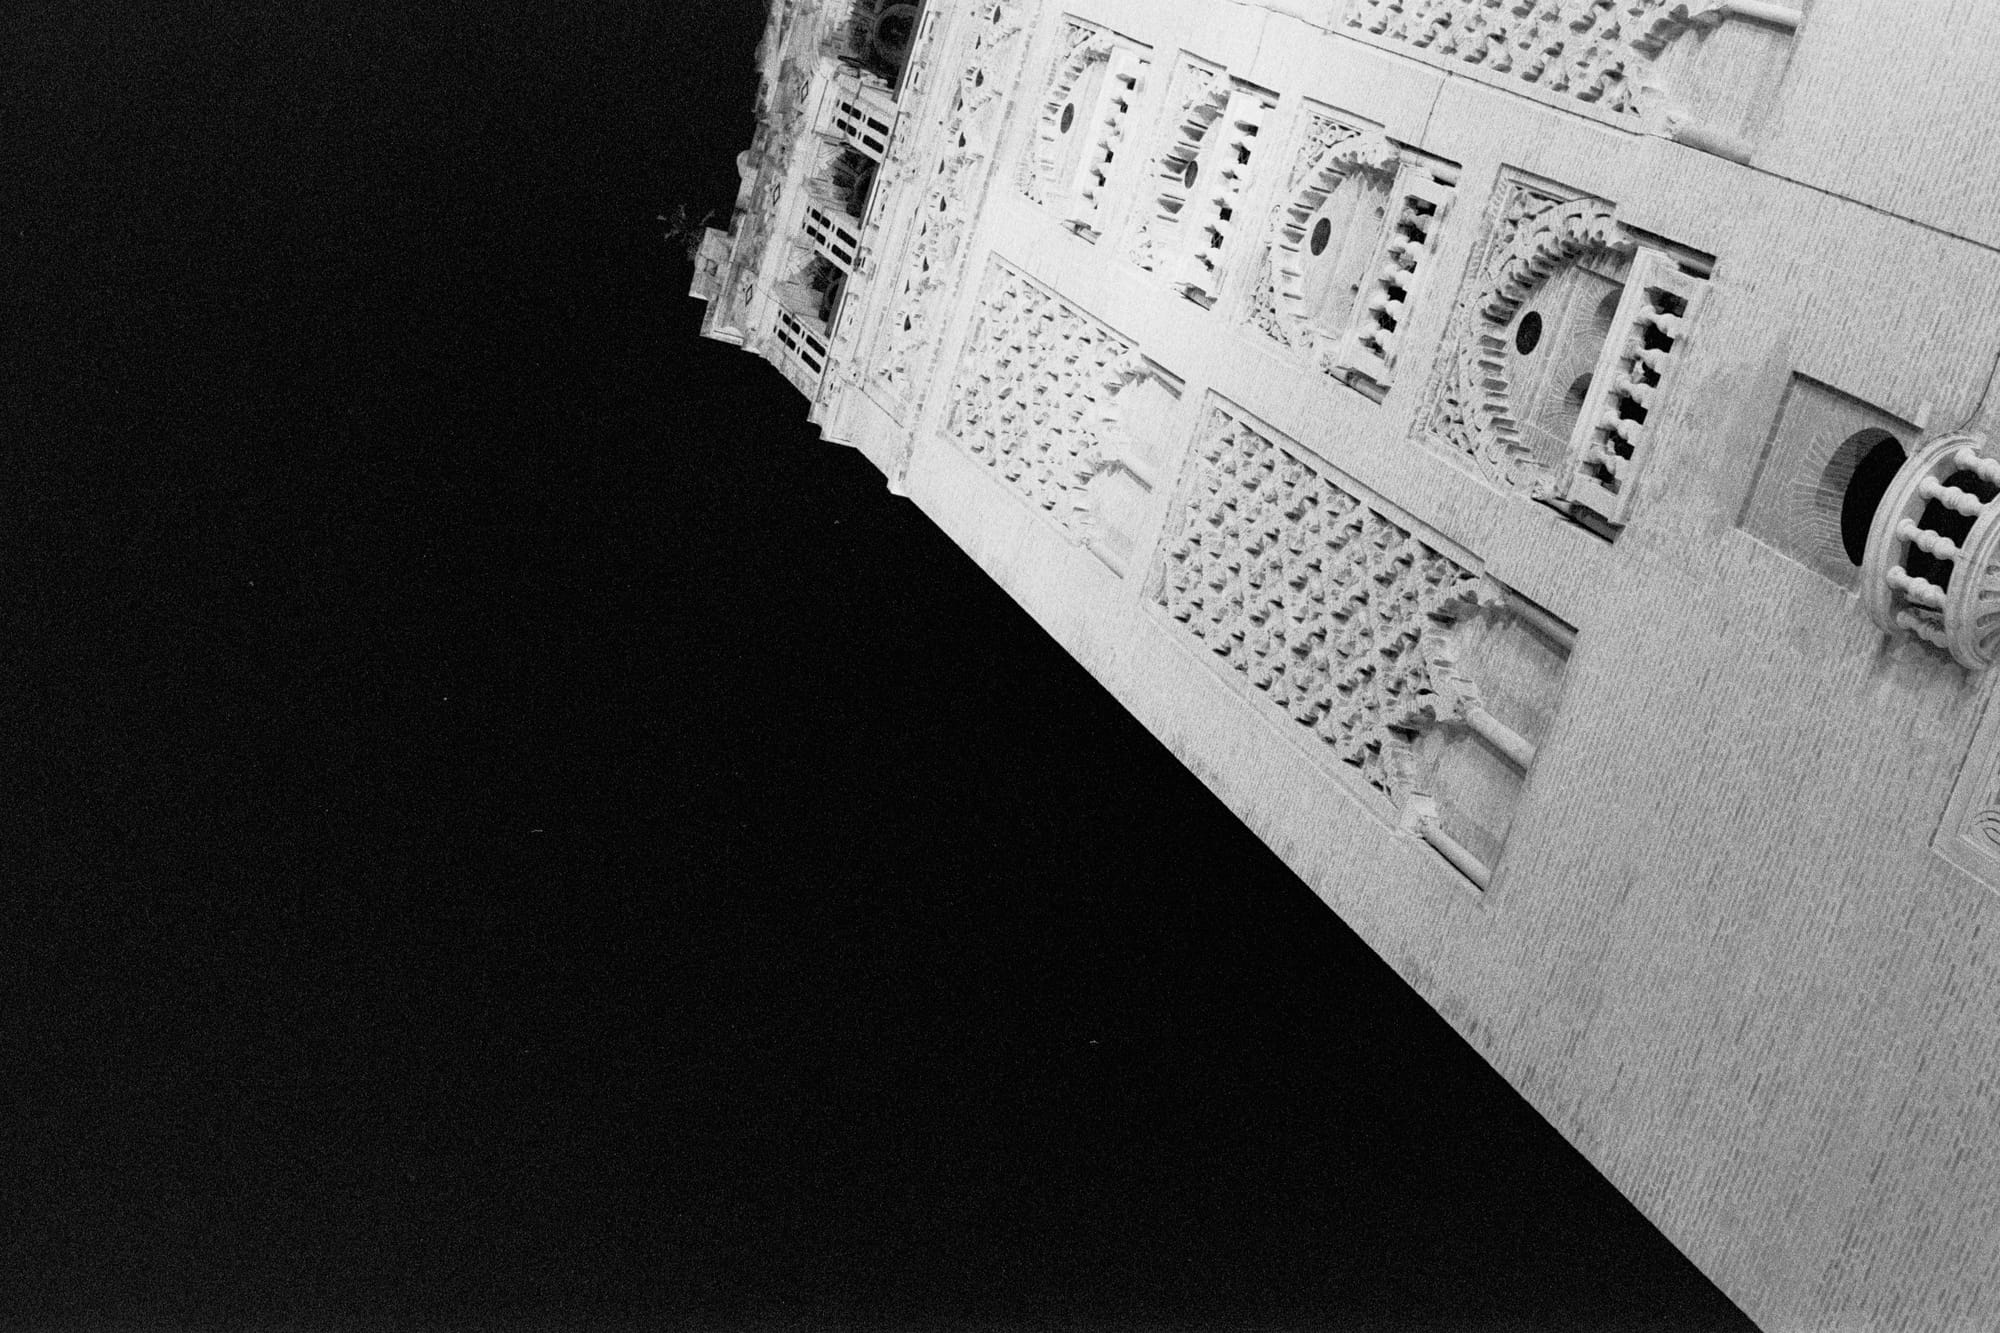
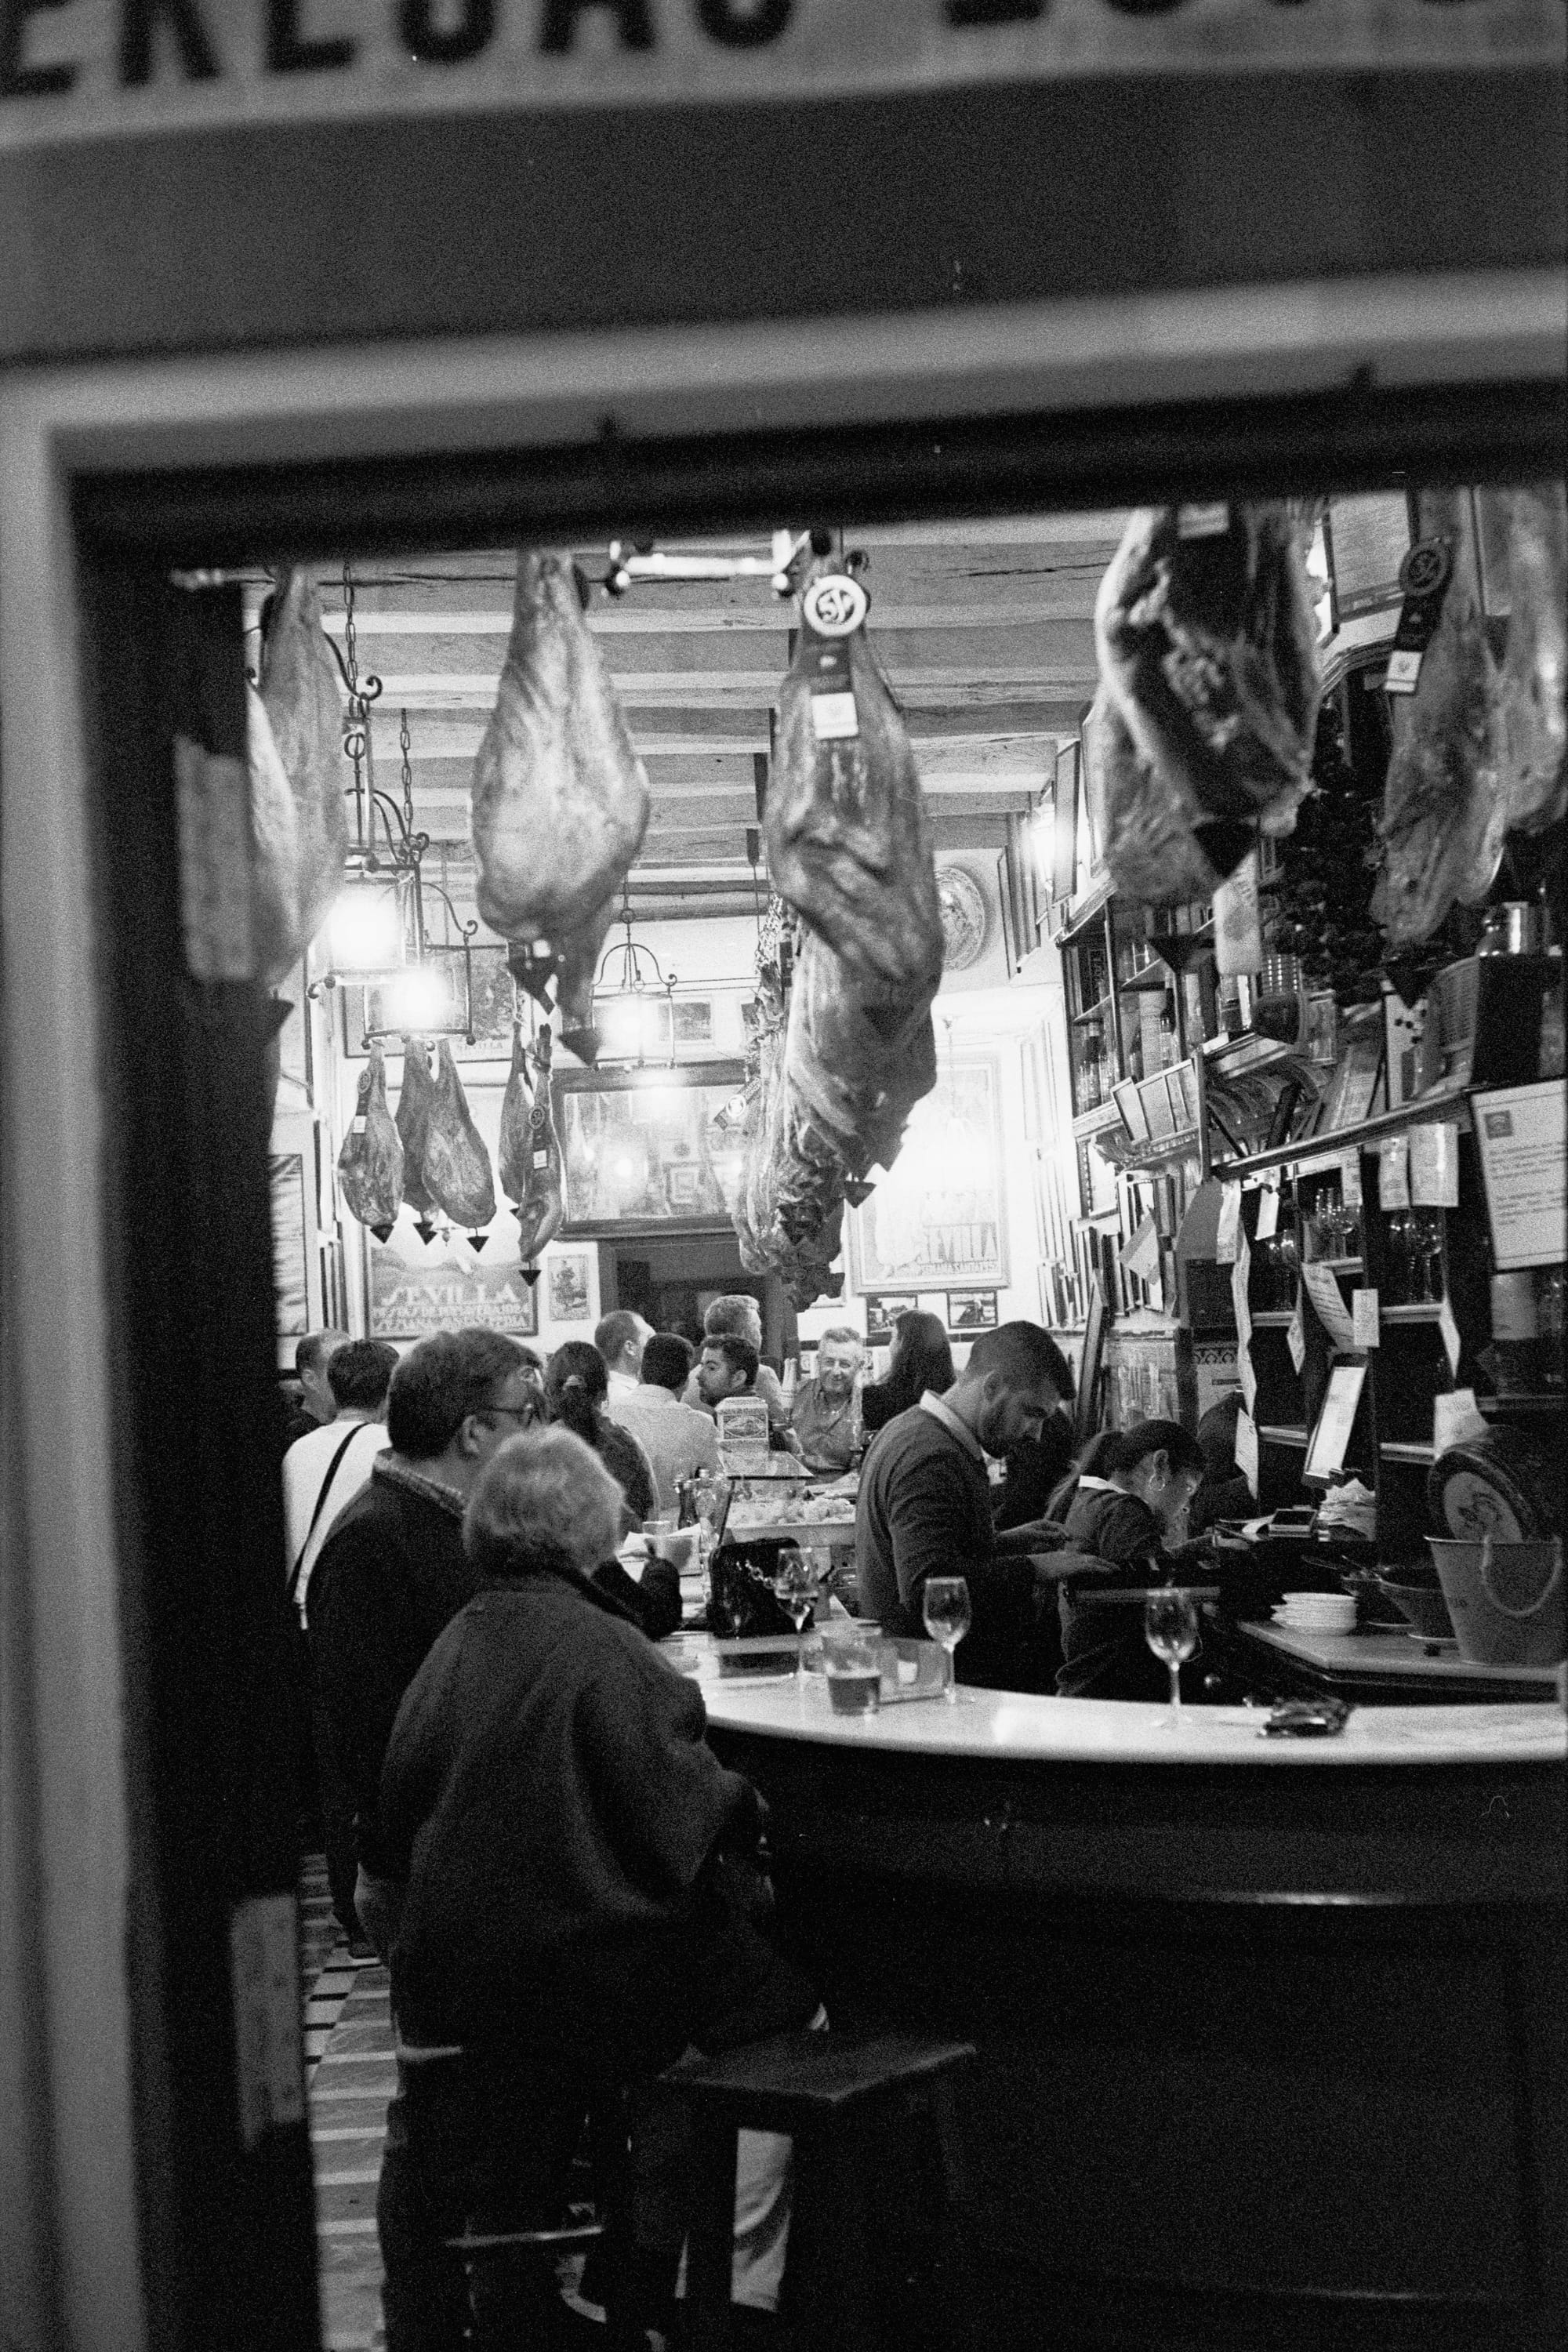
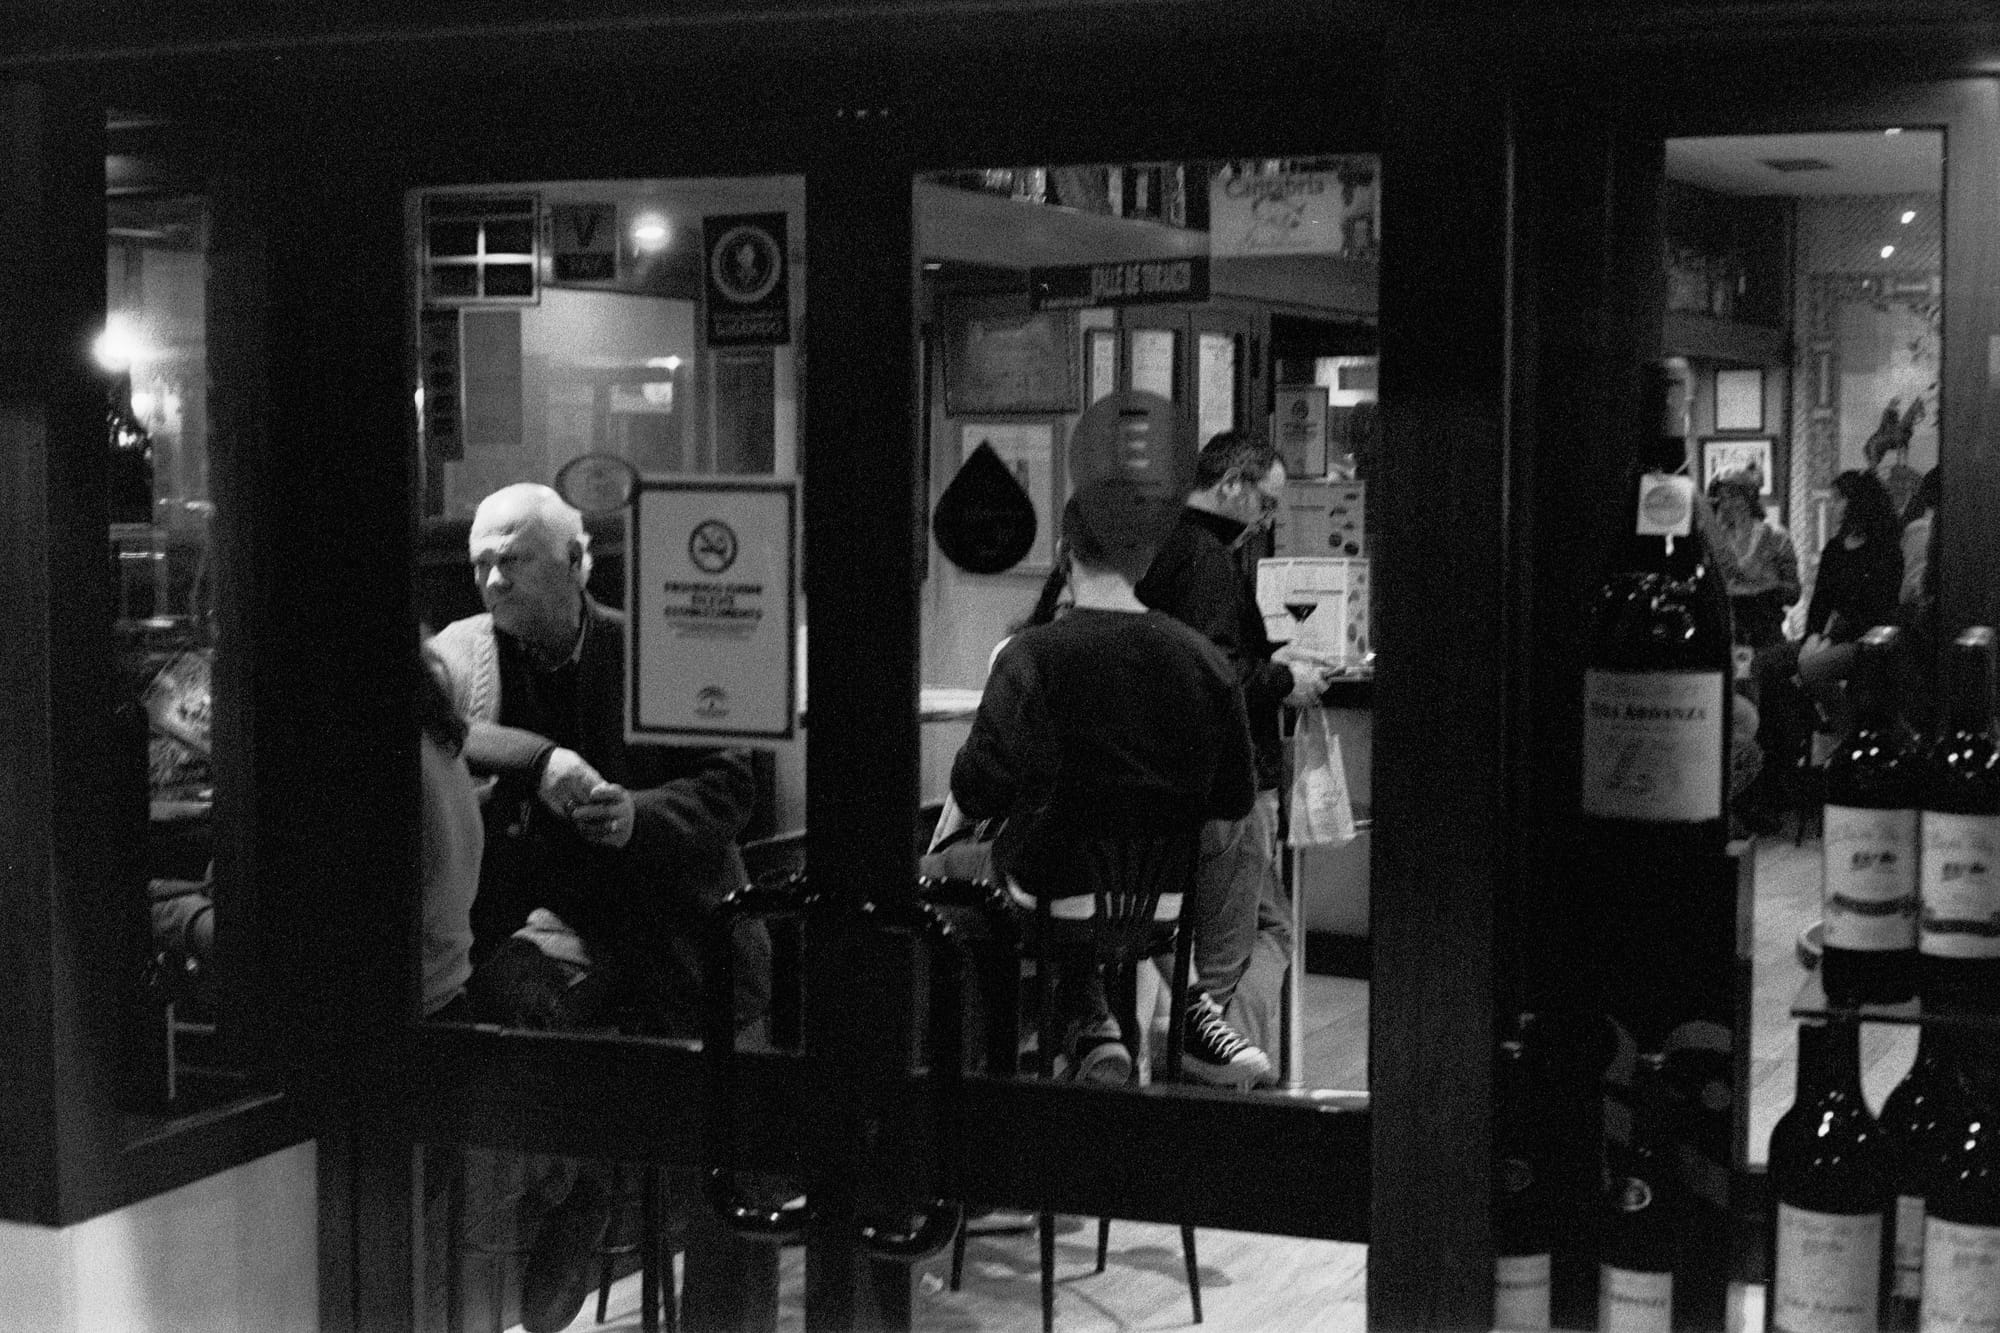
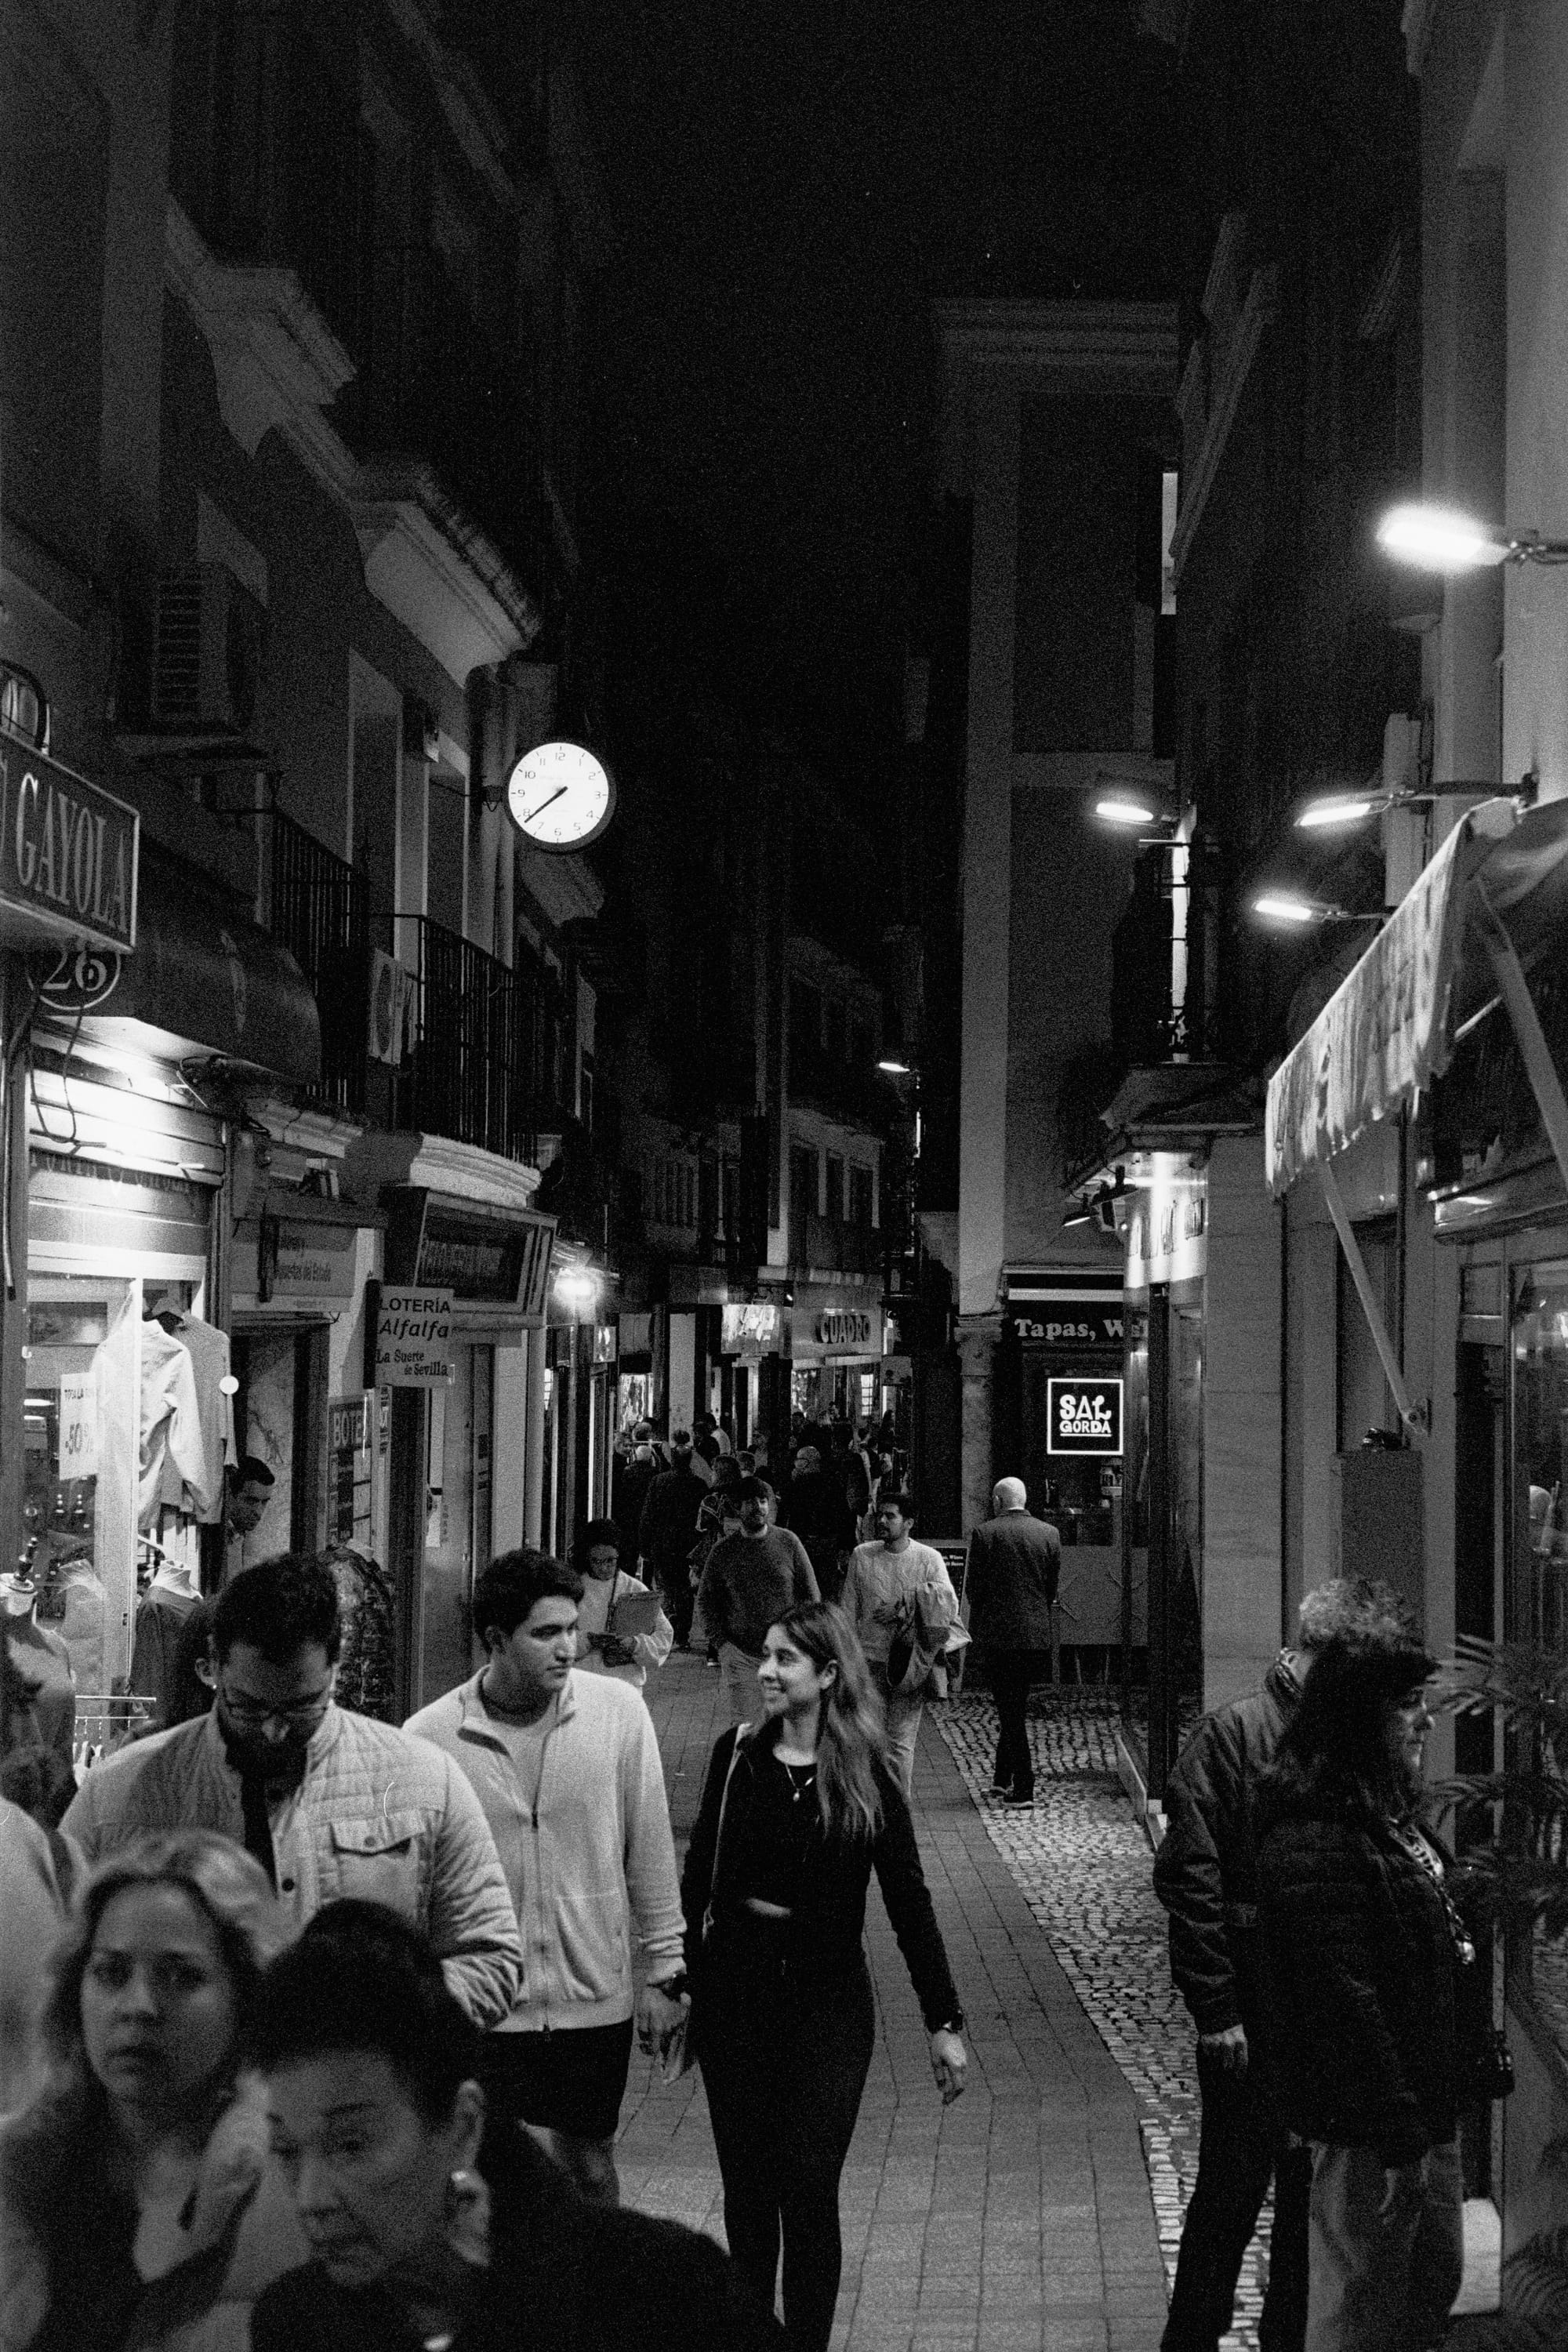
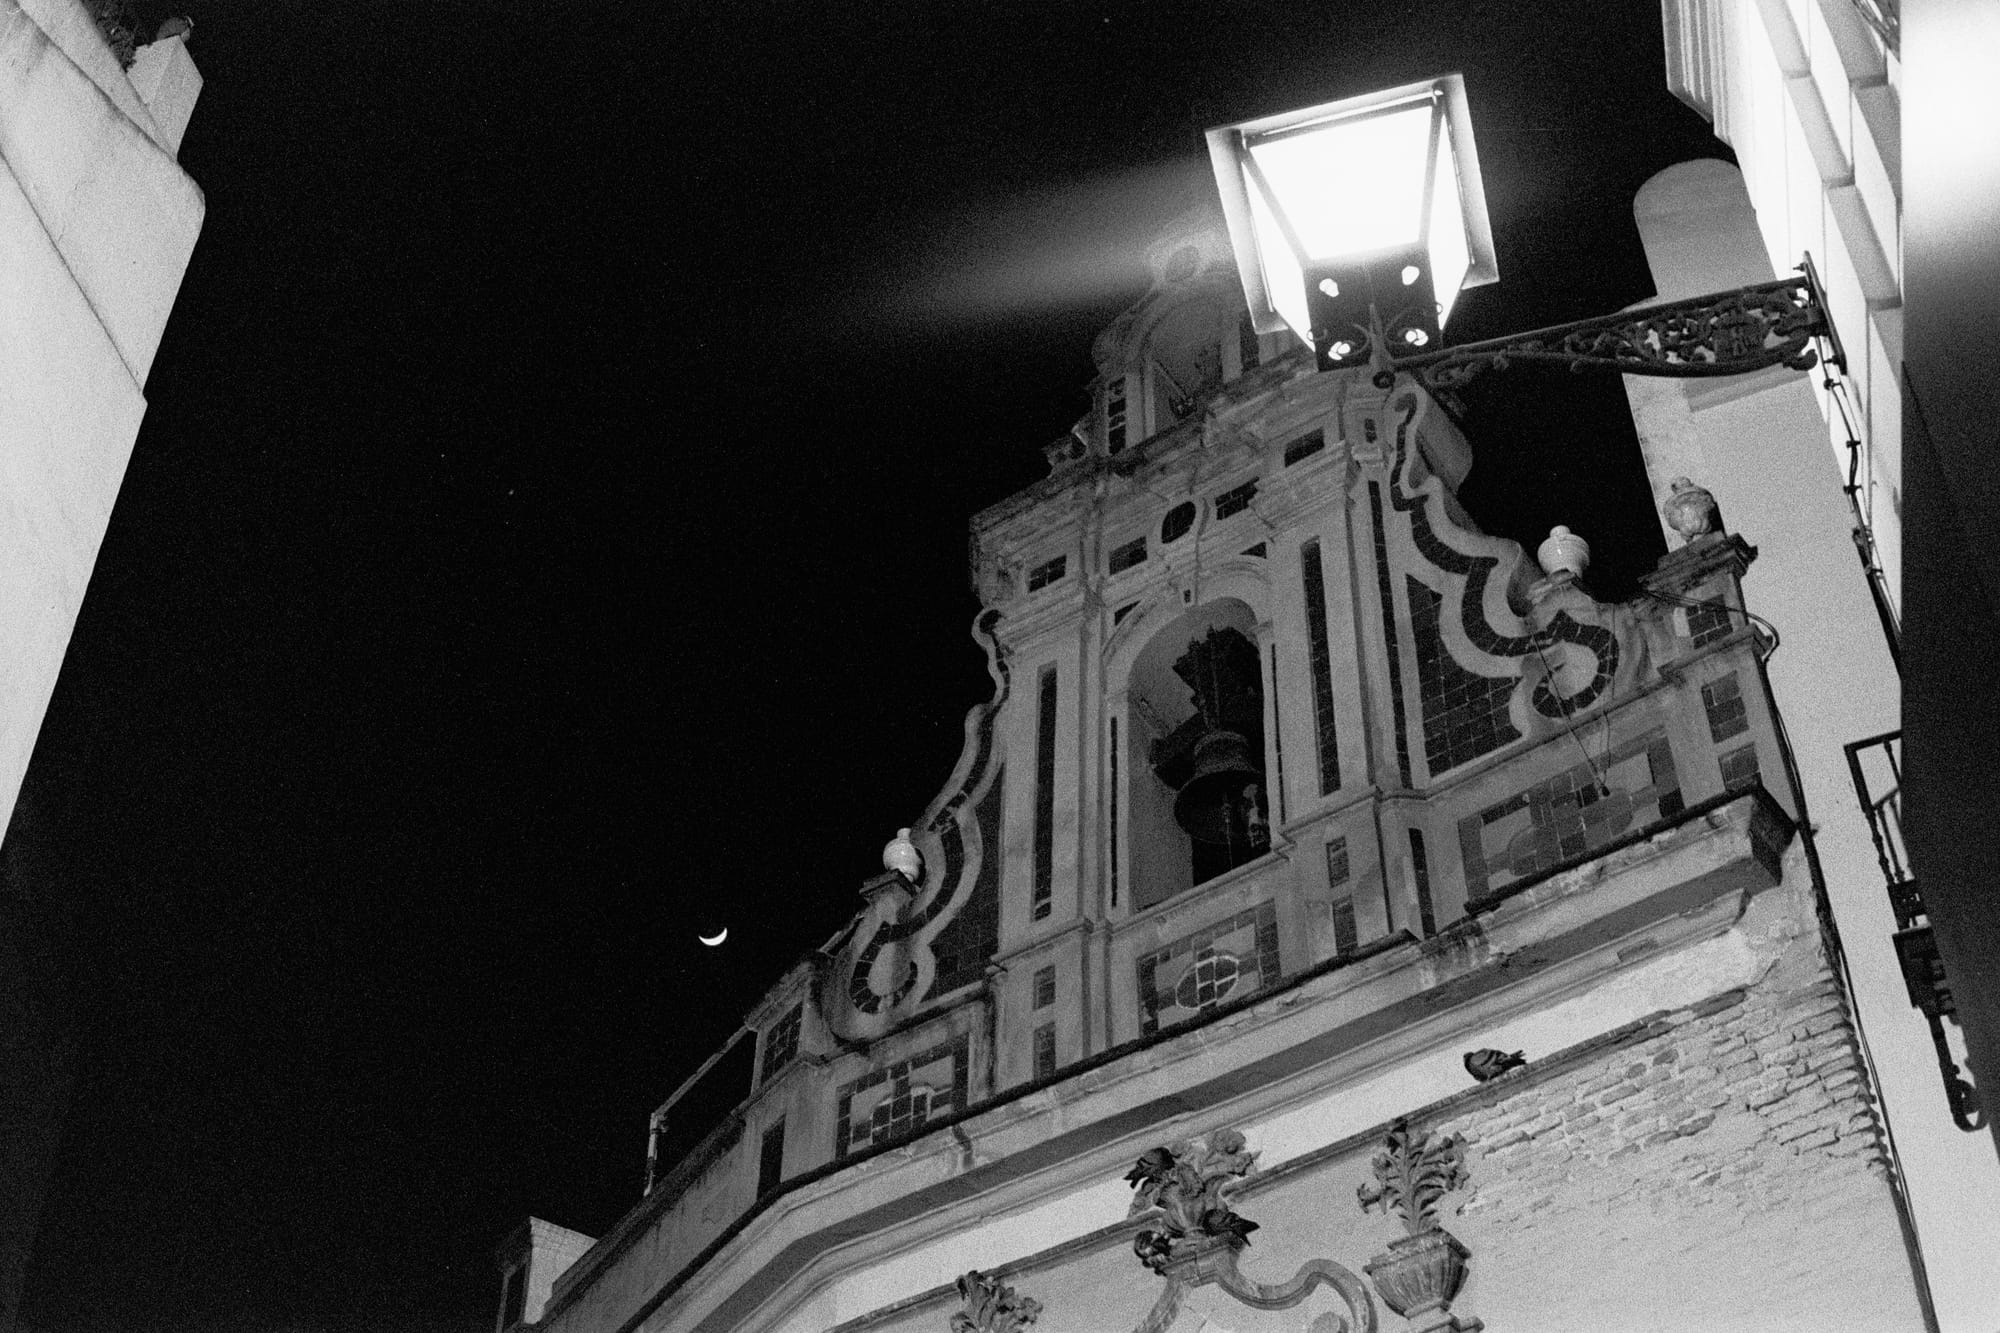
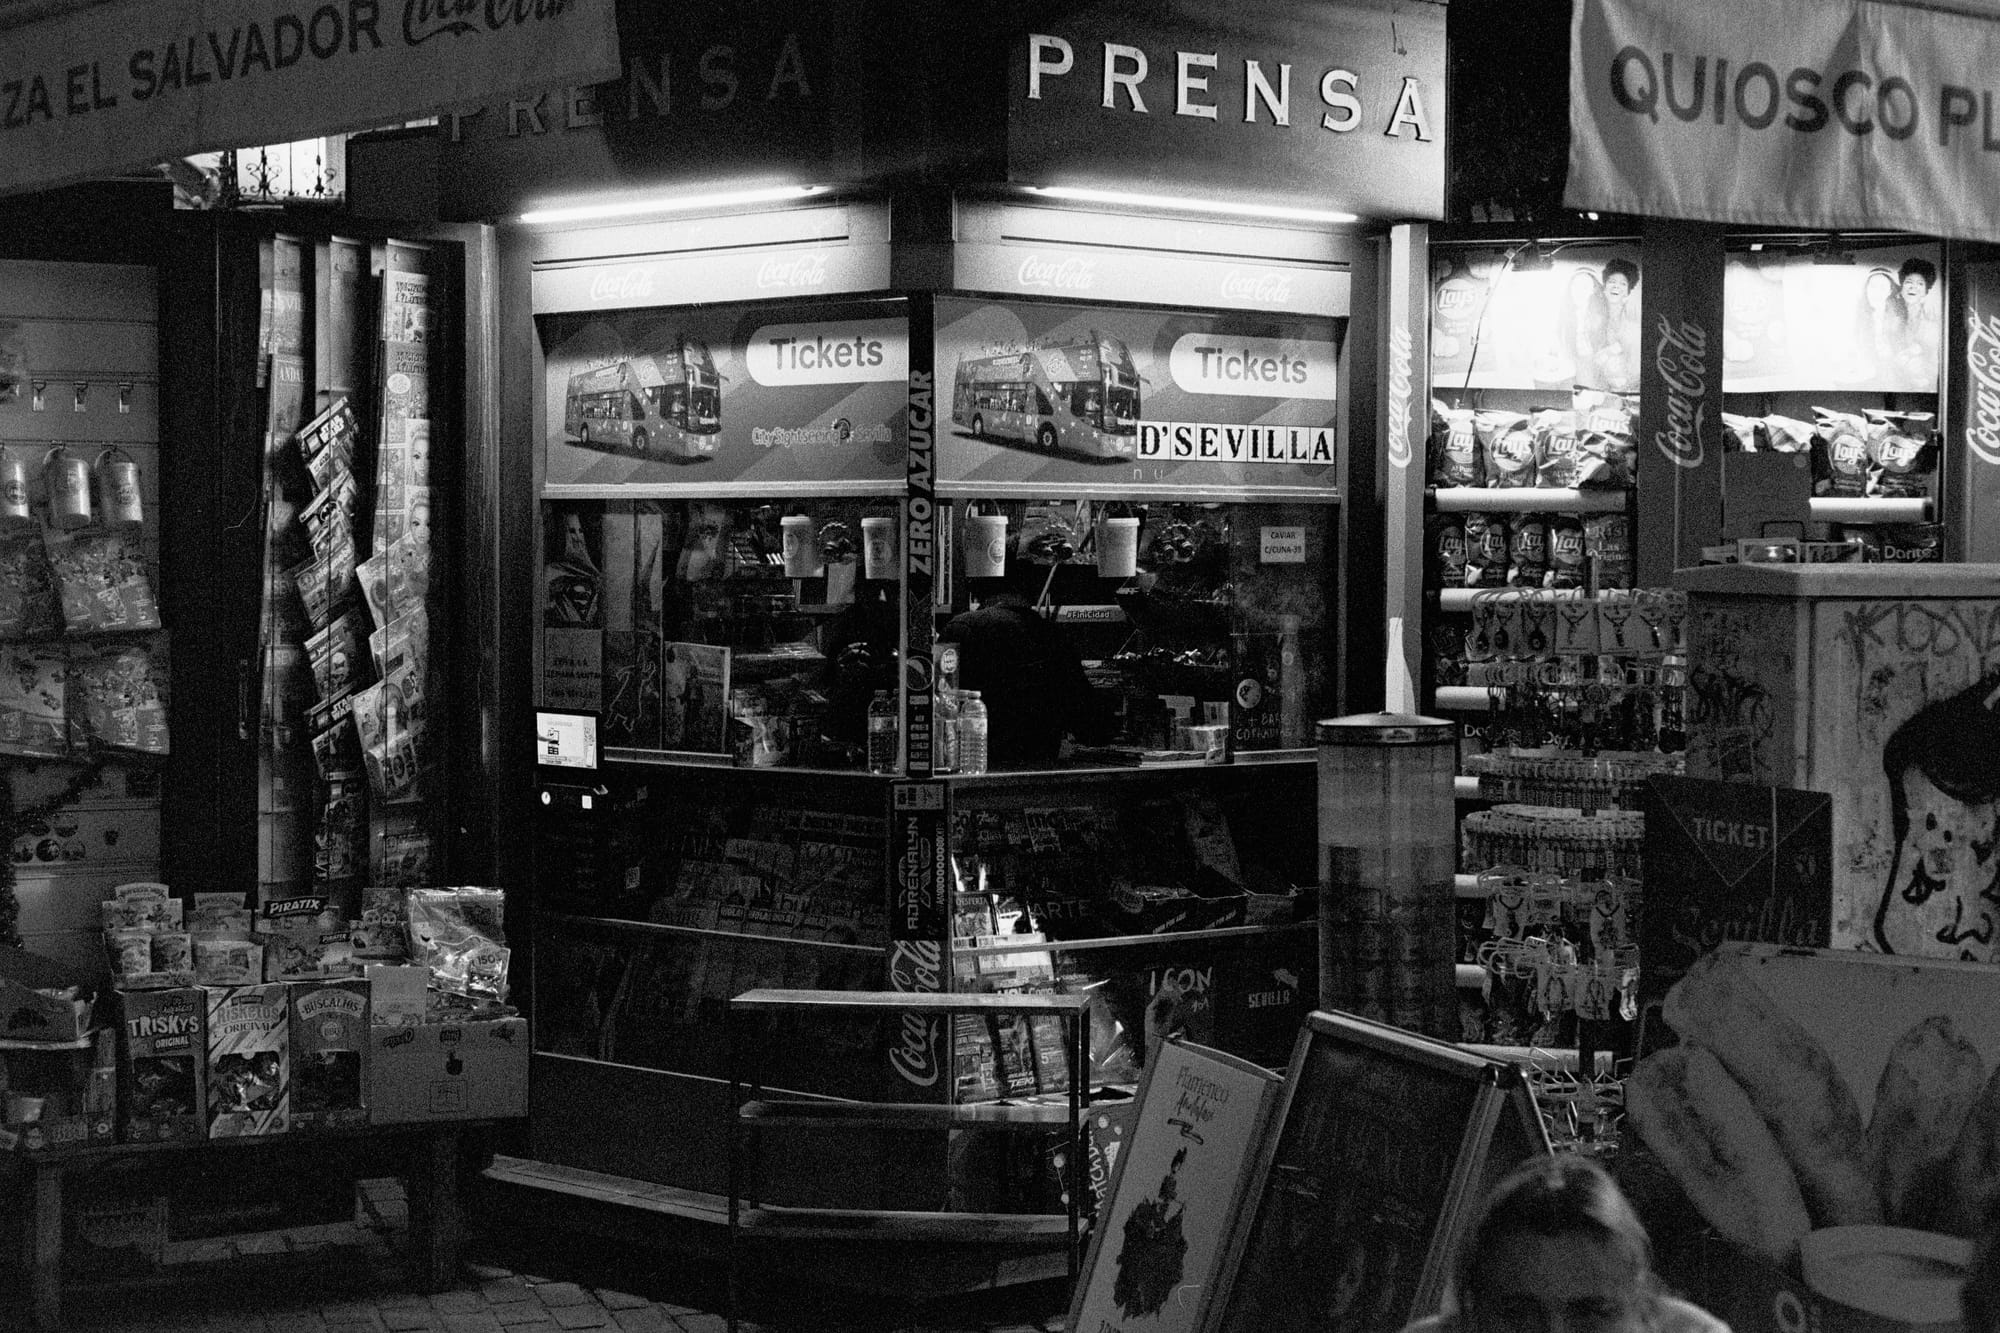
Sevilla is one of the most beautiful cities I’ve ever visited. It has an active nightlife, as folks typically eat dinner quite late, making it a very exciting place to try out night photography. I had the pleasure of spending a week there earlier this month, and of course I brought my film. The images below represent a variety of of scenes, from high contrast night scenes to brightly and evenly lit daylight scenes. All images use the final curve I obtained from the calibration target test shot.
Here are some of the best shots (in terms of exposure) from the roll.
Conclusions
OK, I lied. Two of the photos above required additional tweaking, because they were seriously over-exposed. Film can (in general) take over-exposure, but I bet you can still tell which photos were over-exposed (share your guess in the comments!).
So I’m getting the impression that HP5 Plus pushed to 6400 is very particular about how it is exposed—it feels like it has very little exposure latitude. This is unsurprising, since pushing increases contrast with extreme shadows and highlights on a properly exposed frame, leaving very little room for mistakes. A little under-exposed, and there go the shadows. A little over-exposed, and the compressed highlights make recovery difficult.
So, would I recommend pushing Ilford HP5 Plus to 6400? Yes, but only conditionally. Push it if
- You really need the shot, and don’t have something better (like Delta 3200 or T-Max P3200) handy.
- You are into high contrast.
- You really know how to use your lightmeter to get optimal results, e.g. if you are comfortable exposing low-latitude film like slide film. Or you have the liberty of exposure bracketing.
- You don’t mind agitating your development tank every minute for half an hour.
Next Film?
So, what should I try pushing next? I know there’s a film you’ve been wondering just how far it can be pushed! Share your suggestions in the comments. Until then, I’m going to start defrosting some rolls of AgfaPhoto APX 400!
Support this blog
If you enjoy reading this blog, I encourage you to consider purchasing a book or print to show your support. And if you're into analog photography, check out my new mobile app Crown + Flint.