Relieving the Tedium of Scanning Color Film
I find scanning color film to be tedious and error-prone work—but can turnkey solutions turn in better results?


I don’t shoot very much color film. I prefer working in monochrome, and monochrome film is much easier for me to process at home. But sometimes a subject really demands to be shot in color.
A few weeks back, Afonso Fan invited me on a photowalk with him—he was keen to try out my Mamiya RB67, and I was interested in trying his Leica M3. So we swapped cameras, and took a stroll through the Baixa and Alfama neighborhoods in Lisbon.
As it happened, I had a roll of Kodak Vision3 200T in my freezer waiting for a sunny day to use, so I brought it.
The thing is, I’m really bad at scanning color film. The colors never turn out well, and the work is so tedious. I use Capture One to manage the digital capturing of my negatives, and while the workflow for monochrome film is reasonably straightforward (a topic I’ll touch on another time), I find the process for color film to be…well, typically disastrous.
Thus, I thought maybe I could take advantage of this moment to do a comparison. I had the film processed at Carmencita Lisboa, and paid for them to scan the film as well—normally something I wouldn’t do, because I’m hardheaded. But I thought—maybe I should be more open-minded. For science.
So, we have here a comparison of four scanning methods:
- Carmencita’s work with the Fuji Frontier SP-3000—a high-end professional film scanner. They also (as will be obvious soon) performed a great deal of digital dust removal.
- My own work with a Fuji X-Pro3, Laowa 65mm f/2.8 2x Ultra Macro APO, and a lot of manual fiddling in Capture One.
- Same Fuji RAW files, but this time run through FilmLab using only the fully automatic settings.
- Patrick Marquetecken kindly offered to run the Fuji RAW files through Negative Lab Pro, a turnkey negative processor for Adobe Lightroom, using only the automatic settings.
Let’s see the results.
Results
Here’s my favorite shot from the roll. It is correctly exposed, and features relatively neutral colors—Lisbon’s famous Elevador de Santa Justa in the background is in reality a slightly blueish gray; the buildings around it are painted a pale yellow, with light beige stones. The woman’s jacket is a neutral gray


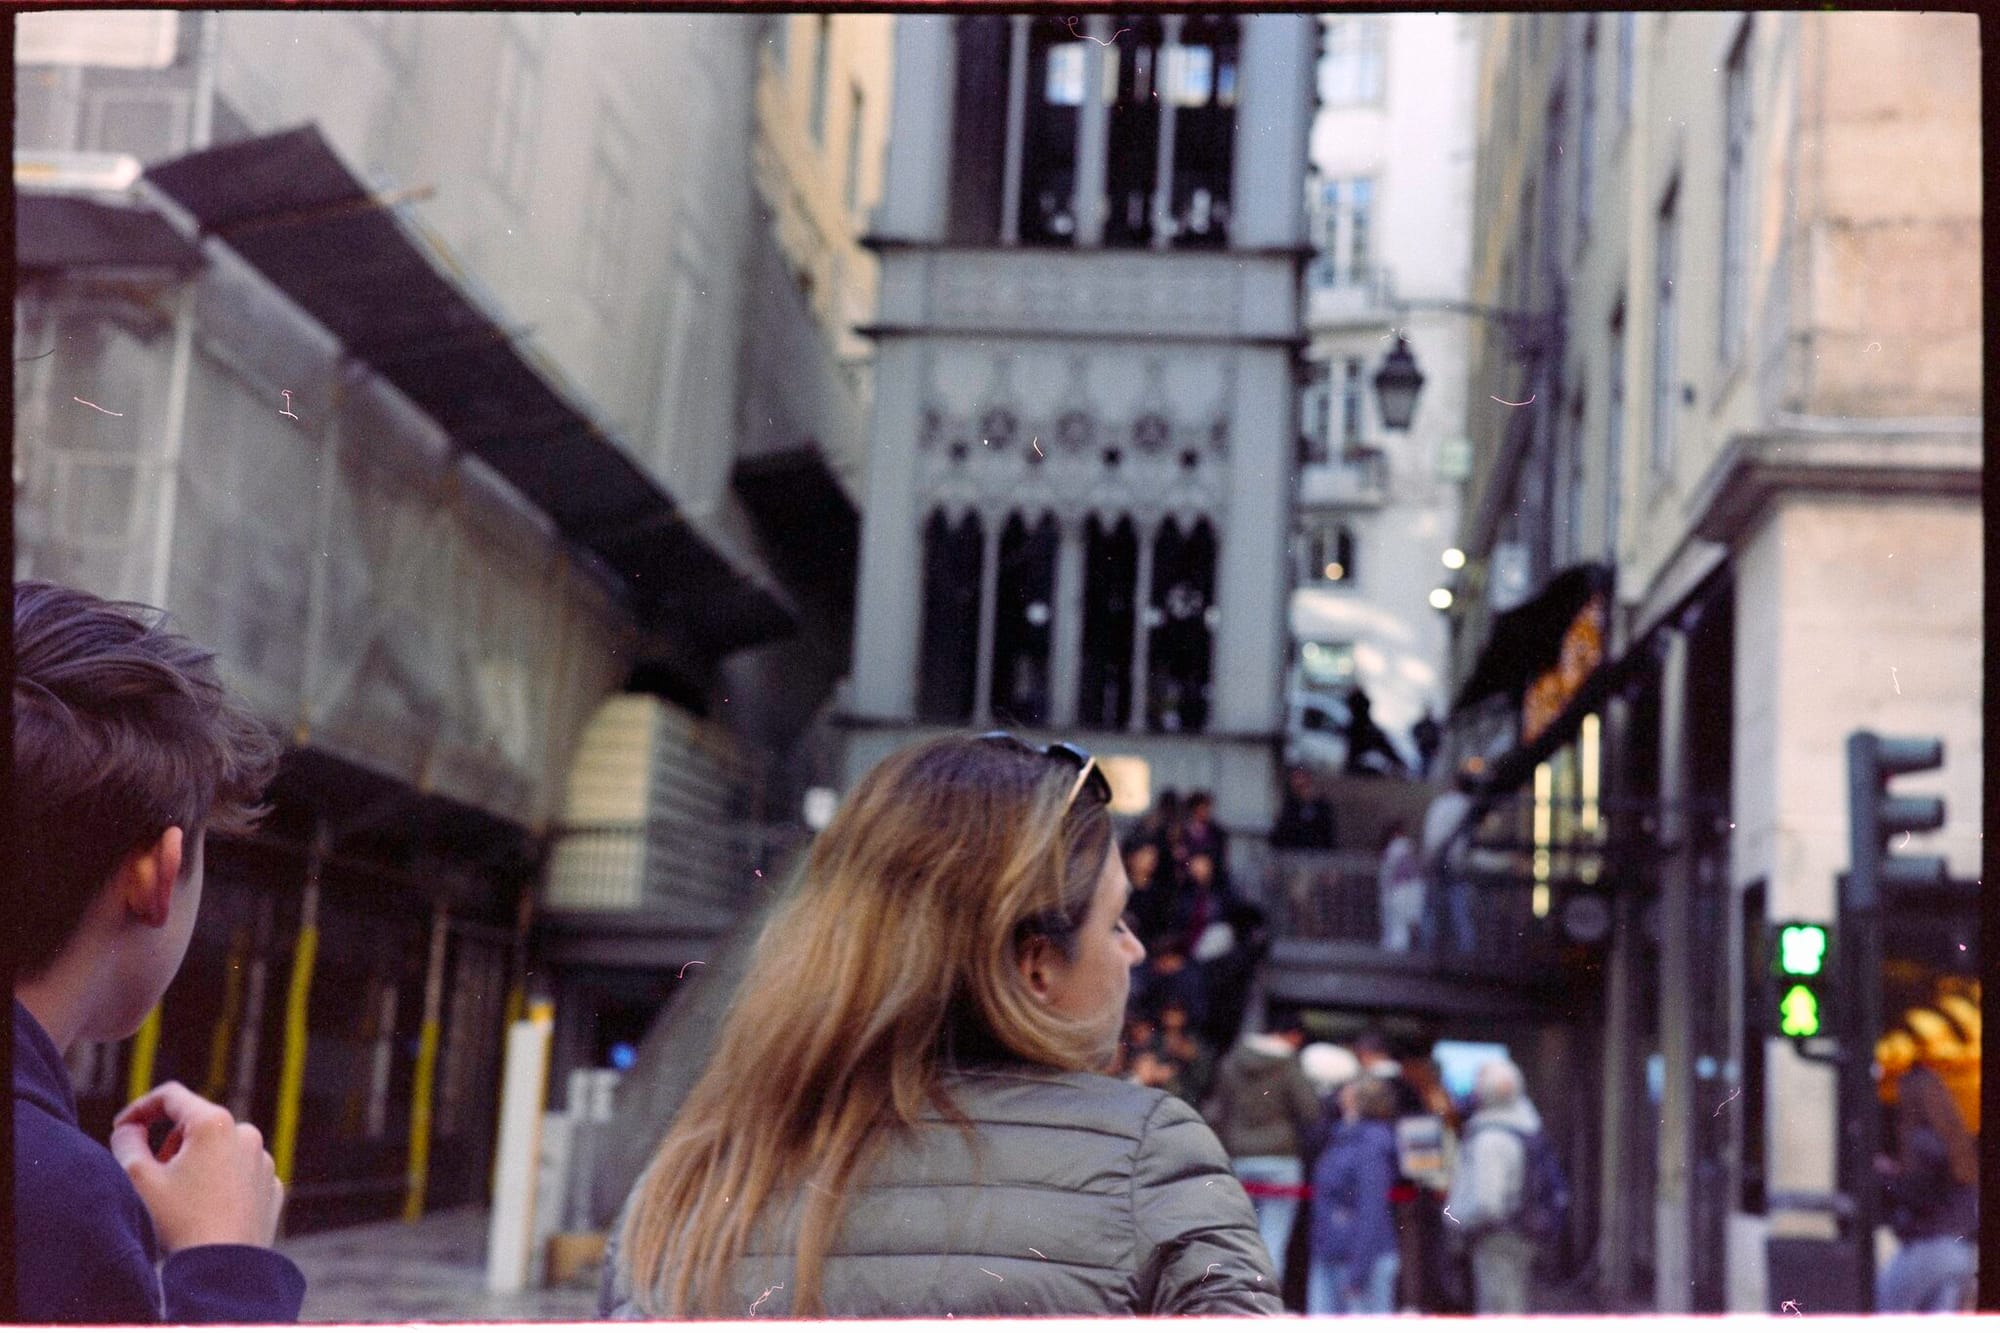
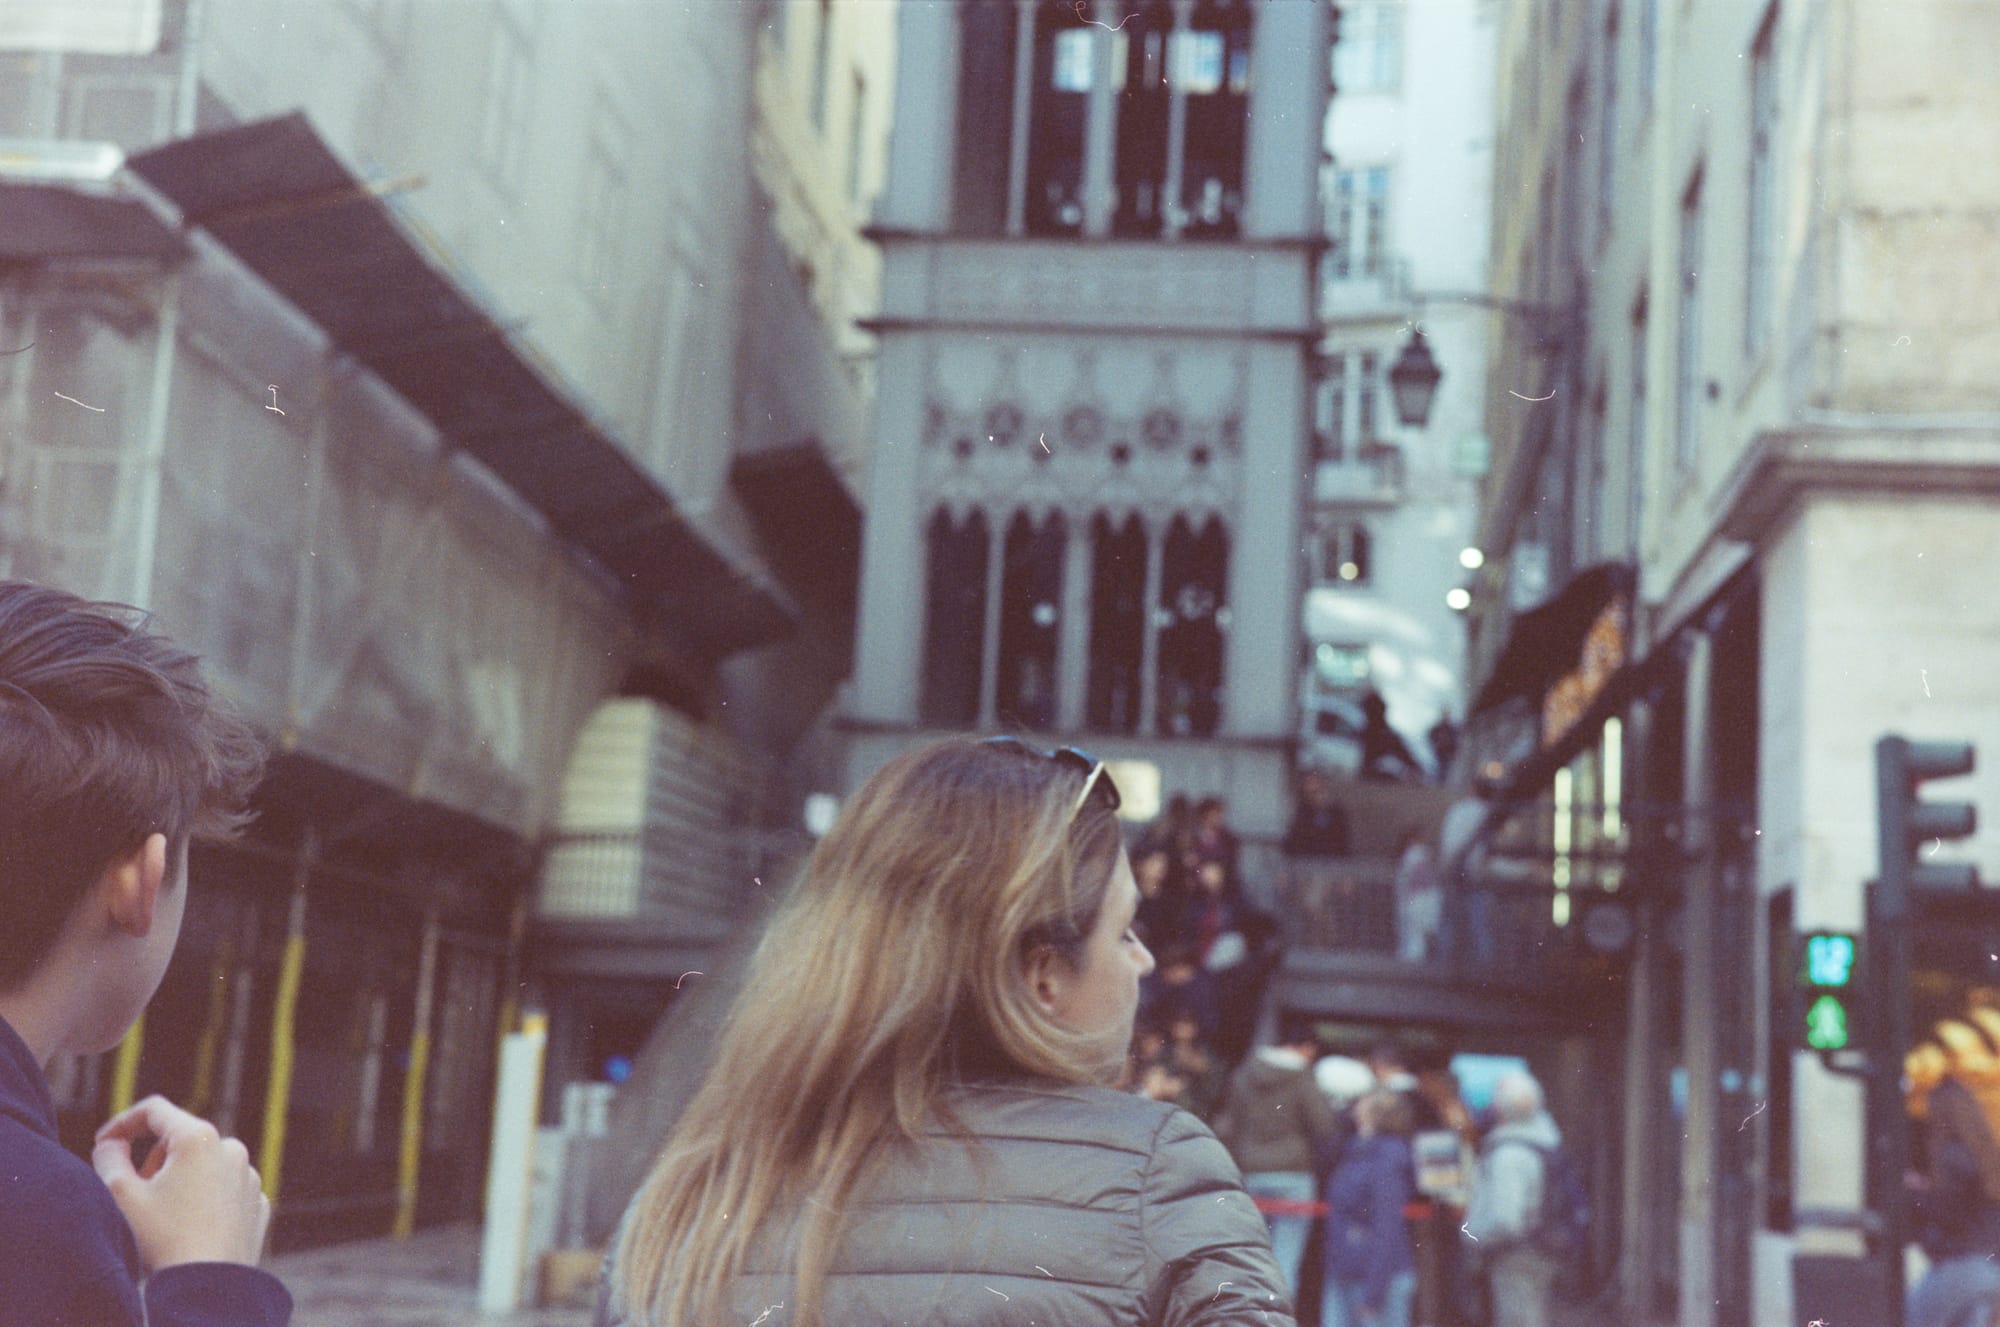
Starting from the top left: Carmencita/Fuji Frontier SP-3000, Capture One, Negative Lab Pro, FilmLab
Looking at each in turn:
- The Fuji Frontier SP-3000 scan has too much contrast. Or anyway, it has the most of all the scans. The color cast is slightly too green to my eye. But, the dust is gone!
- My own efforts to manually develop the image in Capture One feel too red. Contrast is fine, but I’m having a very hard time getting the color balance dialed in.
- Negative Lab Pro is the clear winner here, I think, with balanced colors and good contrast.
- FilmLab’s result is washed out, with dull colors and too-low contrast. But the color balance is very good, maybe just a shade green.
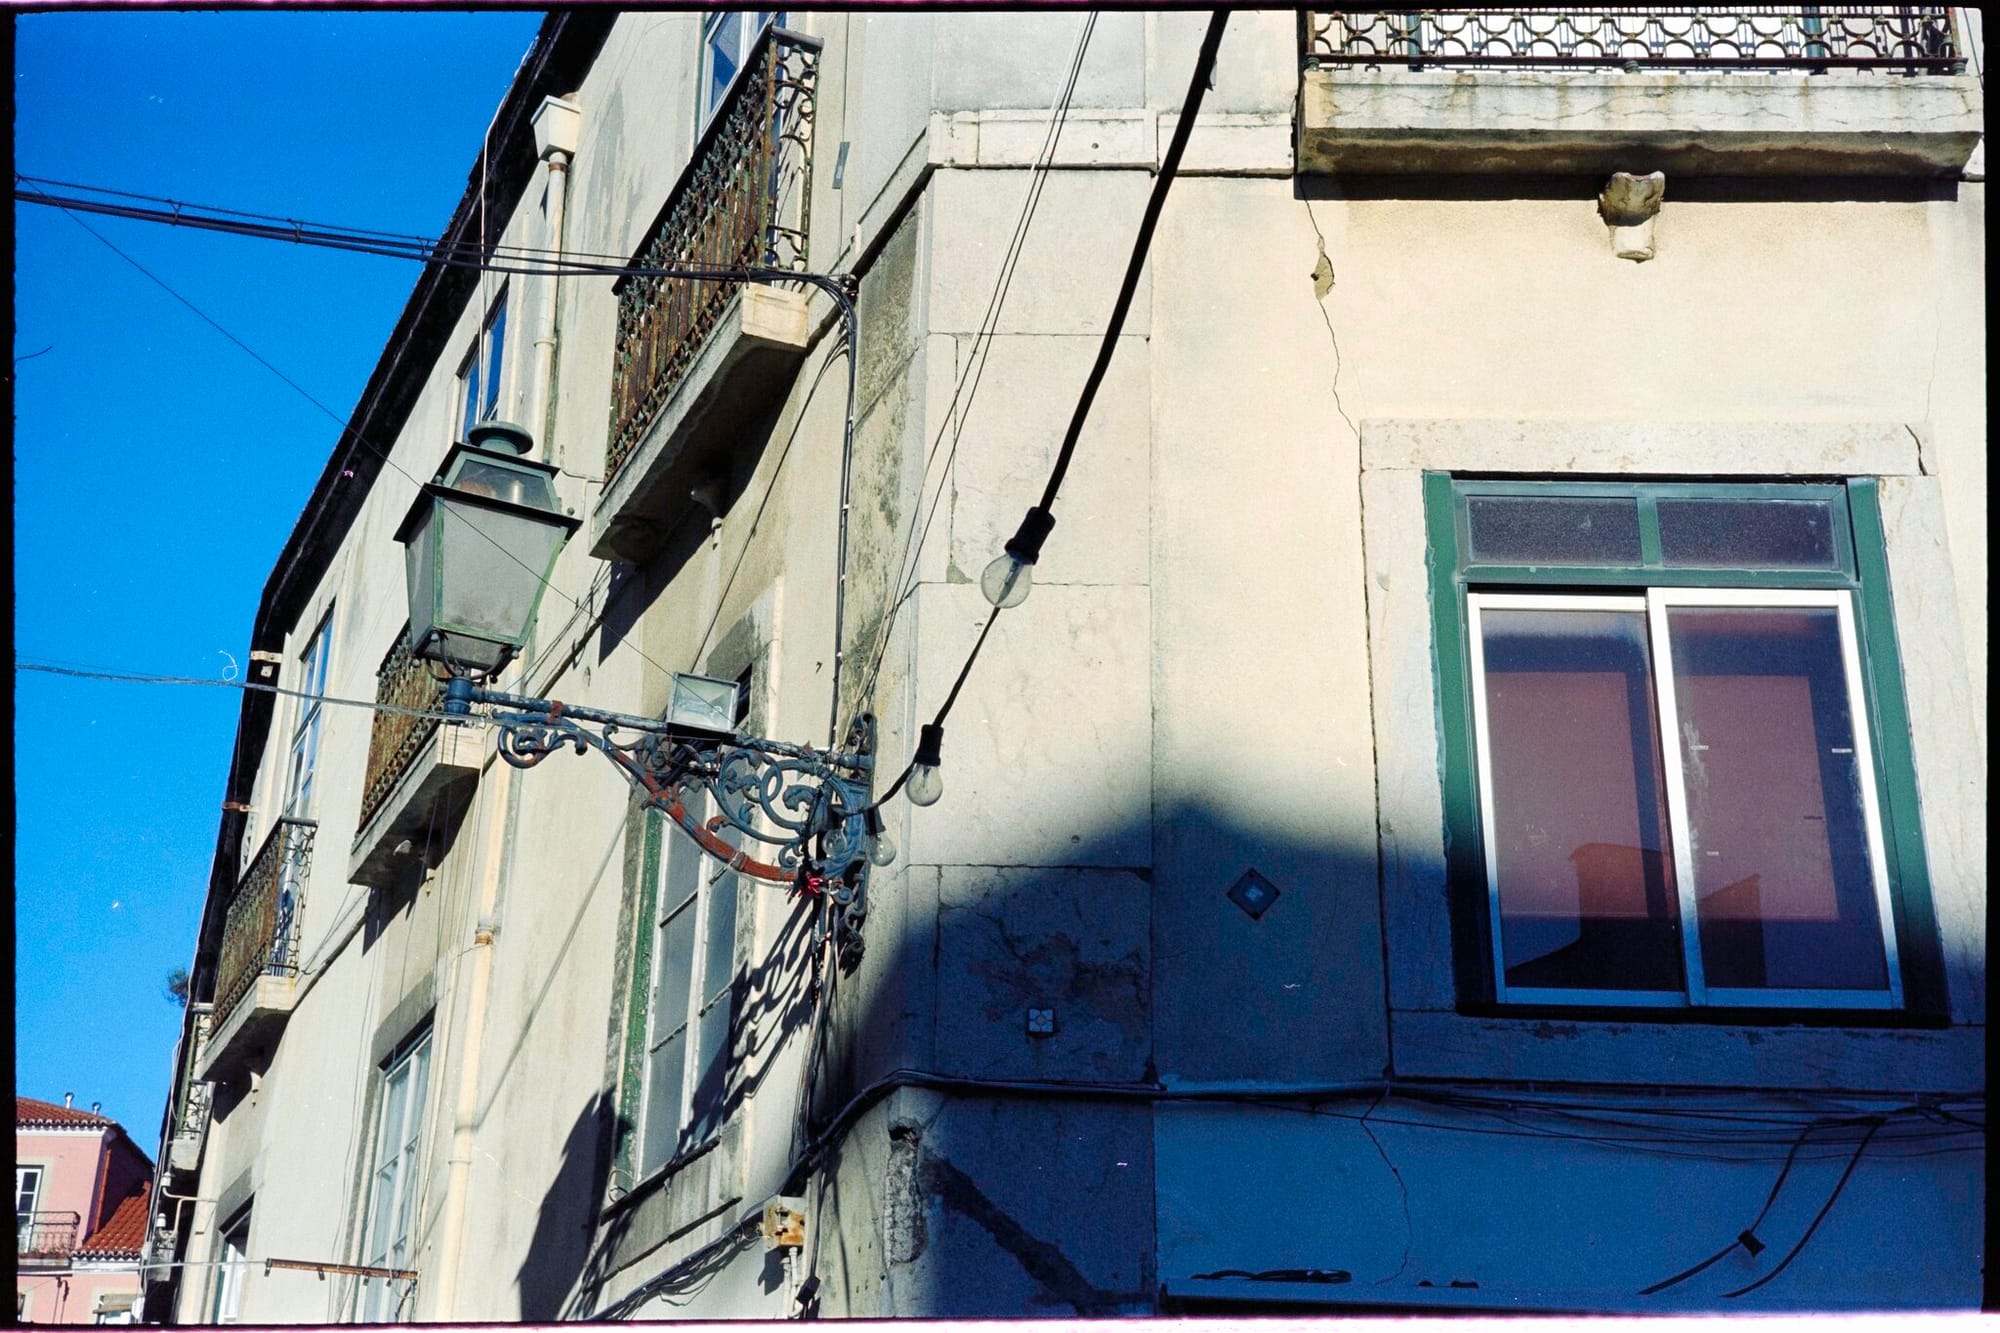
Here’s an image that is guaranteed to give any conversion process absolute fits. The subject is in the shade, the street reflected in the window is in the shade, there are multiple temperatures of light, it’s just a jumble of crap.
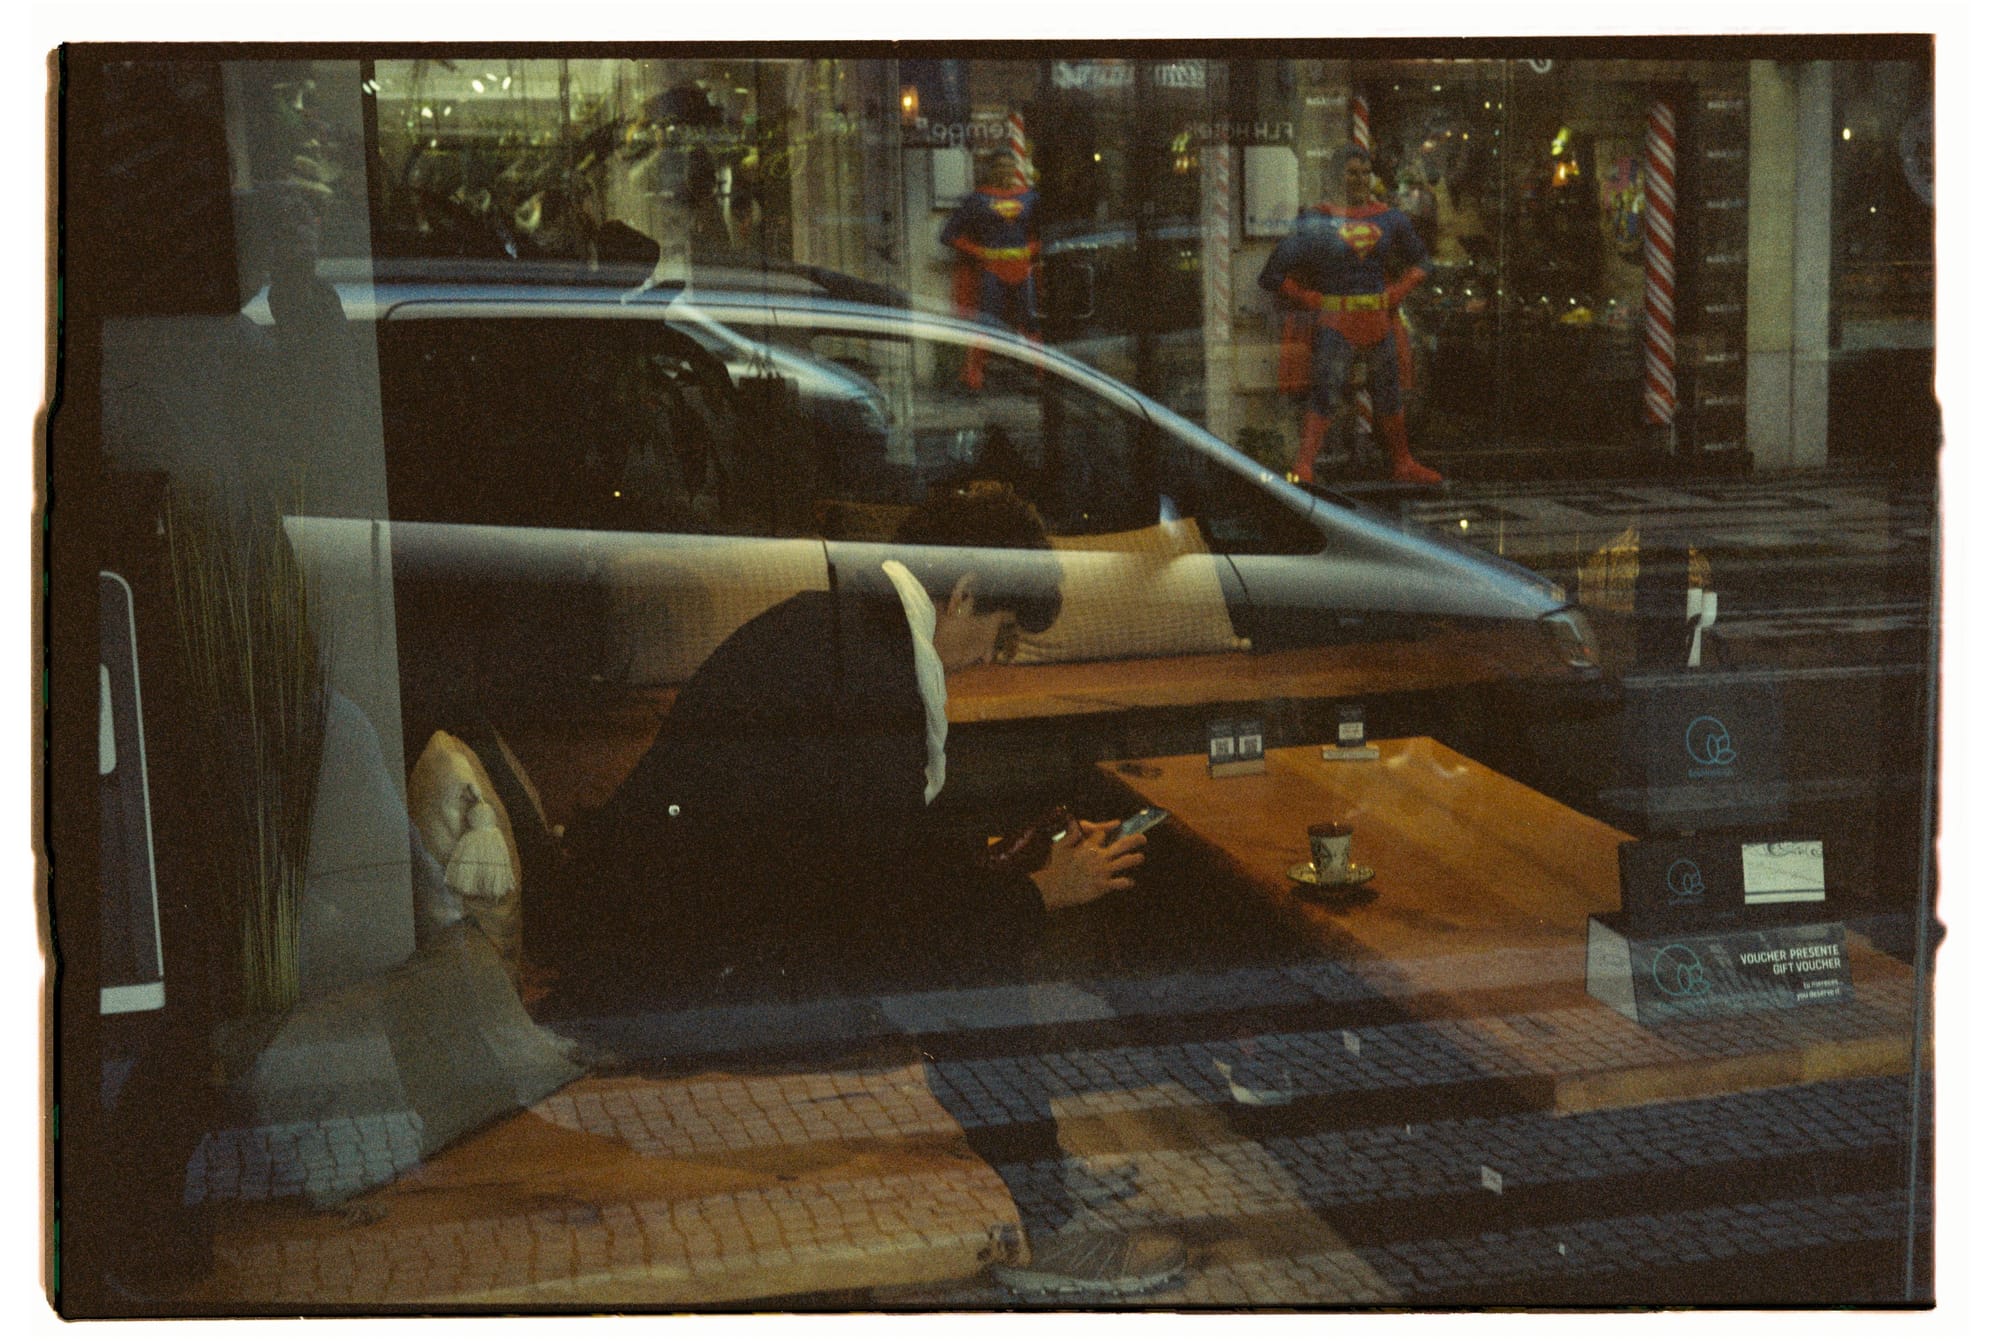


Starting from the top left: Carmencita/Fuji Frontier SP-3000, Capture One, Negative Lab Pro, FilmLab
Nevertheless, we’re starting to see some patterns.
- The Fuji Frontier SP-3000 has good contrast levels, but again feels just a little too warm to me—although this photo benefits from it.
- My own work in Capture One just makes me sad. I absolutely, despite my best efforts, cannot dial in a color balance that makes me happy. I hate this.
- Negative Lab Pro, what happened? The color balance is too blue/green, it is even worse than my own work.
- FilmLab turns in another washed out, low-contrast result…but the color balance looks really good.
Let’s pick an easier subject this time. The plastered walls of Alfama clock in as a slightly warm white. The window frames are pure white. And the sky is…sky blue.


Starting from the top left: Carmencita/Fuji Frontier SP-3000, Capture One, Negative Lab Pro, FilmLab
The pattern is getting pretty well set now.
- The Fuji Frontier SP-3000 is too warm. The colors of the sky is the real giveaway.
- I’m actually happy with the results of manual processing in Capture One. It’s a little warm, the sky is a little pale, and the shadows could be darker maybe.
- Negative Lab Pro is too cool in the shadows. In fact, it’s a little cool overall. But it’s not bad.
- FilmLab has veered all the way from contrast too low to contrast maybe a bit too hight. The colors are well balanced—and look at the blue in the sky! It is too dark, but it is also really beautiful. Overall the exposure is too low.
One last image, a high-contrast scene to see how the various processes handle color shifts across hightlights and shadows.
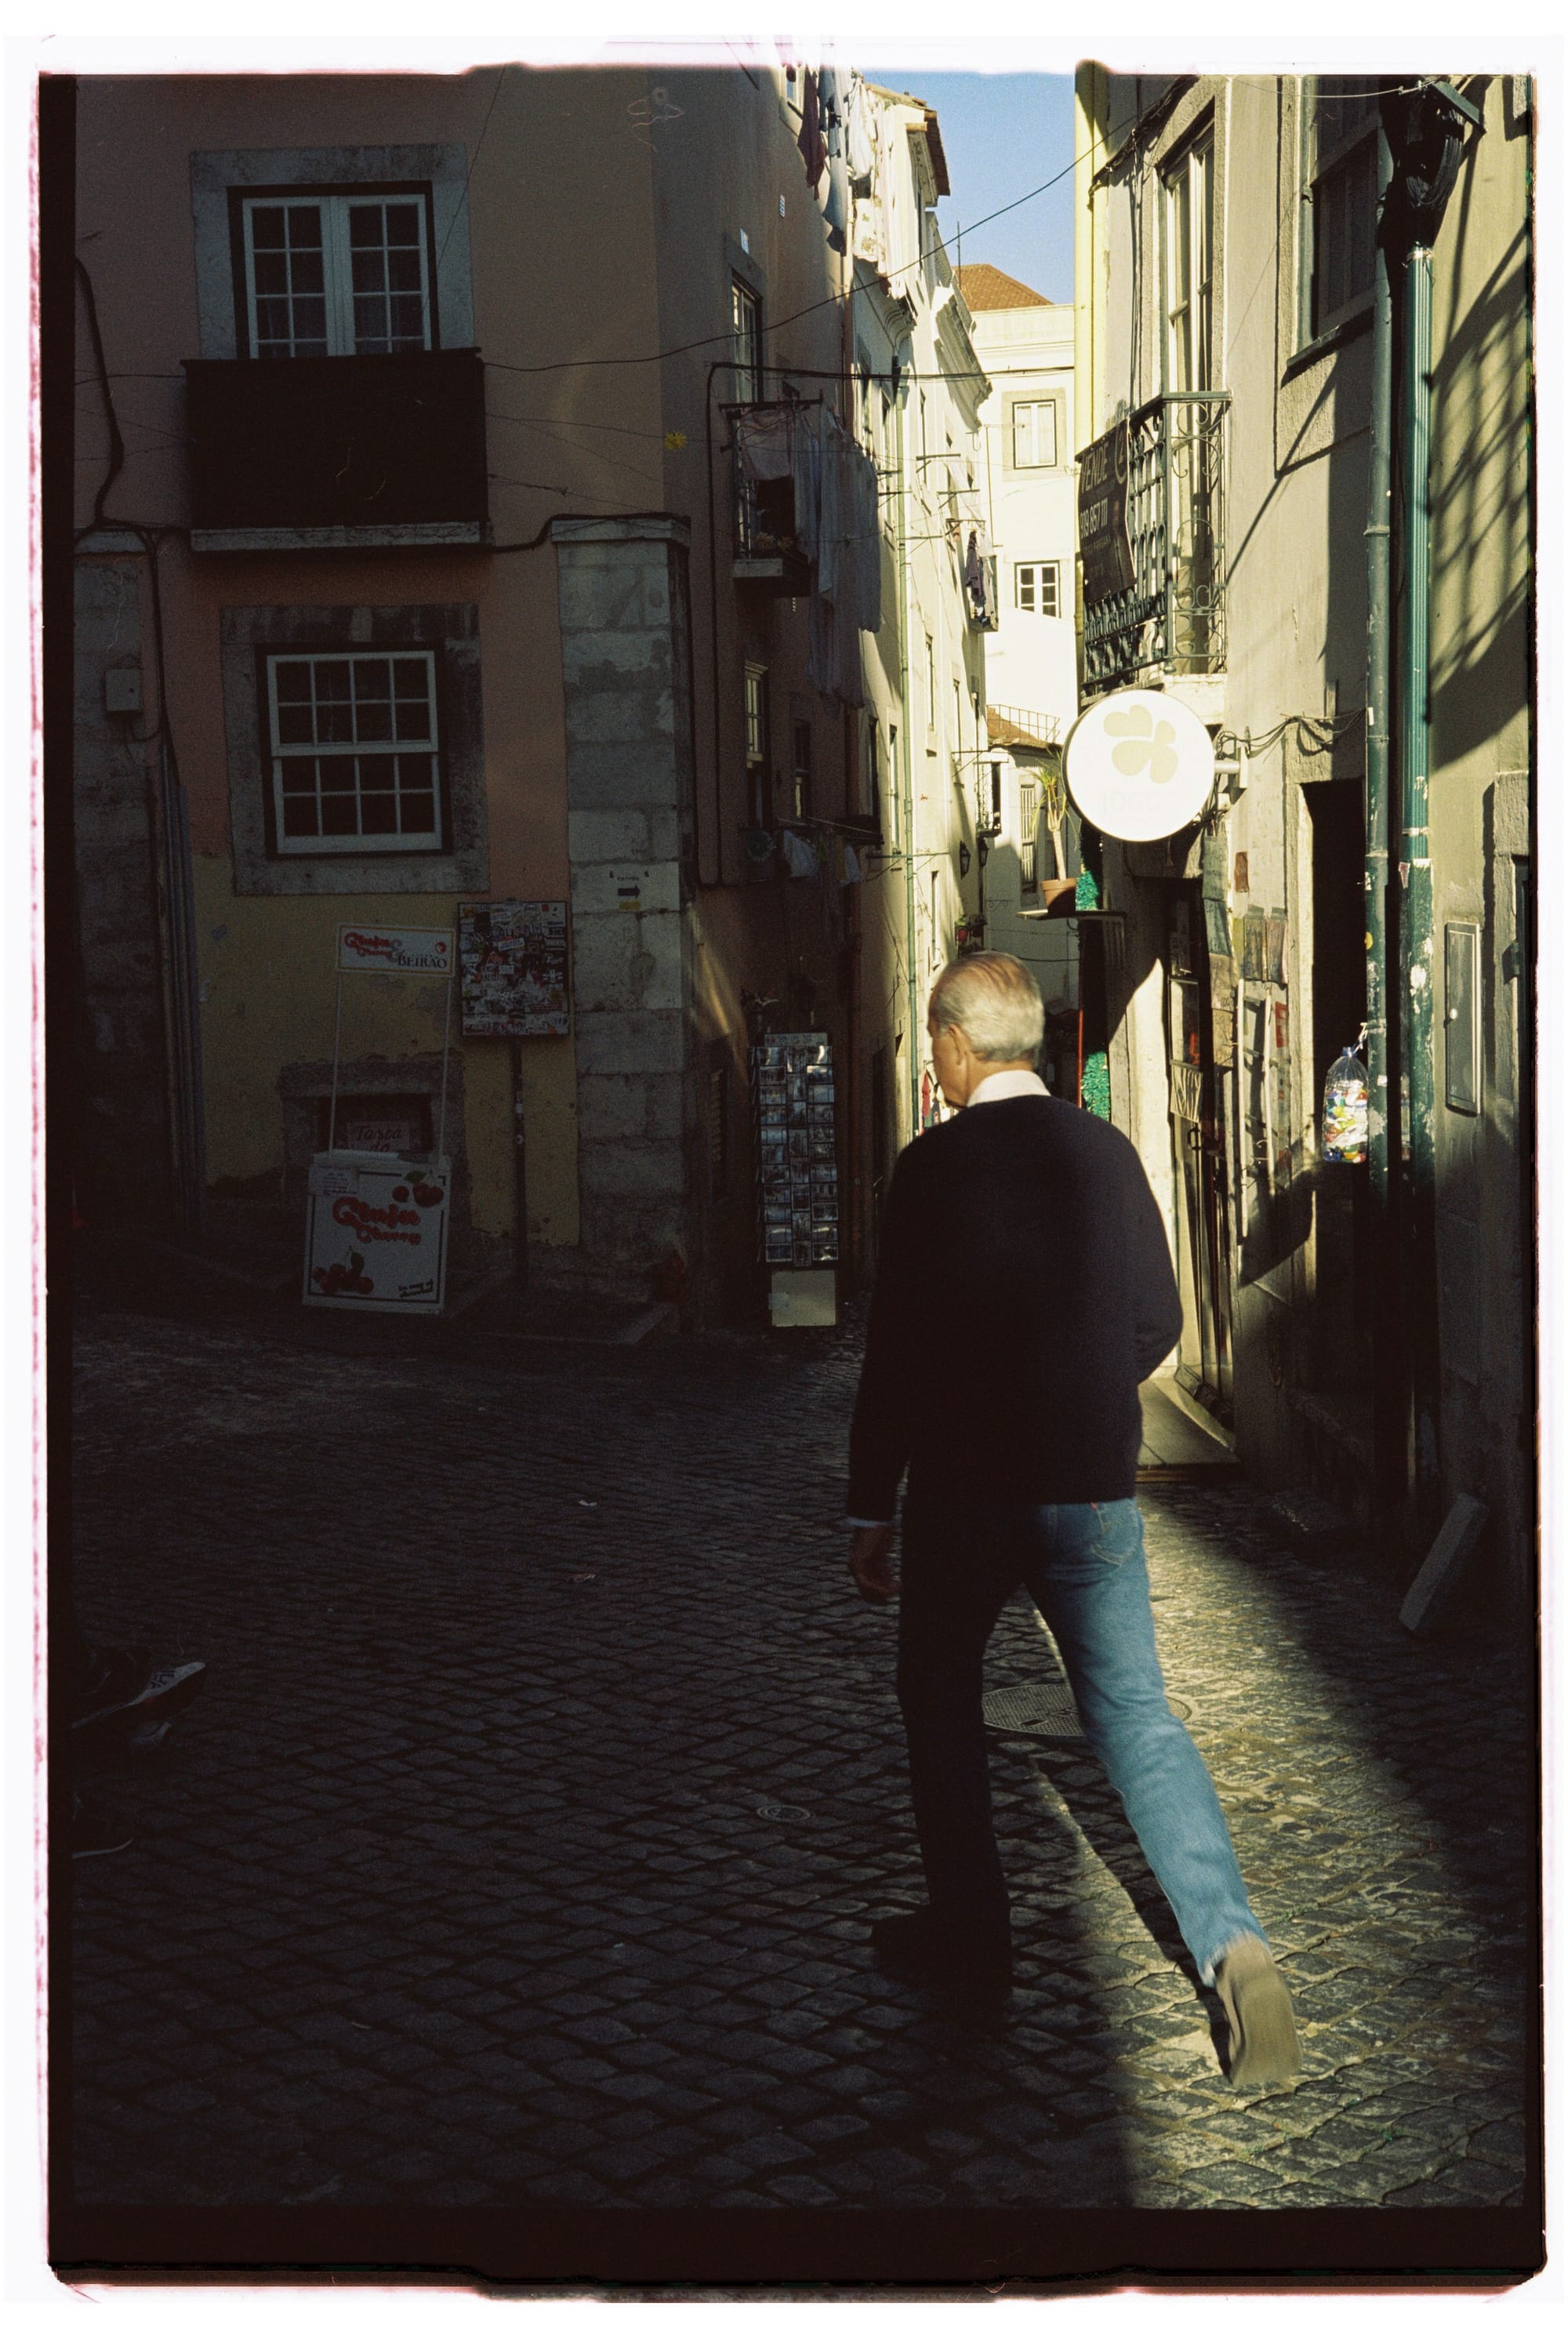


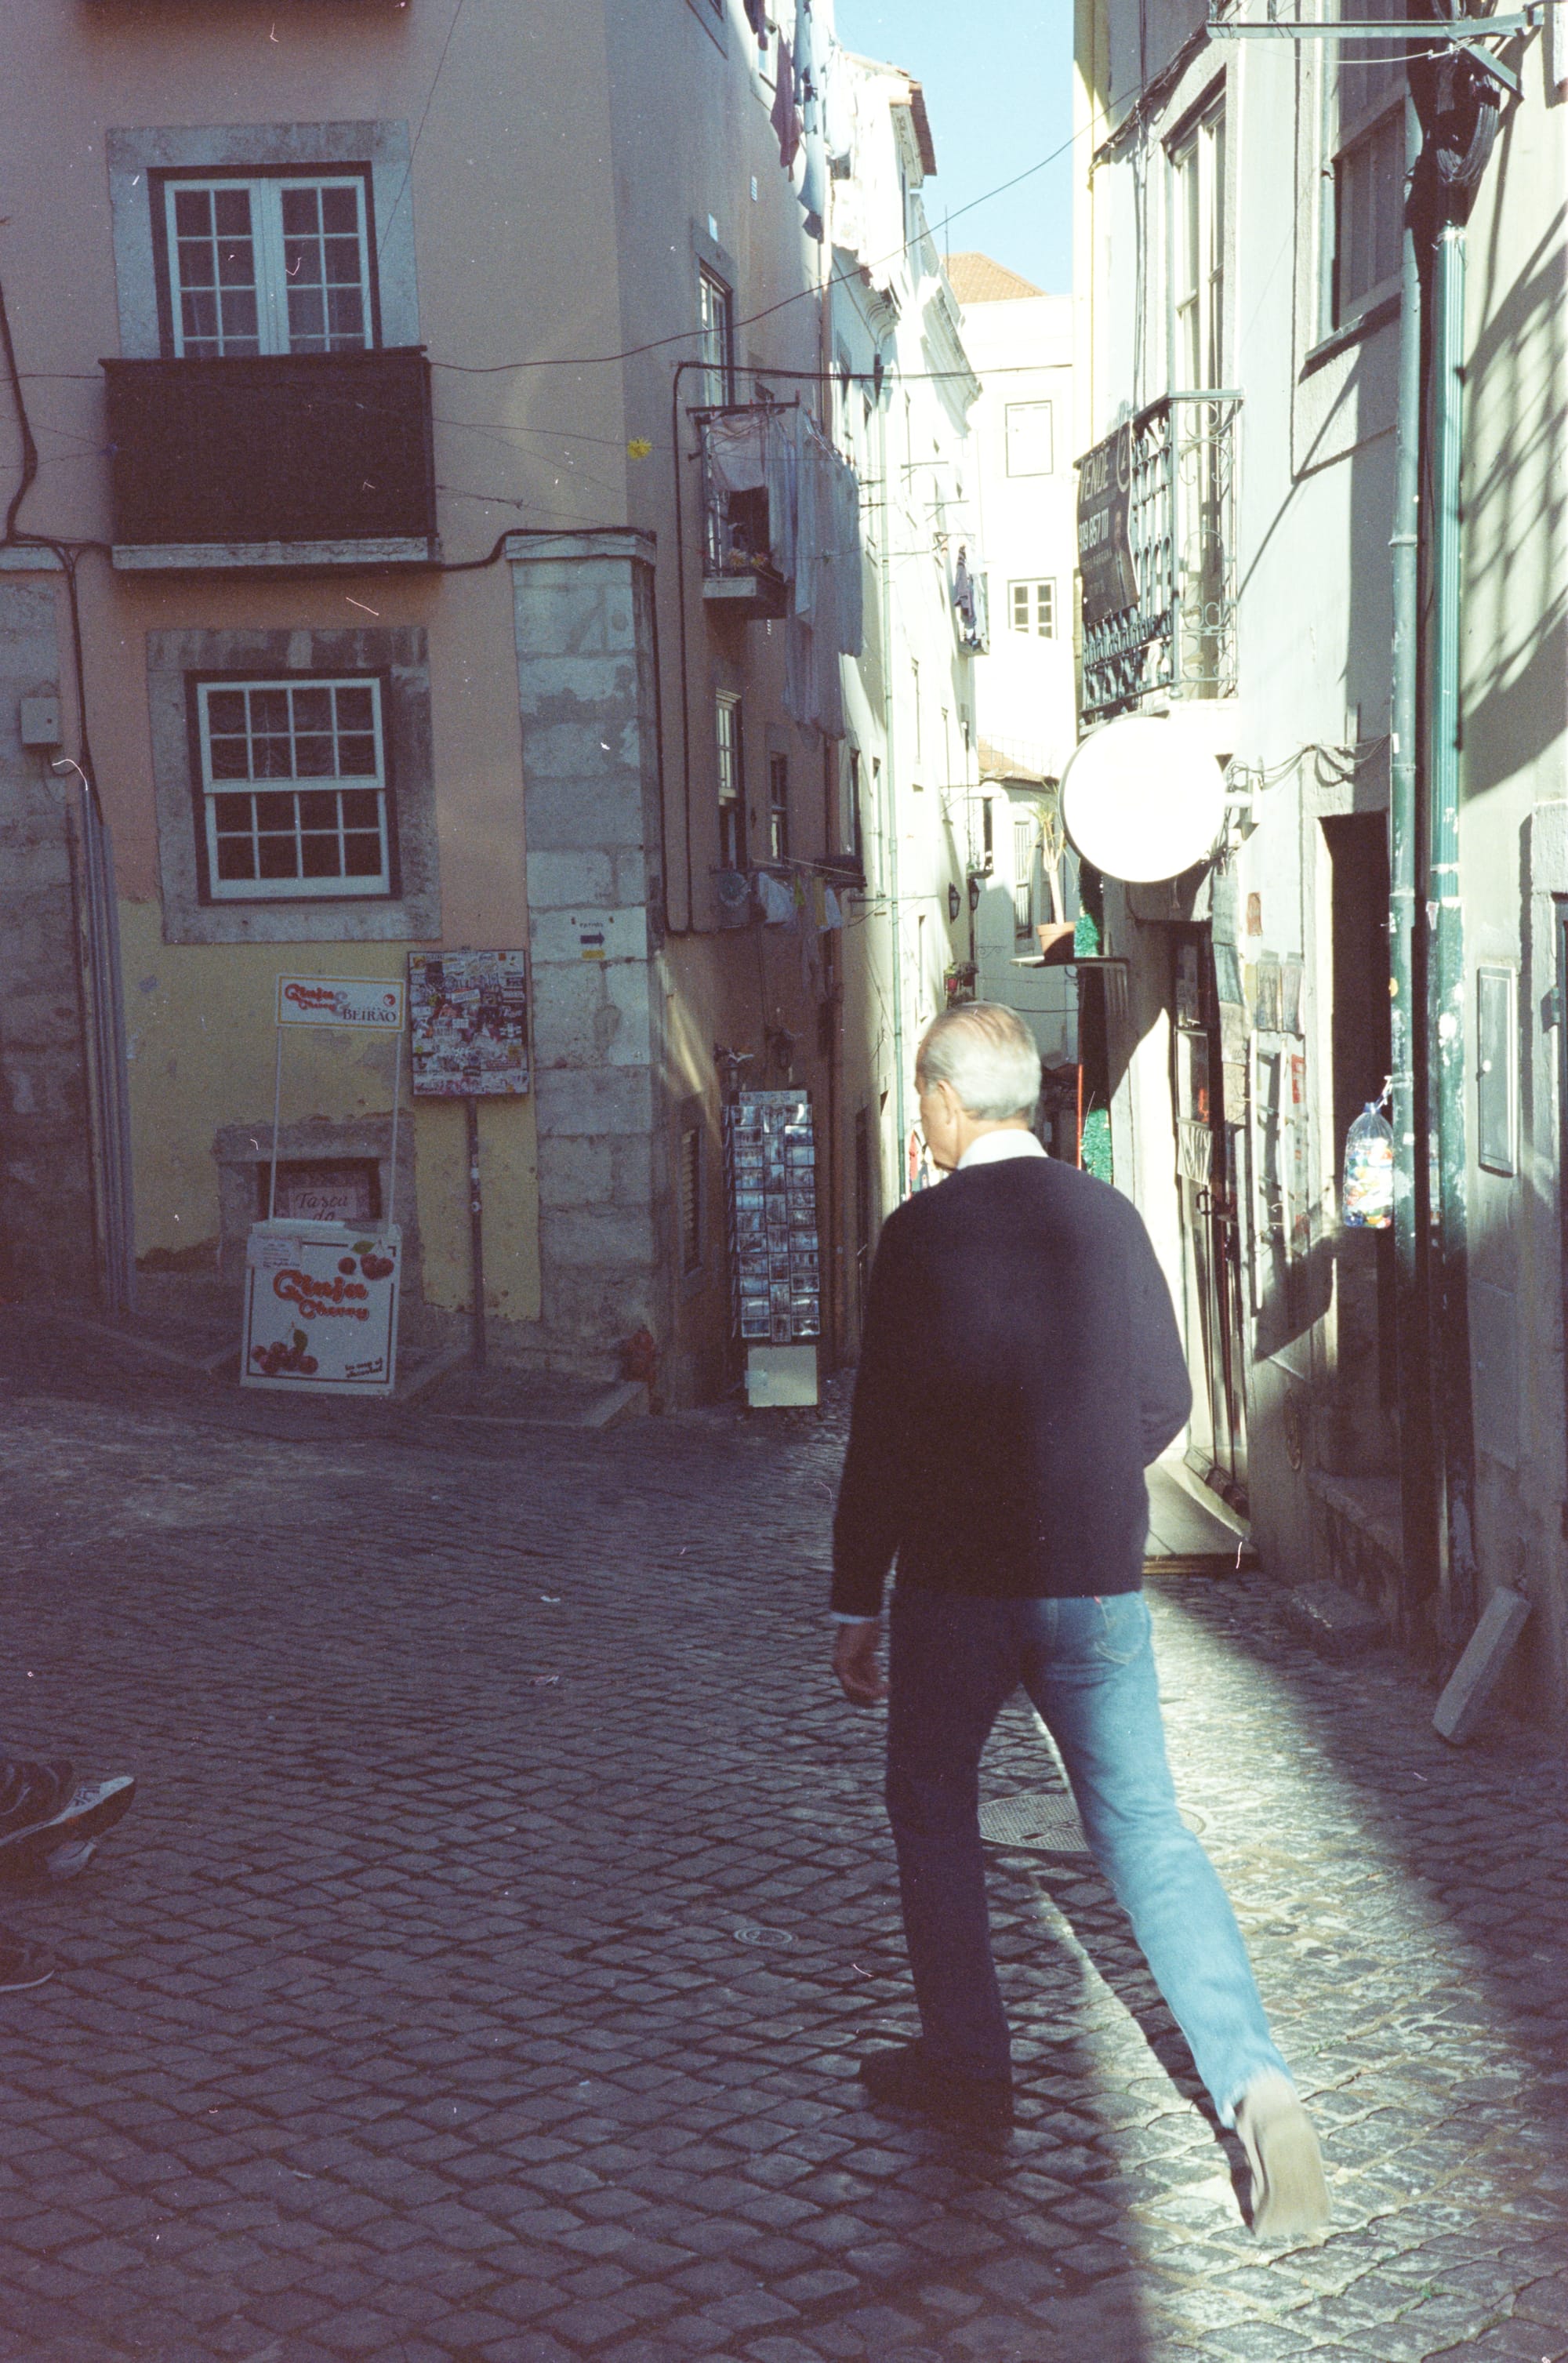
Starting from the top left: Carmencita/Fuji Frontier SP-3000, Capture One, Negative Lab Pro, FilmLab
I think we’re about ready to draw some conclusions
- The Fuji Frontier SP-3000 is too warm, and has too much contrast.
- My own manual work is color balanced well in the highlights, but too blue in the shadows.
- Negative Lab Pro is really nailing this image.
- FilmLab has good color balance, but the color is a bit washed out, and the contrast is too low.
Conclusions
Fuji Frontier SP-3000 / Carmencita Film Labs
The shots from Carmencita come in consistently too warm. That said, as an aesthetic choice it is very pleasing! I suspect there is some issue in the interpretation of the images, rather than a technical problem, as the technician who scanned the images commented that I had taken a nice set of golden hour photos. Thing is, these were taken mid-afternoon, quite a bit before golden hour.
The shots are also a bit too contrasty. Again, as an aesthetic, it’s pleasing. But again I don’t think the scans returned are reflective of a neutral evaluation of the film negatives.
And finally, the files you get back have limited latitude for additional editing, especially if you opt for jpeg files. This means you can’t use the scanner’s results as a convenient jumping off point for final edits.
So, in the end, I'm unsure how I feel about using Carmencita’s services. Five stars for ease of use, five stars for returning results that look great on Instagram, but one star for not being to my taste and not being editable to my taste.
3.5 / 5 stars
Capture One / Don
Crap, I hated this work. I have a process that I follow for handling color negatives. I automatically set the white point from a section of the film rebate to get rid of the red film base. I invert the levels, and use the automatic level adjustments on the red, green, and blue channels individually to get the levels more or less close to where they should be. Then I pull down on the green and blue curves to make final adjustments to the overall color balance. This works on most photos that have some neutral colors, or a range of colors—but it often doesn’t work at all.
And when it does work, adjusting the curves on each photo is tedious and error prone. If there’s high contrast, and a color shift in the shadows, I have to go back and adjust that too (I skipped that step for this test).
So, that’s a lot of work! But the results are not very good overall. Some shots turn out well, most others are disasters. I don’t care much for this approach.
So, zero stars for ease, one star for results, and five stars for leaving the door open to shoot myself in the foot some more.
2 / 5 stars
Negative Lab Pro
NLP turned in some solid results in this test. If you use Adobe Lightroom, I feel like you can’t go wrong with this tool. I don’t use Adobe Lightroom, opting to pay my photography taxes to Capture One instead, so for me NLP is a non-starter. But maybe for you?
Four stars for ease (you still have to scan the negatives yourself with your camera), four stars for results, and four stars for ability to edit further (because it’s integrated into Lightroom).
4 / 5 stars
FilmLab
FilmLab’s results out of the box were at least as disappointing as my own work, but for very different reasons. I’m using the latest beta, which has options for film stock (I used Kodak Vision3 800T, since 200T was not an option), camera sensor, and light source. I set all of these, then hit the automatic adjustment button. The results you see above.
But the thing is, the color balance is consistently the best of all the methods I tried. And it has lots of dials for adjusting other aspects of the image. The UI needs some polish still—there’s no undo, and no way to reset a control to the defaults, or to use the keyboard for fine, incremental adjustments. But it’s easy enough to recover the lost contrast (shadow density up).
I think that in the future, FilmLab is going to be my method of choice, because it offers a much easier starting point for edits, and provides just enough control to dial things in.
Four stars for ease (no different than NLP), three stars for results, and three stars for ability to edit further.
3.5 / 5 stars
Final Notes
I want to thank Patrick for taking the time to run my negatives through his copy of Negative Lab Pro. If you’re using Crown + Flint (and if not, why not?) and Lightroom, Patrick has written a plugin to import Crown + Flint metadata!
Support this blog
If you enjoy reading this blog, I encourage you to consider purchasing a book or print to show your support. And if you're into analog photography, check out my new mobile app Crown + Flint.