Introducing the RB67-Pan: Panoramic photos in a medium format camera
It's easy to transform a Mamiya RB67 medium format camera into an inexpensive—if extremely bulky—35mm panoramic camera.

I love ultra-wide aspect ratios. 16:9 (1.78:1) is great. 21:9 (2.33:1) is better. 69:25 (2.76:1) makes me drool. 3:1 is the dream. I love the cinematic feel, I love the drama, and I love the challenge of shooting with ultra-wide aspect ratios.
Many of you will of course know of the Hasselblad XPan / Fujifilm TX1. This is a rangefinder camera—so, compact and lightweight—capable of capturing images at 2.7:1 (24mm x 65mm) on 135 film. It's unparalleled…and very, very expensive for a 25 year old film camera. I certainly cannot afford one.
So, I've turned to the tradition of loading 135 film into a medium format camera. It's tricky to get right, but I think the results speak for themselves.
In my case, I went for cheap-but-reliable—I chose a Mamiya RB67 Pro SD (I've chronicled my adventures shopping for this camera in Seoul already). This is a 6x7 format camera, which means that it produces negatives that are nominally 6cm x 7cm. The reality is that the film gate on my camera is closer to 6.9cm, maybe a little less. But that's already wider than the XPan, with an aspect ratio of 2.88:1! Plus—if you like this sort of thing—it exposes the entire height of the film, sprocket holes and all.
How to load 135 film into an RB67
So, the question is: How do you load 135 film into an RB67? There are a lot of potential answers out there on the intertubes, but I've found one that suits me. Here's what makes my solution stand out:
-
Zero film wastage. Medium format film has a very long paper leader, and just throwing 135 film into a medium format camera without any kind of paper leader is going to waste a lot of film.
-
Full camera capabilities. The RB67 series of cameras—especially the later models—offer a very thoughtful range of features for a fully-mechanical camera, including multiple safety interlocks to avoid accidental double exposures, and a fancy frame counter. My solution preserves every bit of the camera functionality, without resorting to hacks or workarounds.
But there are disadvantages too:
-
It's finicky. You need to do a good bit work up front to get these results, and a little additional work for each roll.
-
You need a 220 Pro SD back, which are pretty rare. I couldn't find a single one in all my hunting in Seoul and Tokyo—I had to buy the single solitary listing I found on eBay. On the other hand, because no one wants them (220 film isn't made anymore), they're not expensive.
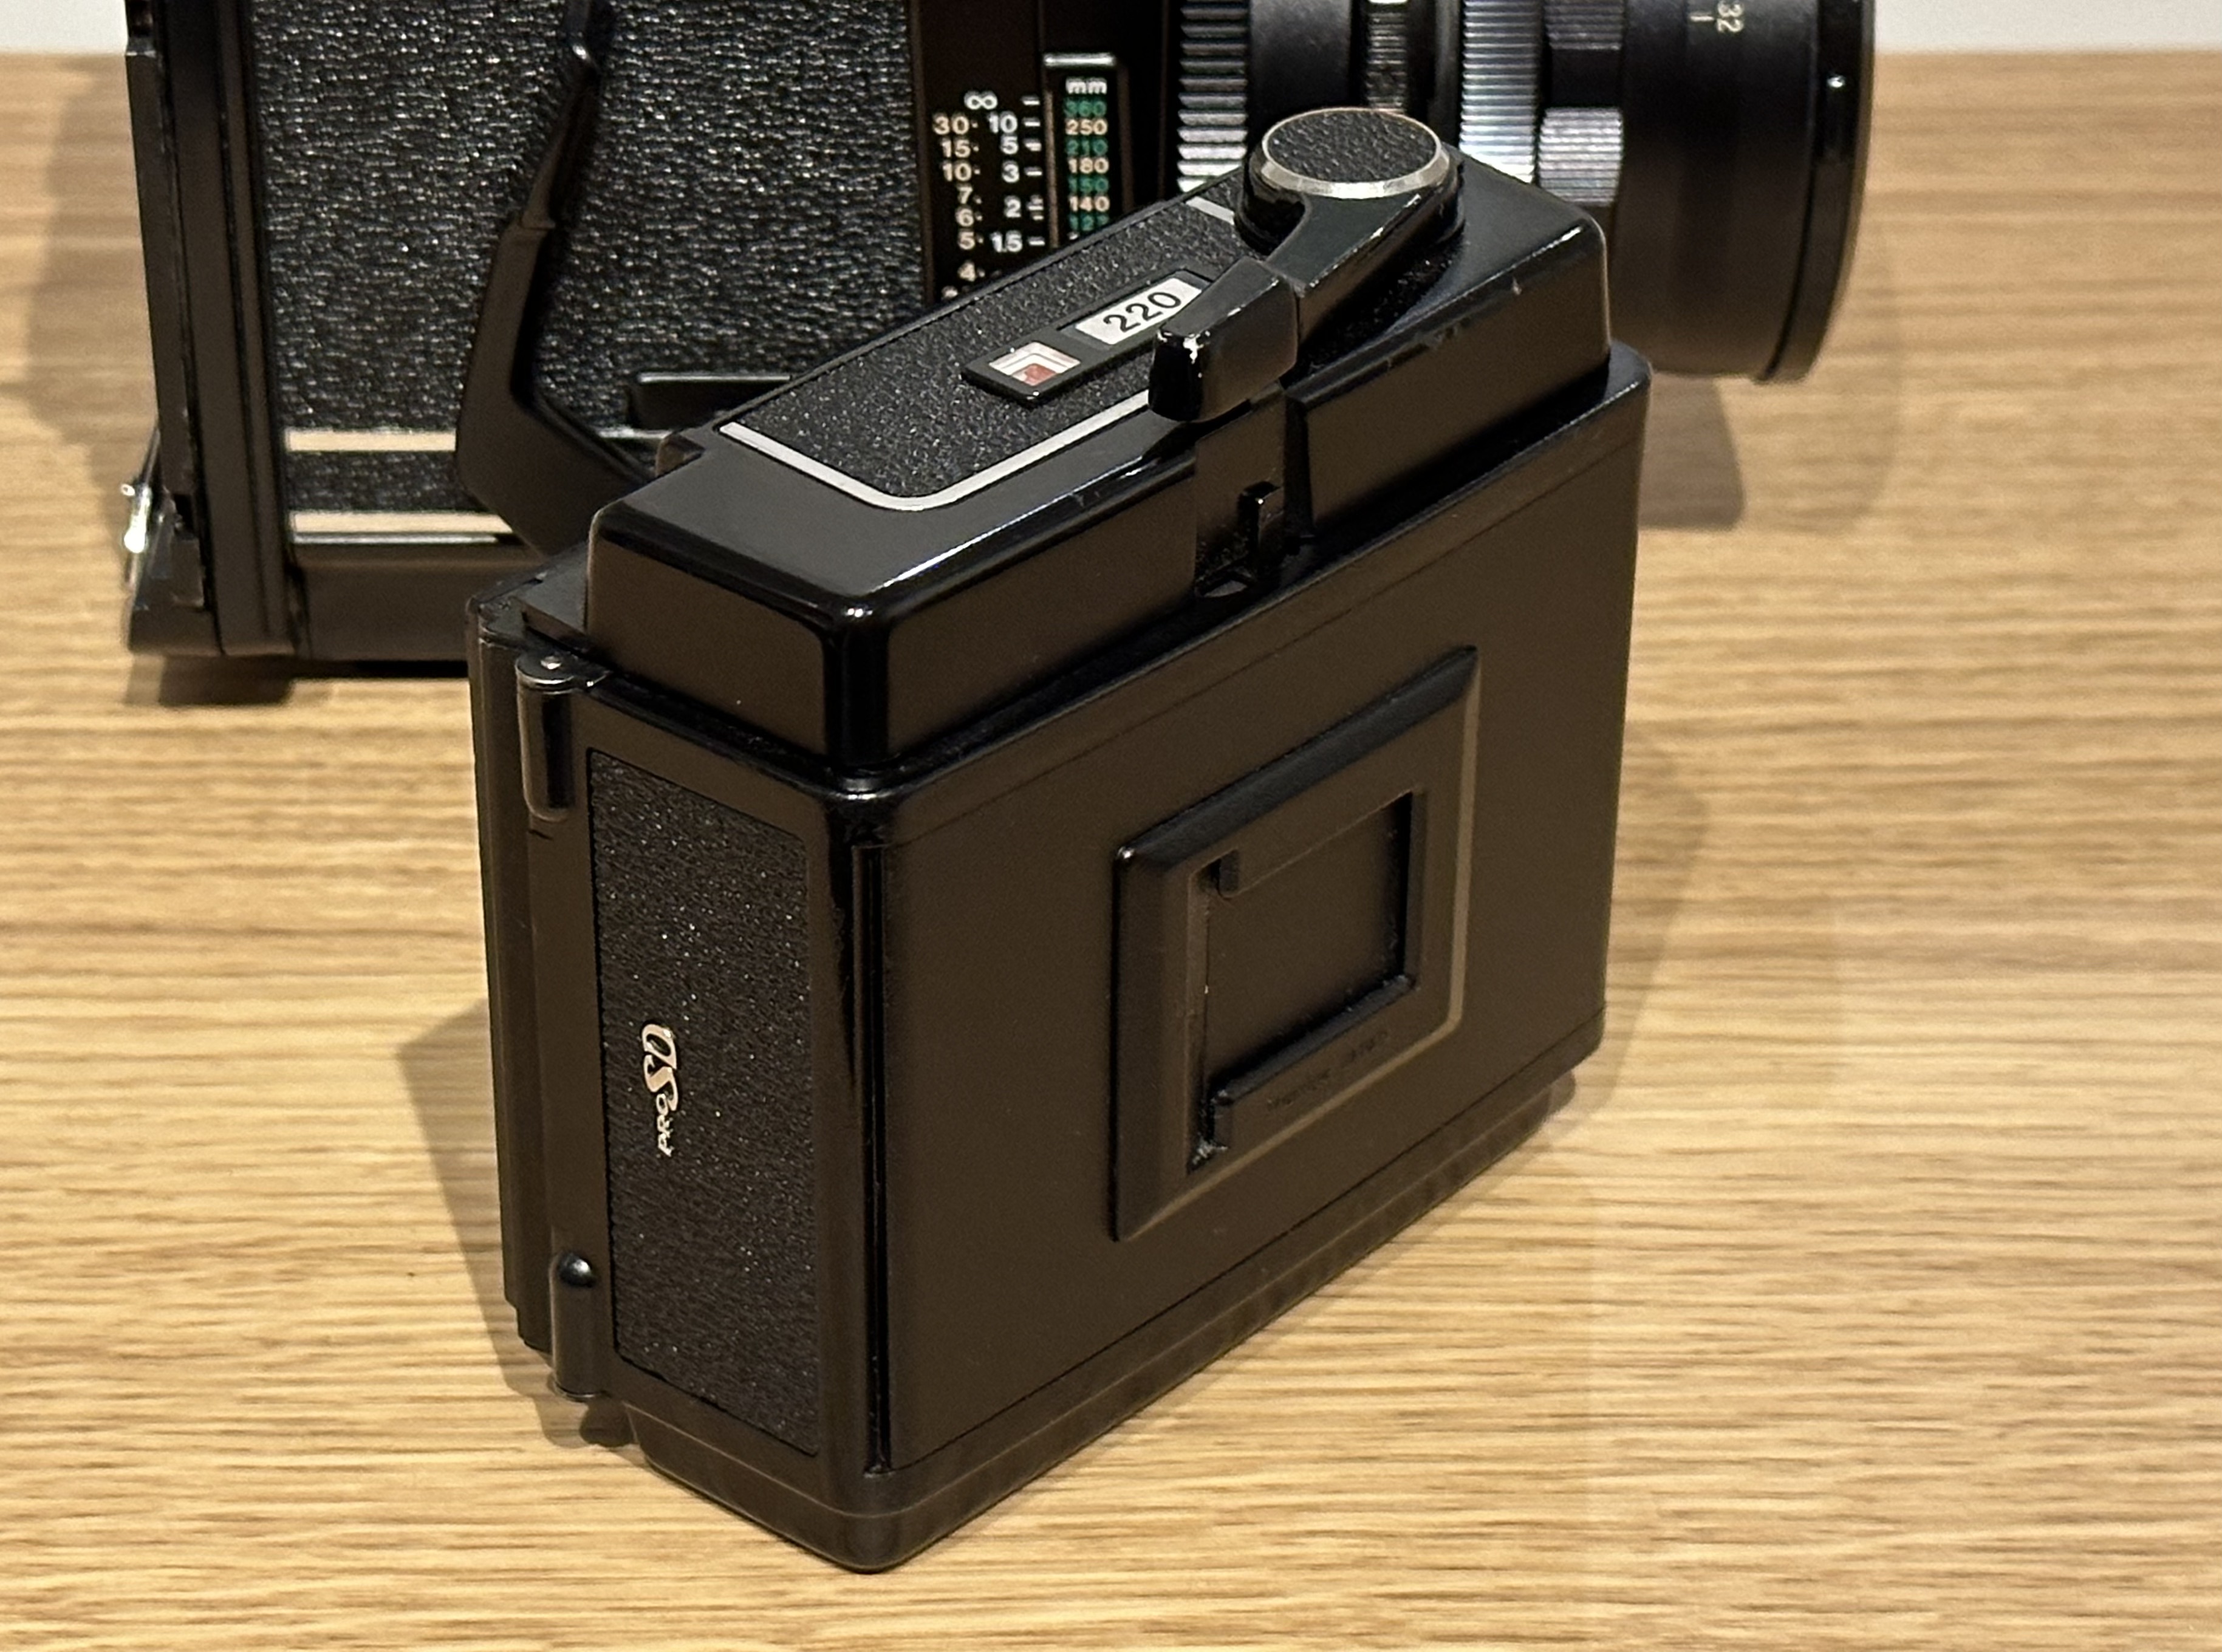
A 220 film back is not strictly necessary, but because 220 film doesn't have a paper backing (unlike 120 film), the back will hold our un-backed 135 film much flatter. The other advantage of using a 220 back is that the frame counter goes up high enough—we will get at least 18 shots out of our roll, maybe more, and 220 film offered 20 shots of 6x7 per roll. You can use a 120 back, but to get more than 10 shots requires turning the double-exposure interlock off, and losing that extra bit of protection against unwanted double exposures. You also lose the frame counter.
Step 1: Gather materials
For this project, in addition to your RB67 and the 220 film back, you'll need the following materials
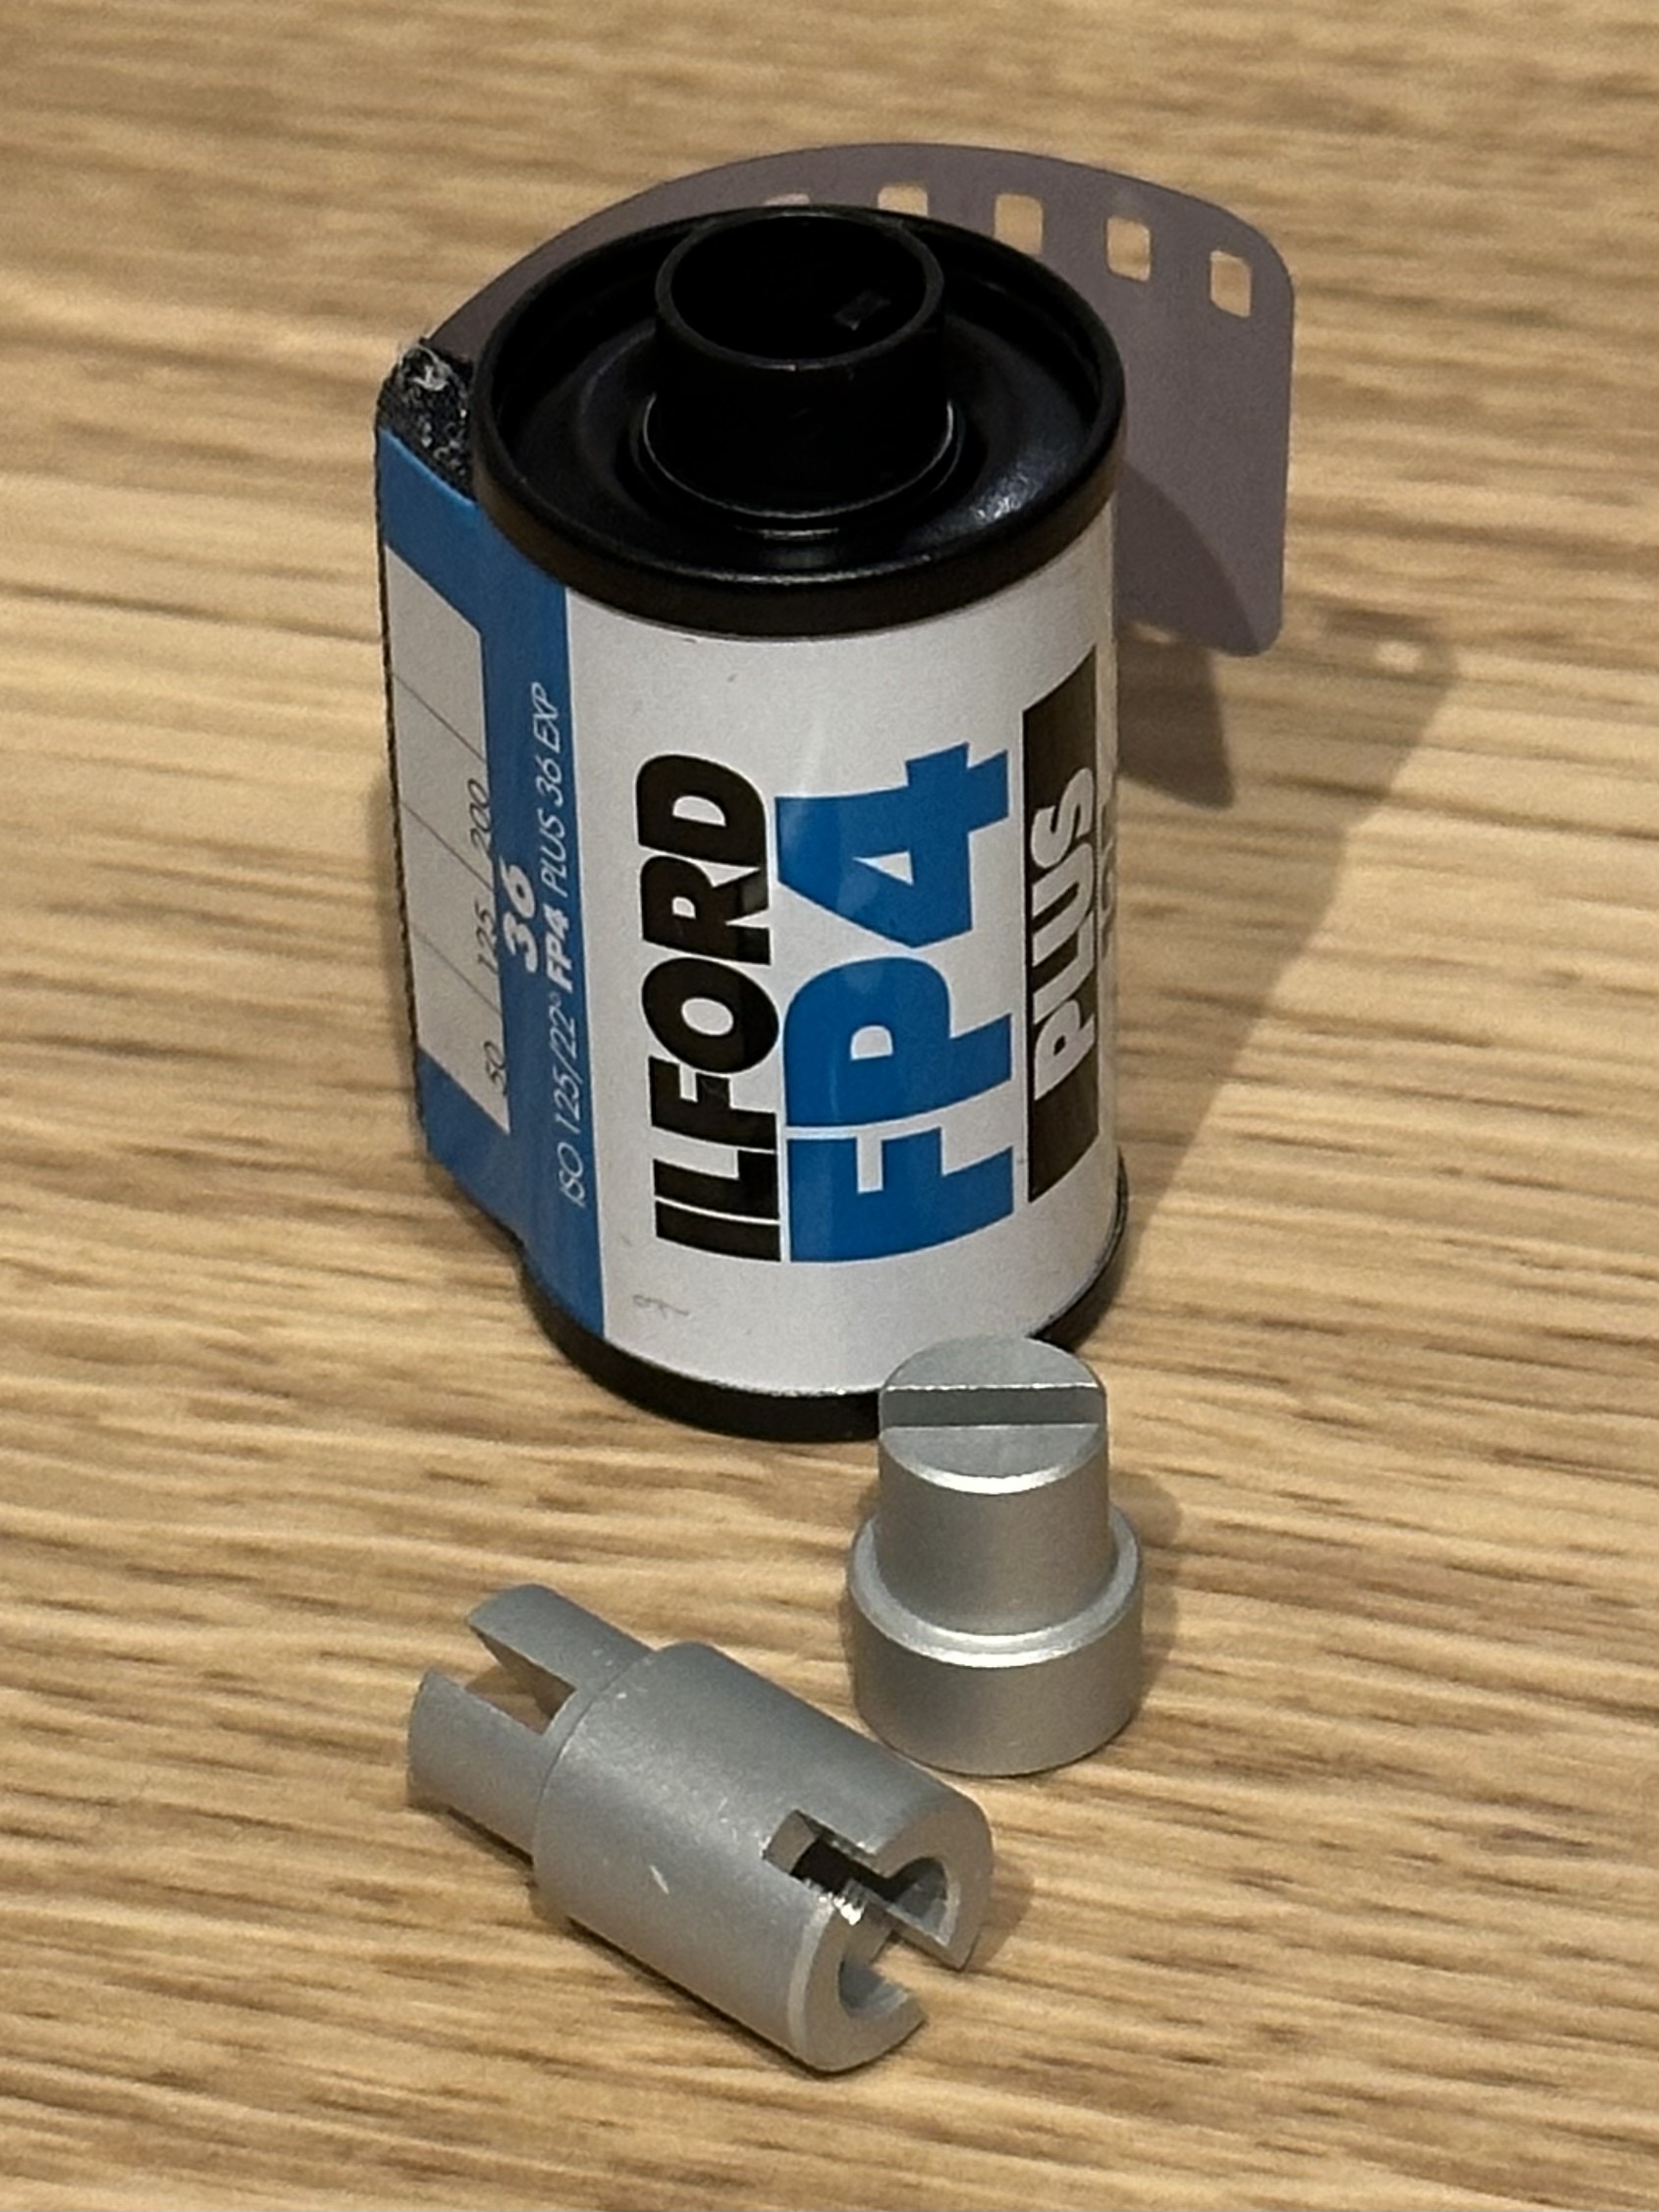
- 135 adapters
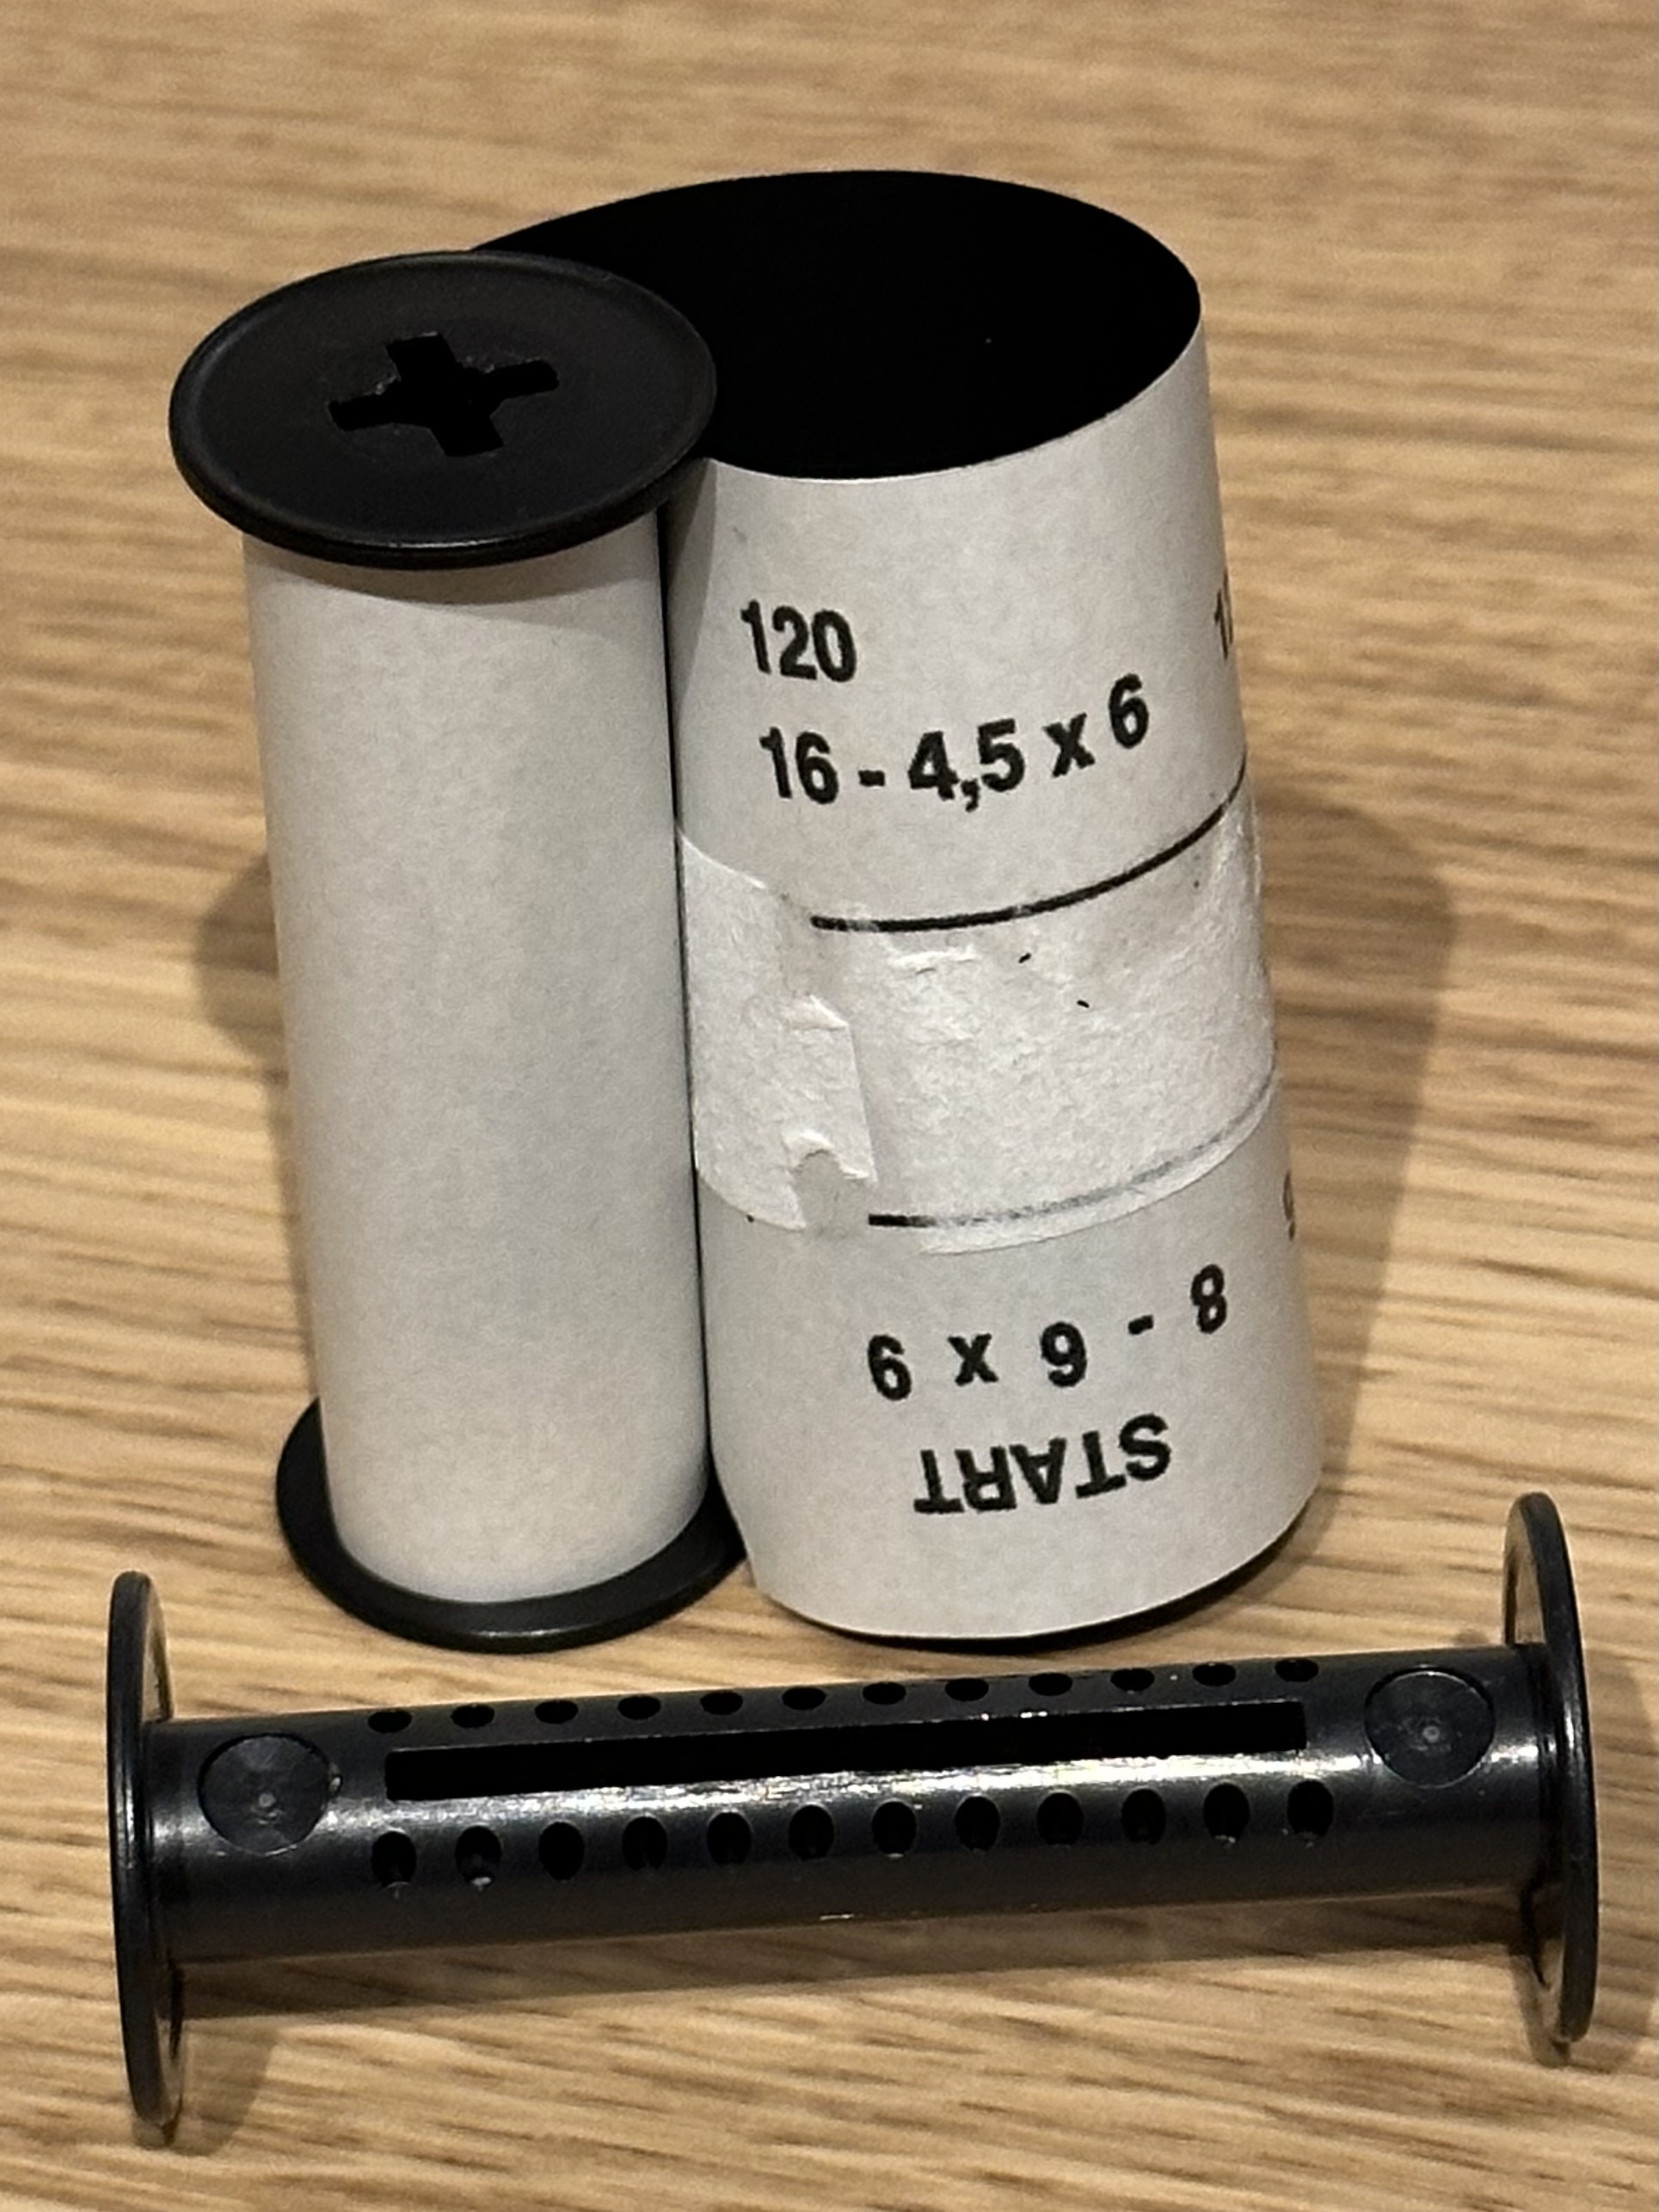
- Backing paper from a developed roll of 120 film
- Ruler and straight-edge, metric
- Sharpie or similar
- Scissor, tape
- Light-tight bag, or a darkroom
- A basic understanding of how you would normally load an RB67.
The advantages of using a Pro SD back instead of a Pro or Pro S back are slight—you get a light-tight seal without foam that degrades and needs replacement, so the cost of ownership is lower. And you get an improved set of mechanical interlocks. The disadvantage is that we need to modify the 220 back—albeit with only a small piece of tape. It's easy-peasy.
Step 2: Modify the Pro SD back (if using)
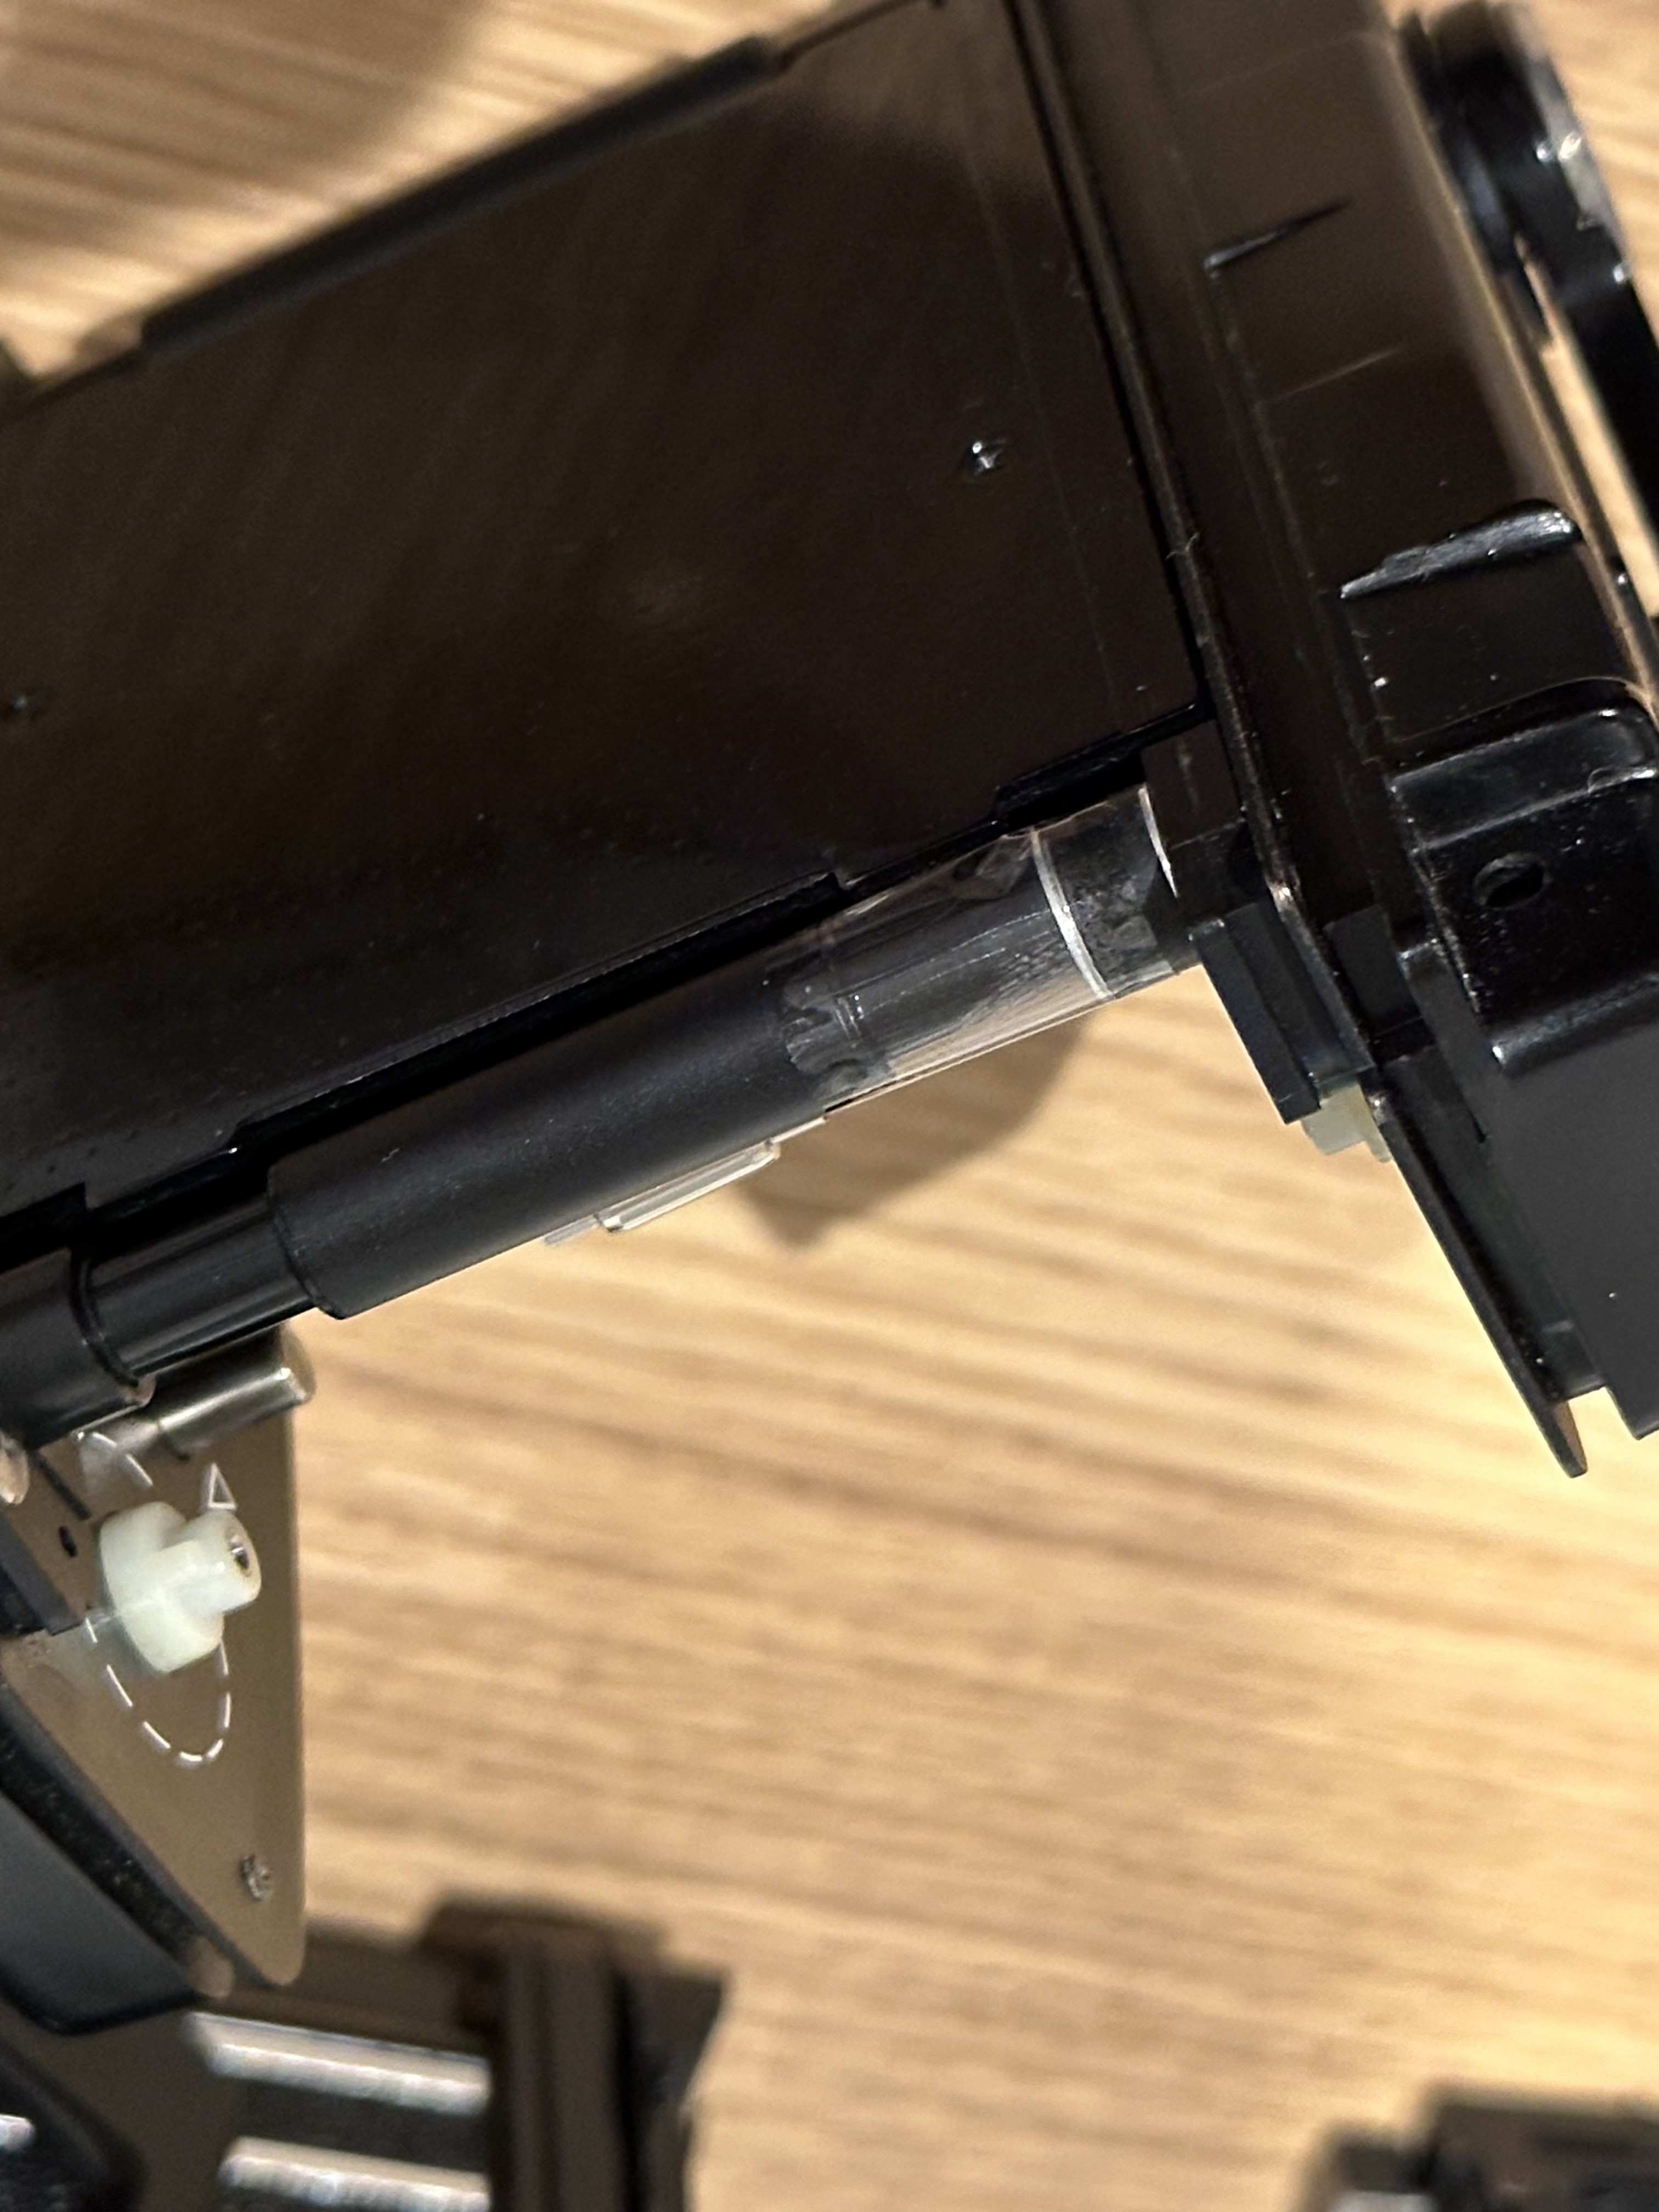
You got yourself a Pro SD back? Awesomesauce. Here's the problem. There is a roller that supports the film as it comes off the spool. On older backs, this roller also advanced the frame counter. The Pro SD back uses a separate roller to advance the frame counter. Medium format film is tall enough to roll on both rollers, but 135 film isn't.
So we need to tape the two rollers together so they roll as one. You got this.
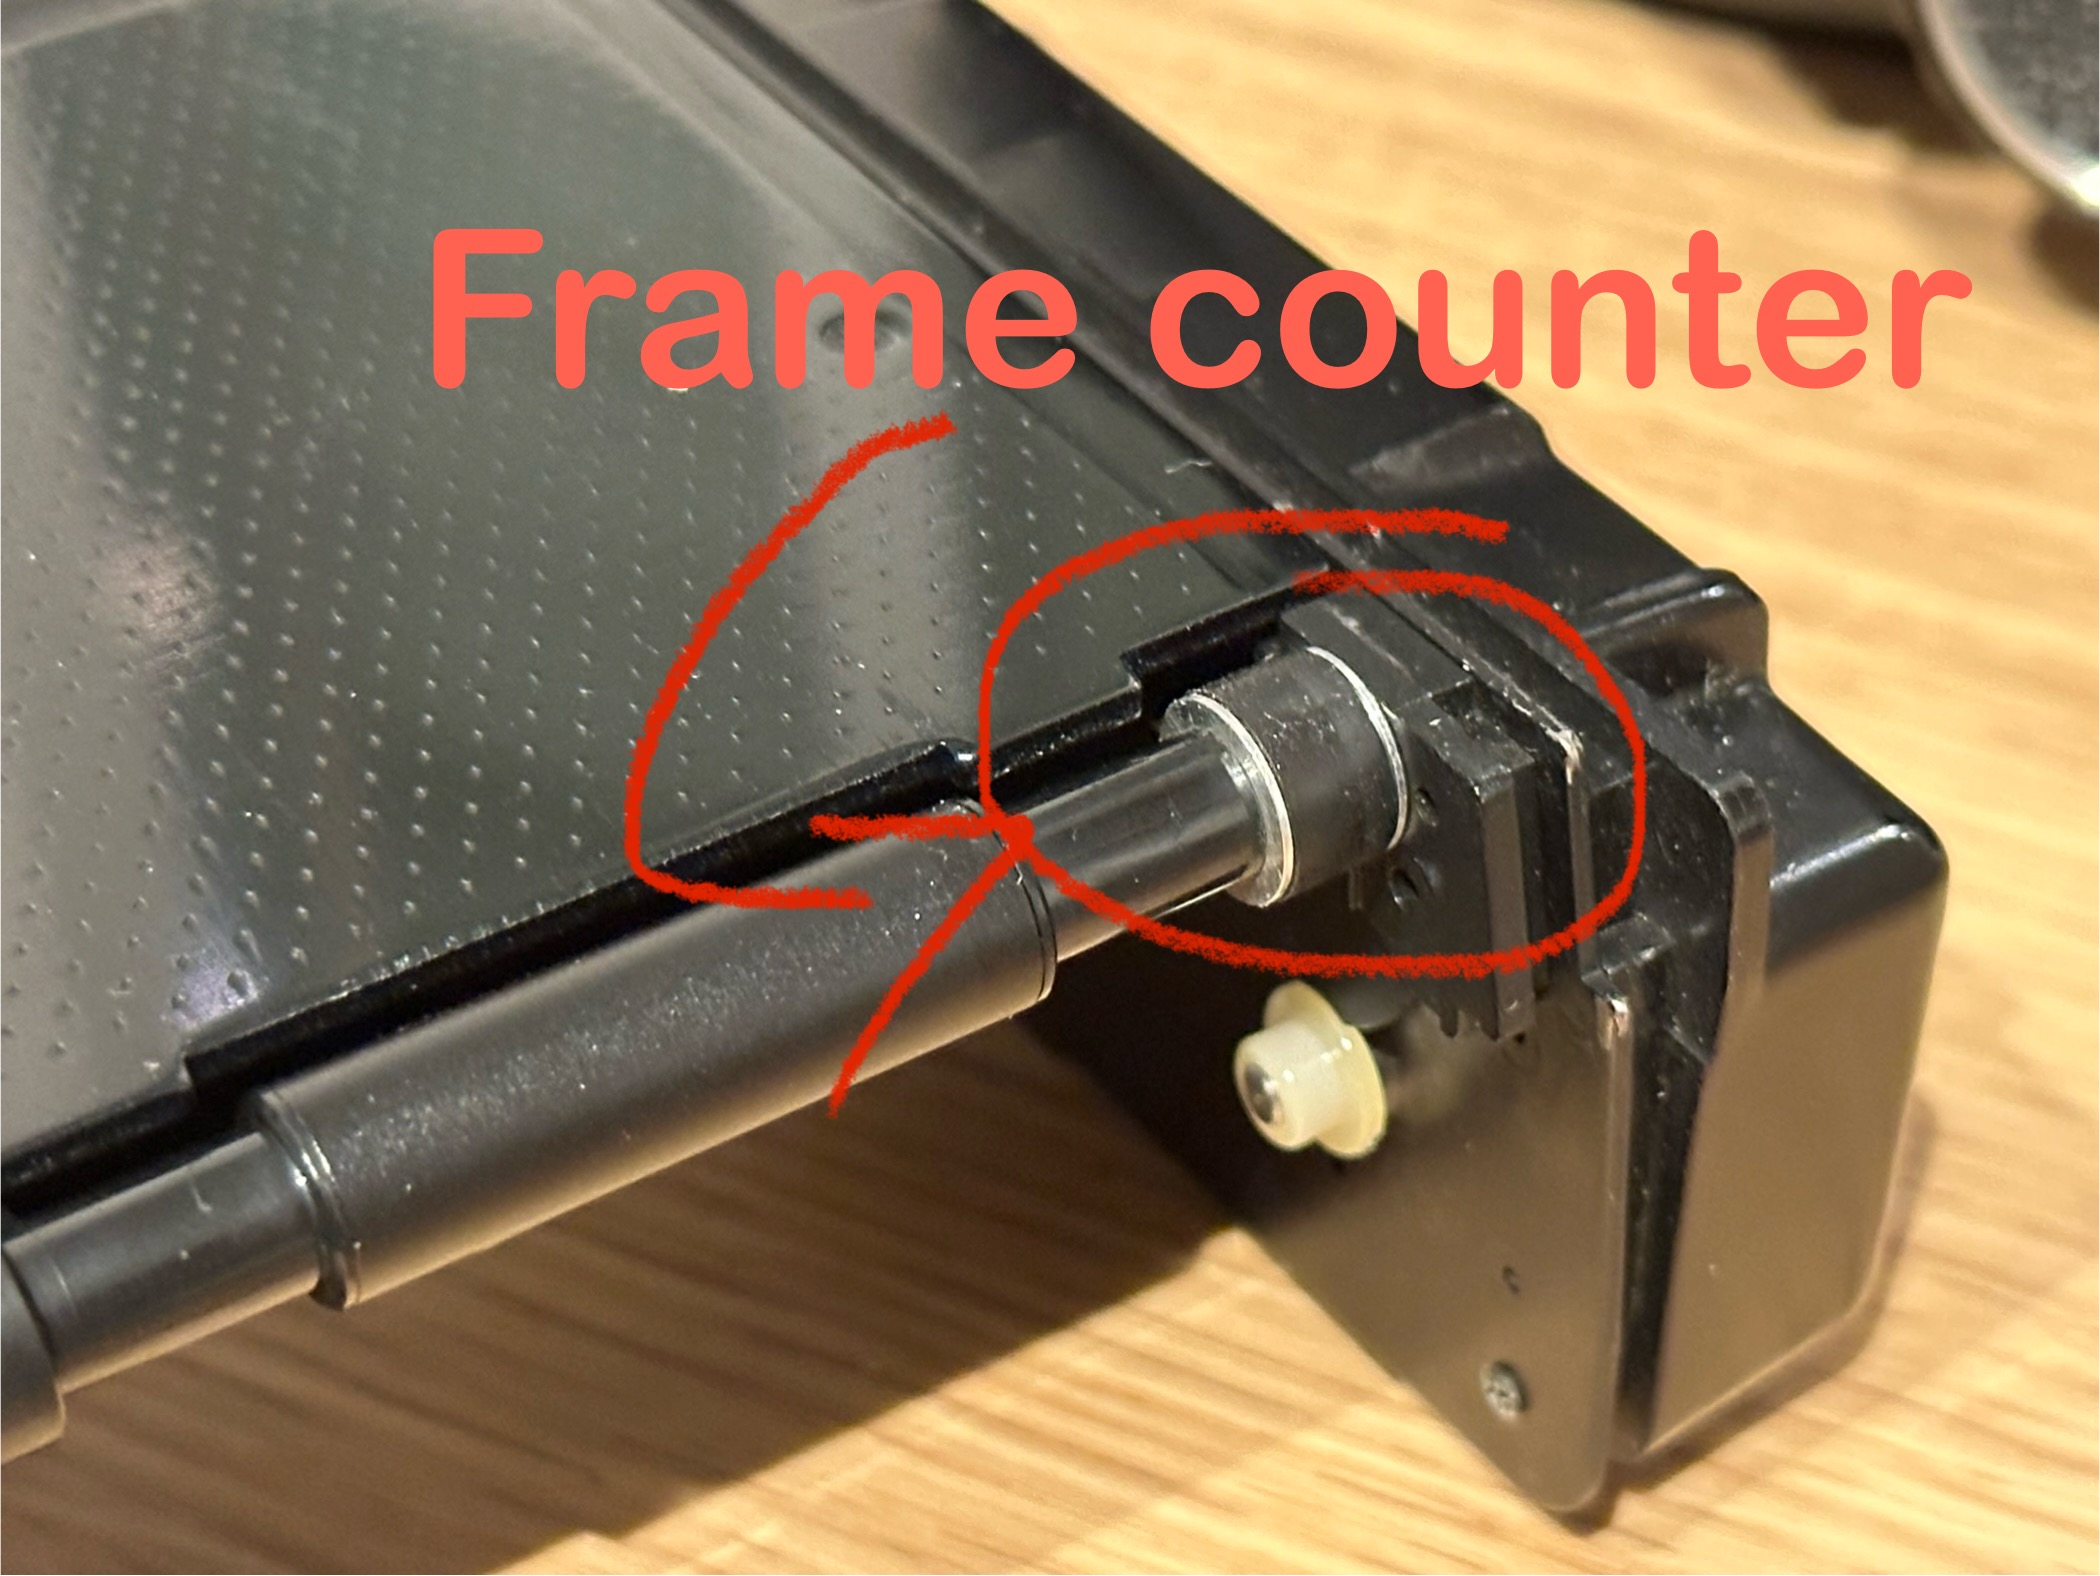
Just place a piece of tape so that it bridges the two rollers…
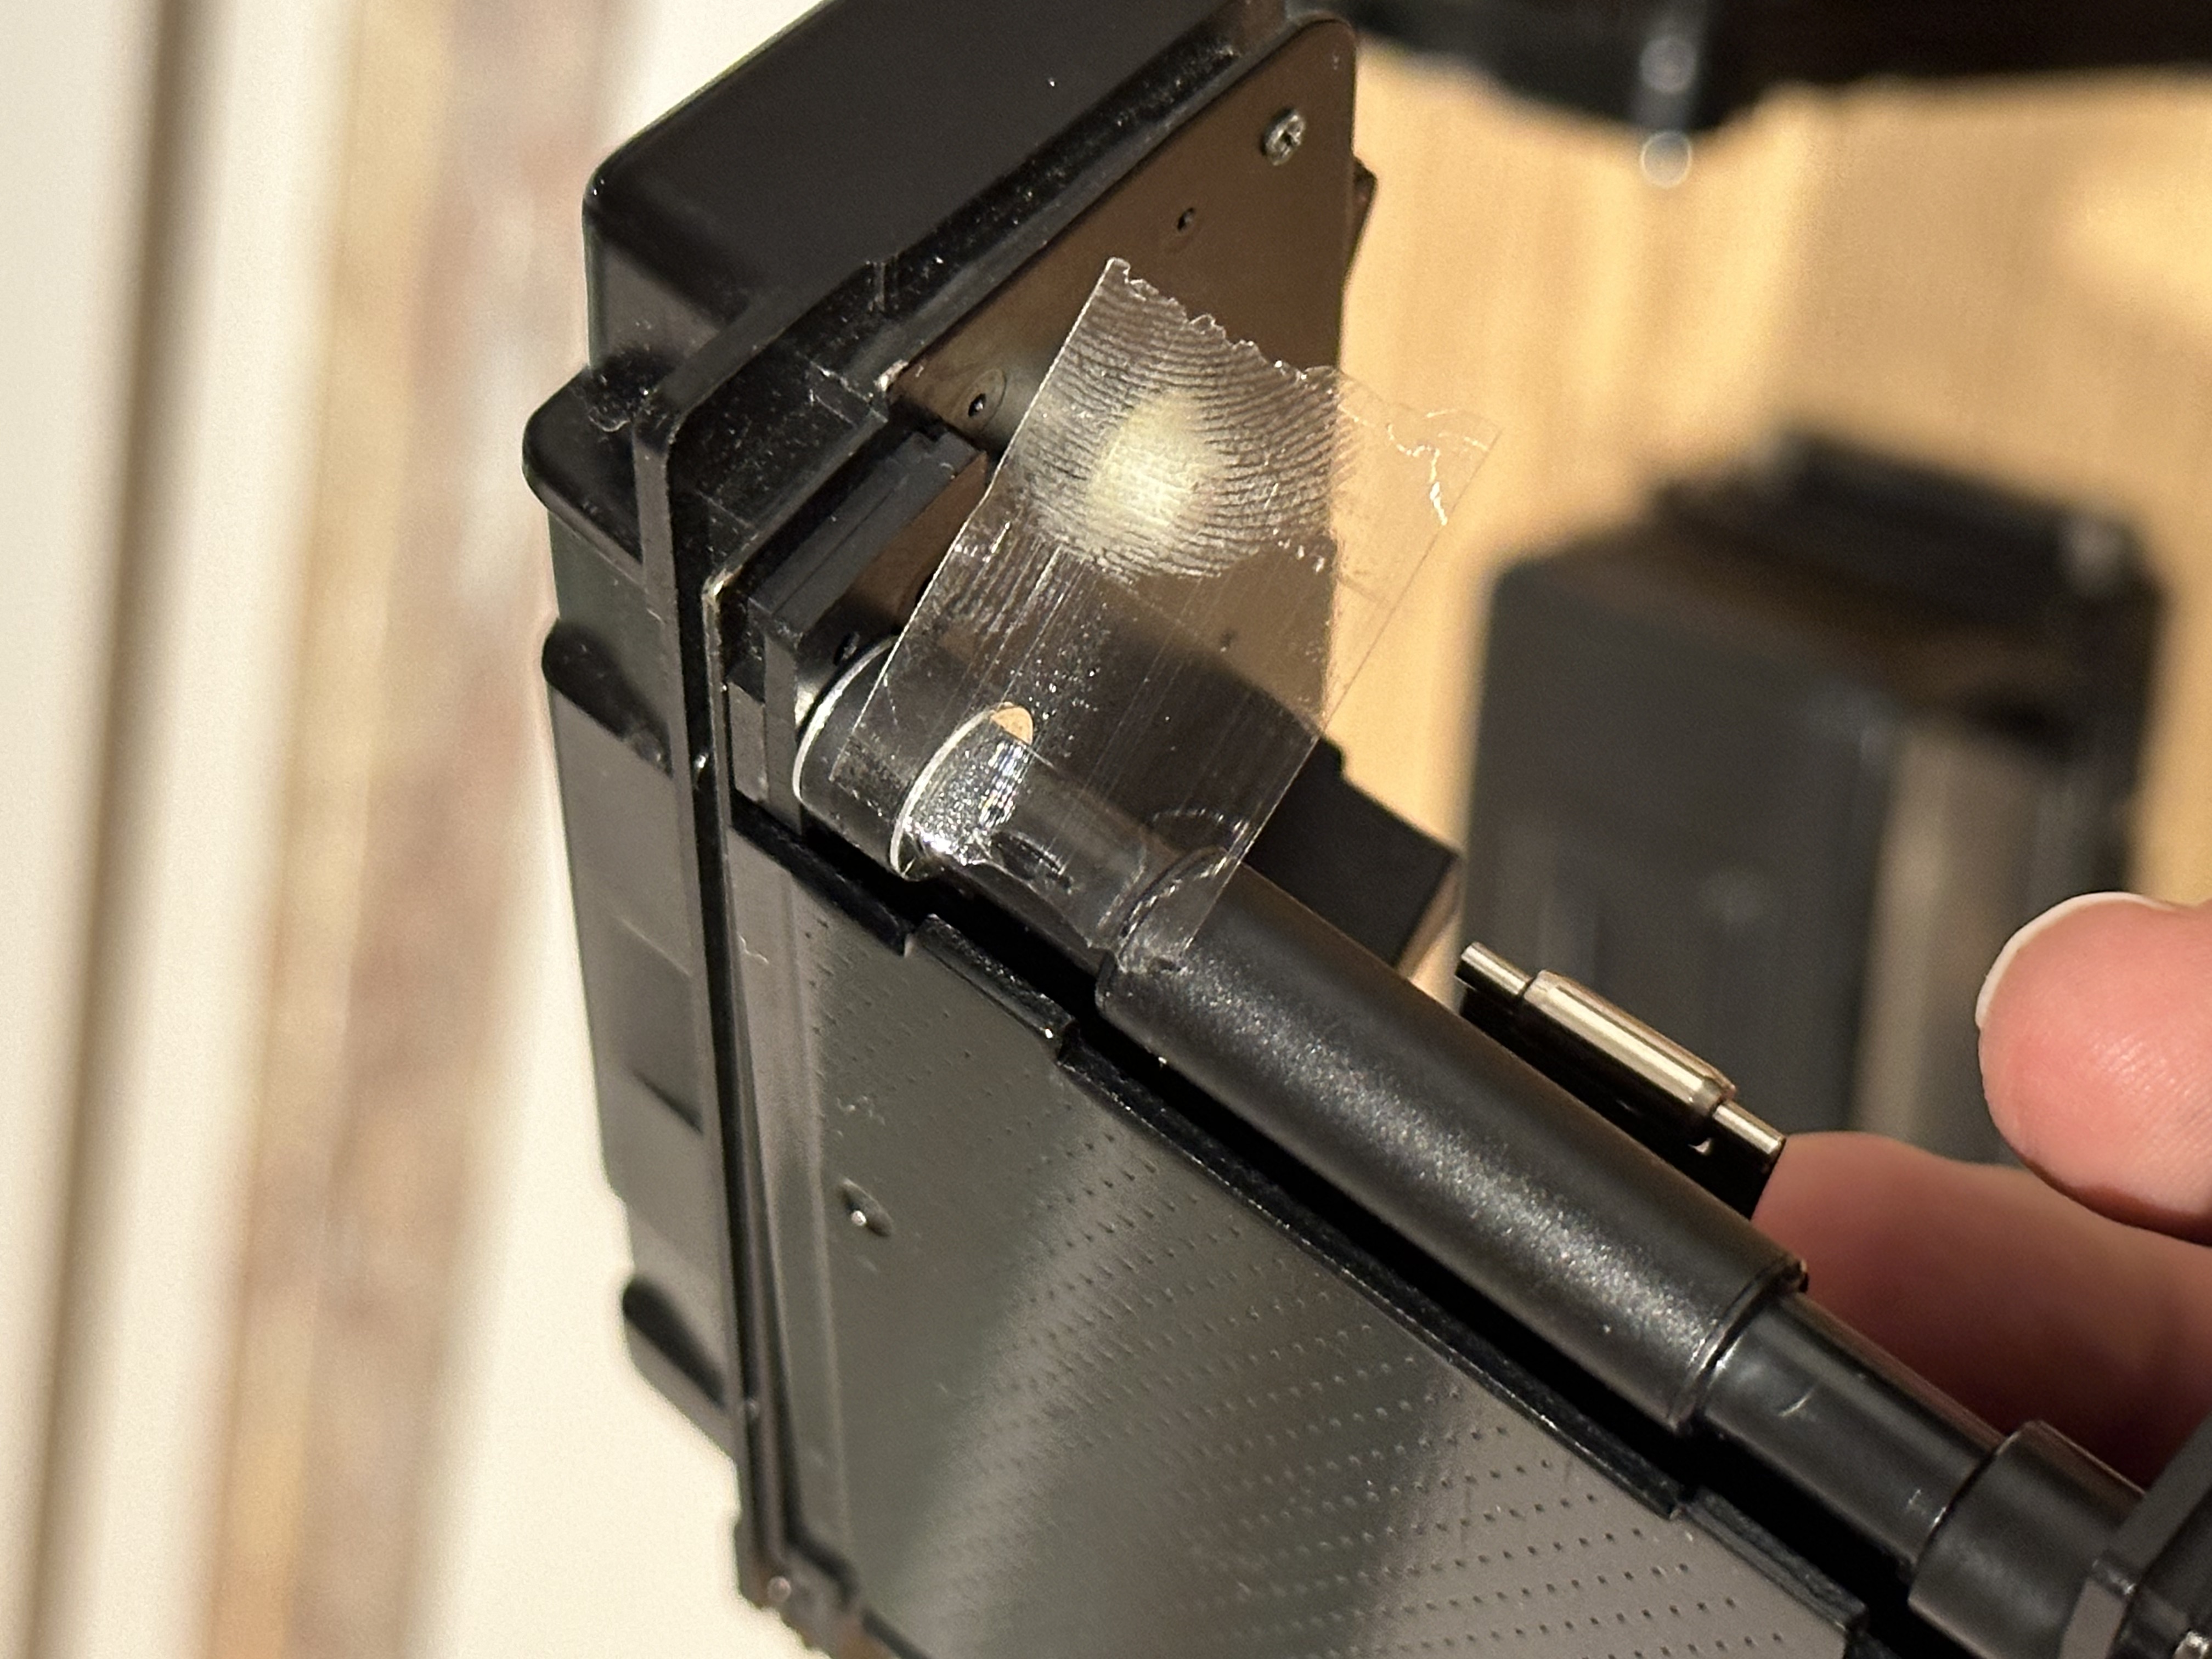
And gently roll the tape onto the rollers.
Obviously, this is reversible should you ever need to, but honestly I can't imagine this interfering with your use of 220 film in the future.
Step 3: Prepare the paper leader.
You can wind the film on to another 135 cassette, as many online tutorials advise. But even with reloadable cassettes I found this fiddly. The leader has to be fixed to the spindle of the take-up cassette with tape, and the opening has to deal with the double-thick film+backing paper + tape interface which frequently caused me problems. Finally, the narrow opening of the cassette was less tolerant of film that might be at a slight angle, leading to binding. Your mileage may vary. But I found that using a 120 spool with the leader cut as above is less fiddly because it loads almost just like 120 film, and the results remain really good.
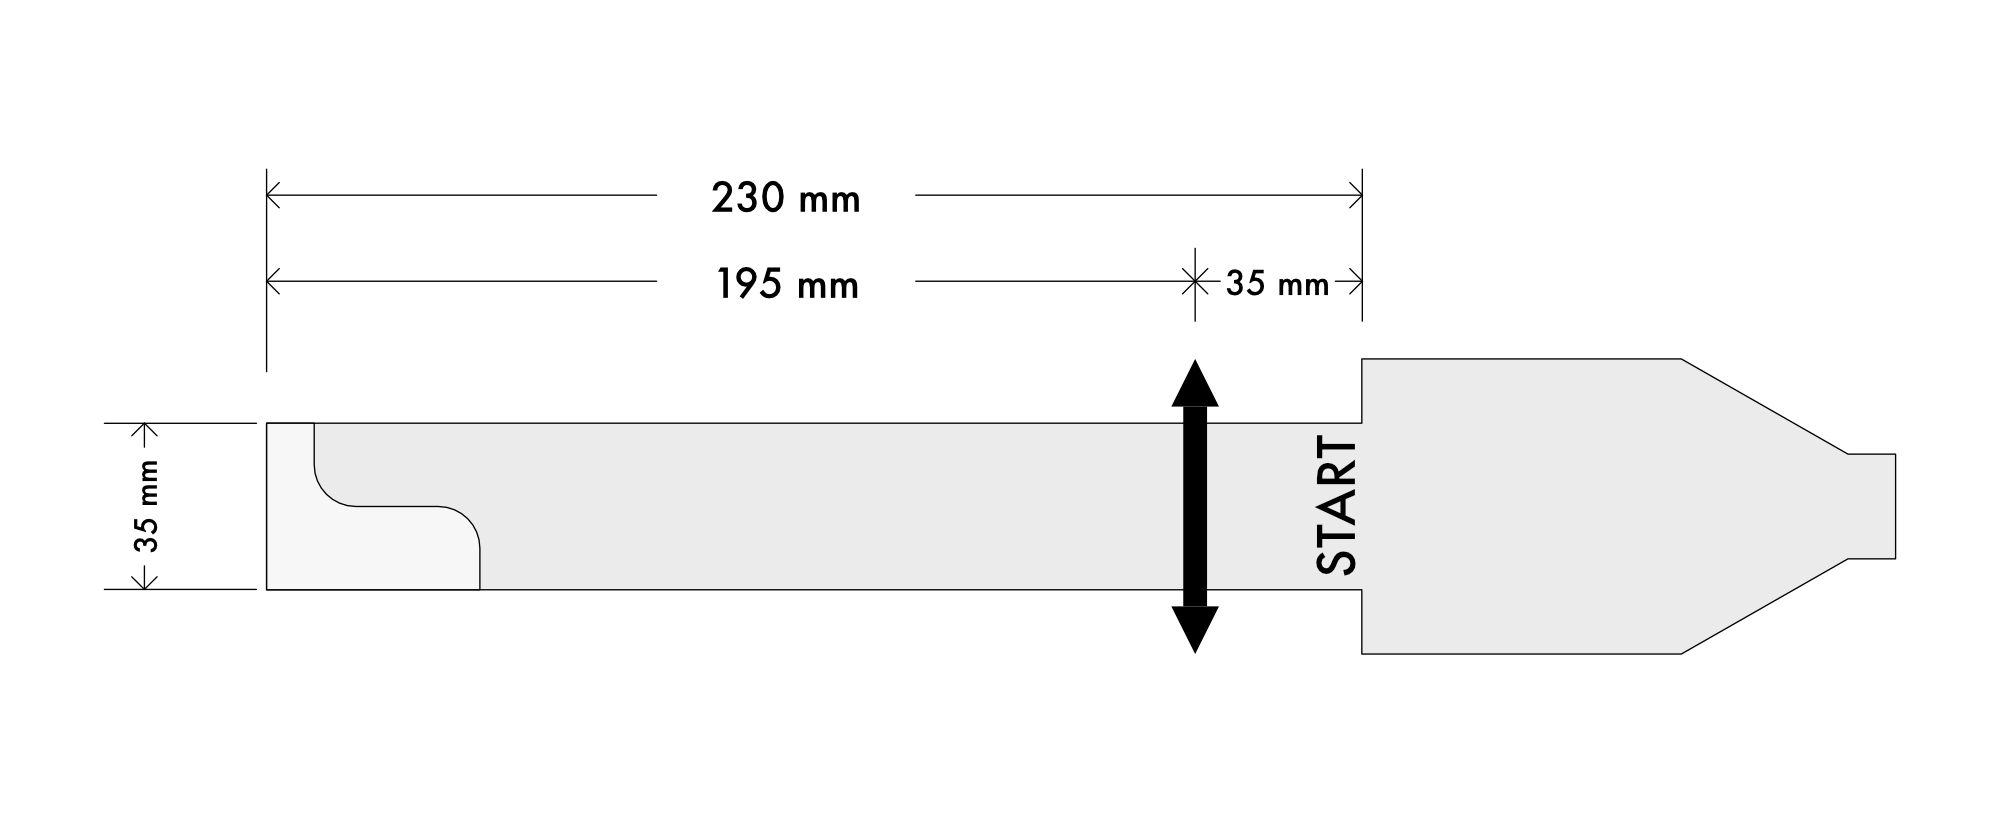
So, instead, let's prepare a paper leader using our used 120 film backing paper, so we can wind-on to a standard 120 spool without all that fuss..
Take your backing paper, and working from the beginning, cut it to the following dimensions. You won't be able to print this out, the template is far too long for 14 paper. But with a good ruler and straight edge, it's not very complicated to cut out without a template.
Step 4: Attach the paper leader
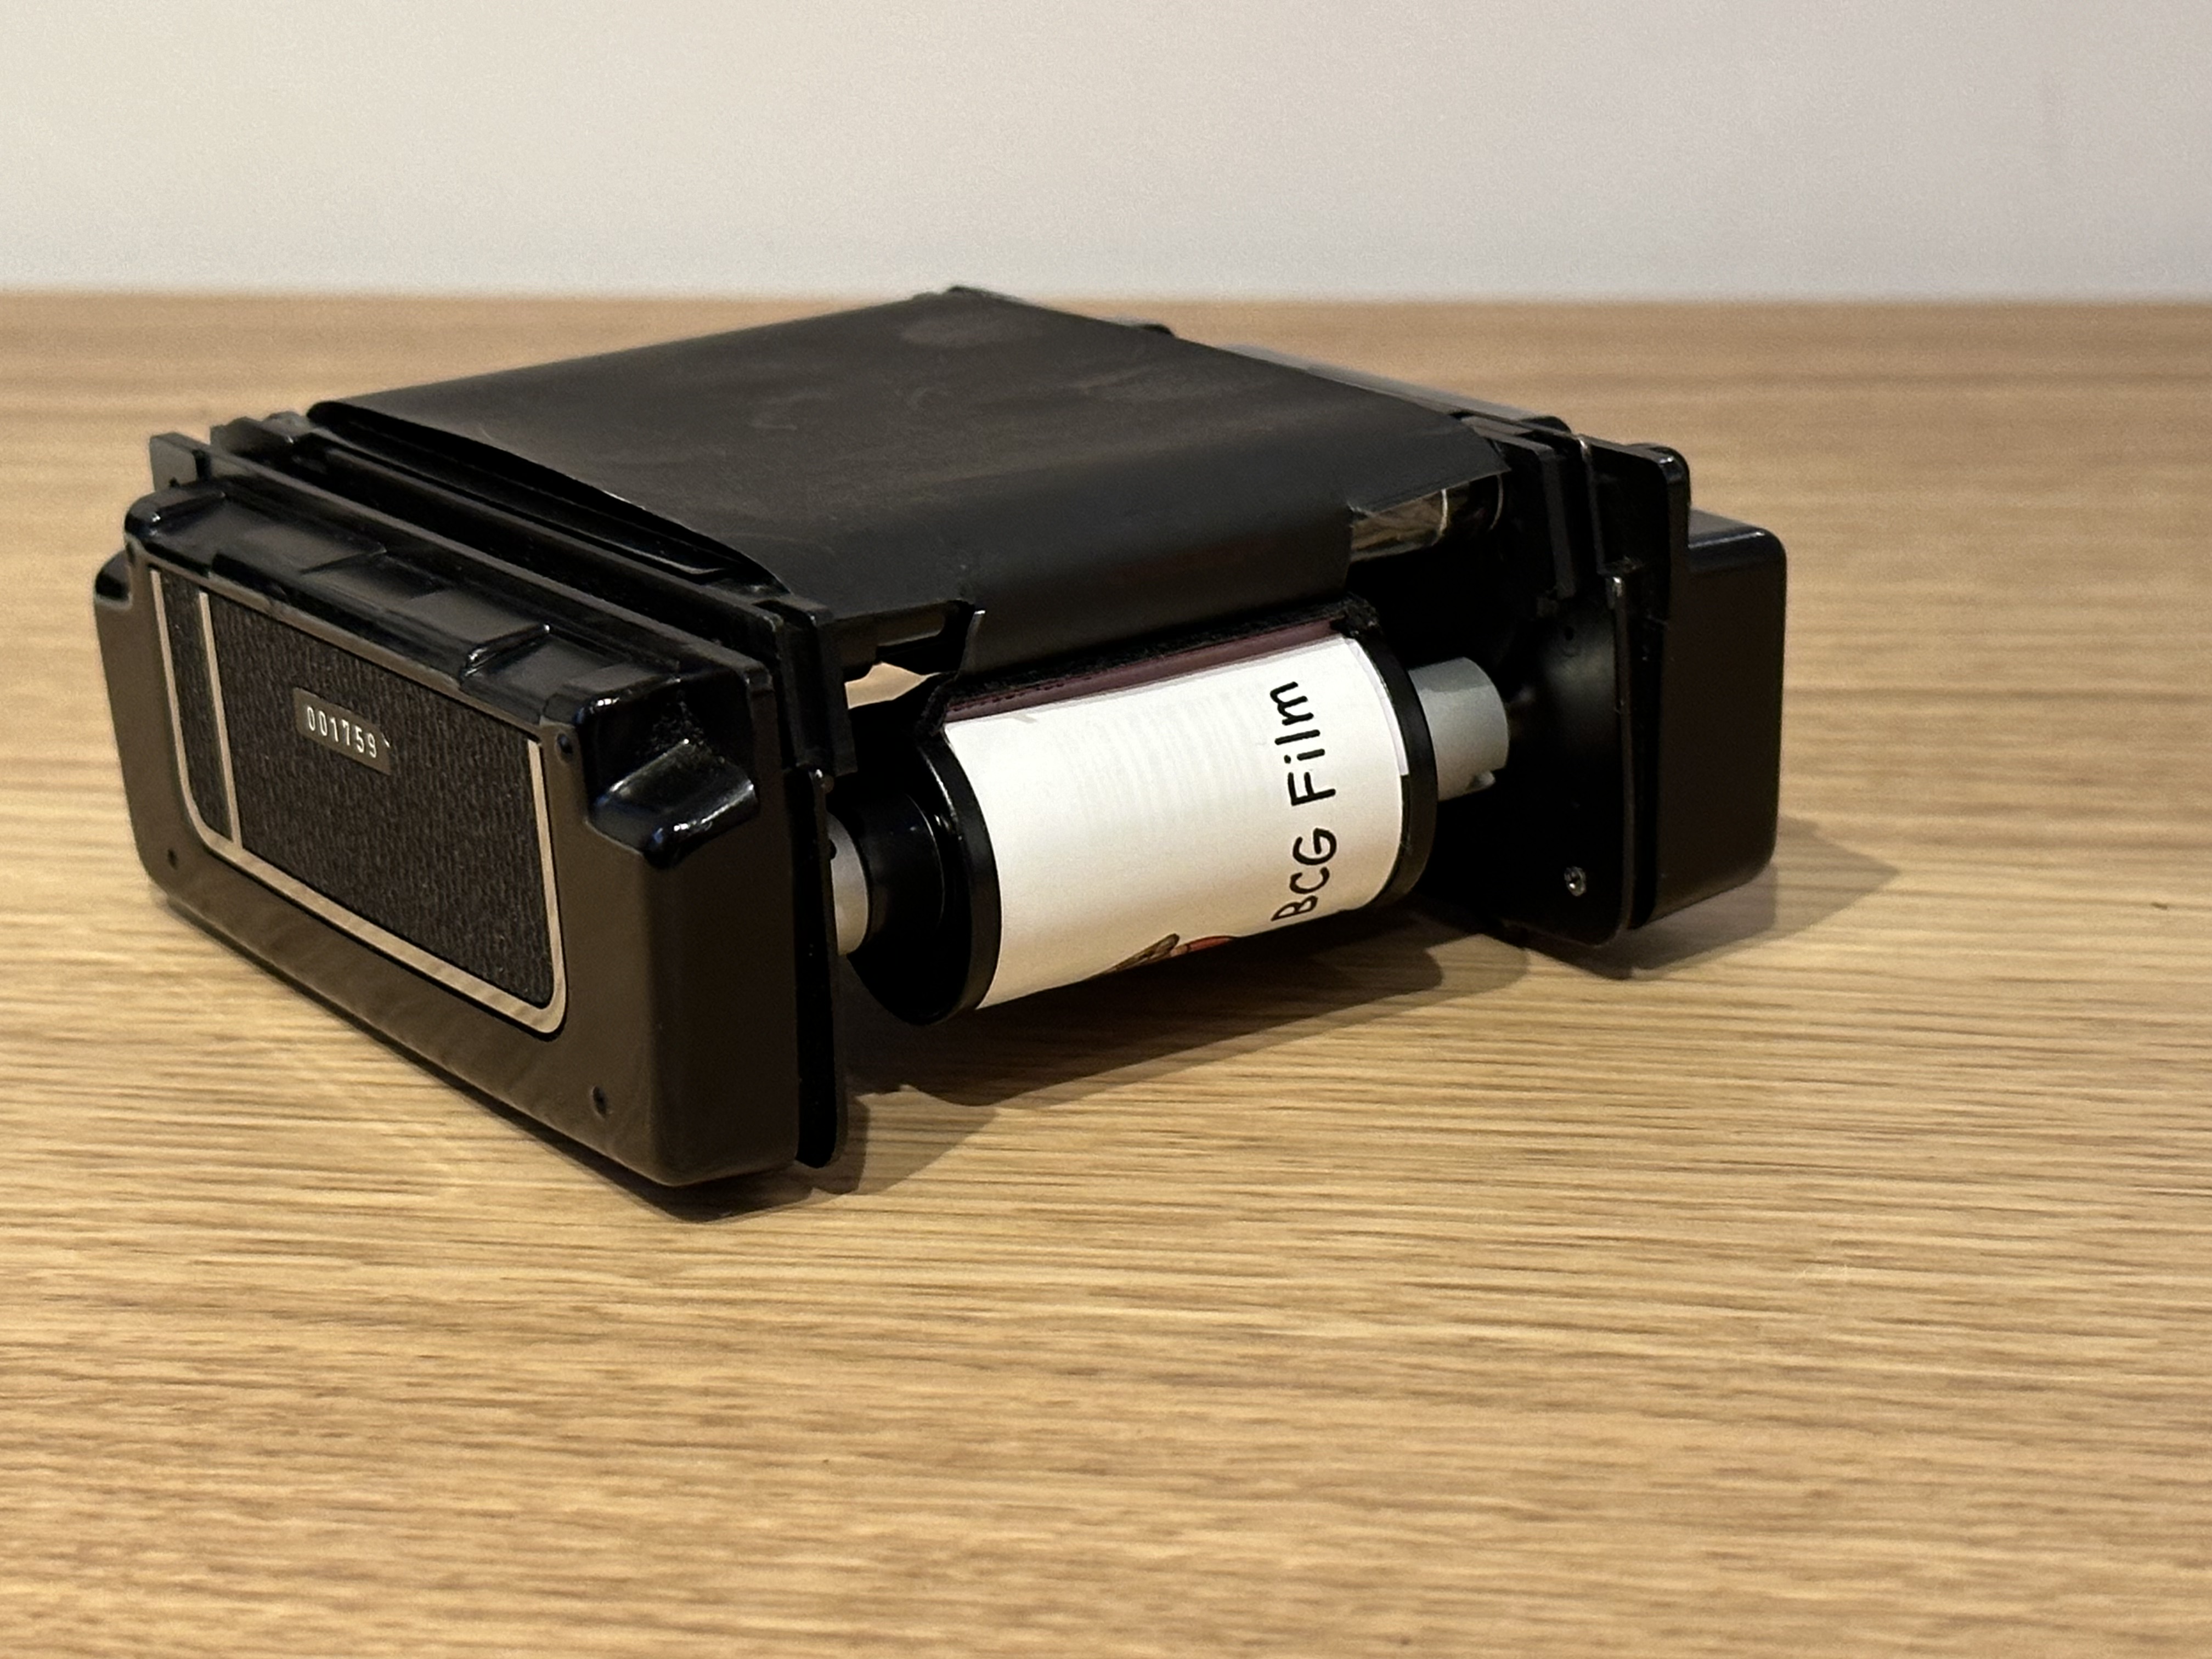
Without removing more leader from the 135 cassette, line up the exposed leader with the narrow end of the paper leader. They need to be perfectly aligned, or nearly so anyway, but you won't have much to work with. Tuck some of the paper leader into the slot in the 135 cassette, behind the film (as per the photo). This will not only help alignment, but with the next step as well.

With the paper leader held in place by the cassette's slot, use two pieces of clear tape to affix the film leader to the paper leader. Tape only on this one side, it's not necessary to tape the back (since it's tucked into the cassette already), and it will make it easier to remove the leader in the dark later. But this tape is going to do a bit of work for us, so make sure that it is secure enough to wind on the film!

Once the film leader and the paper leader are attached, roll the combined leader into the cassette as far as it will go, right up to the point where you cut the paper leader down.
Step 5: Load the film
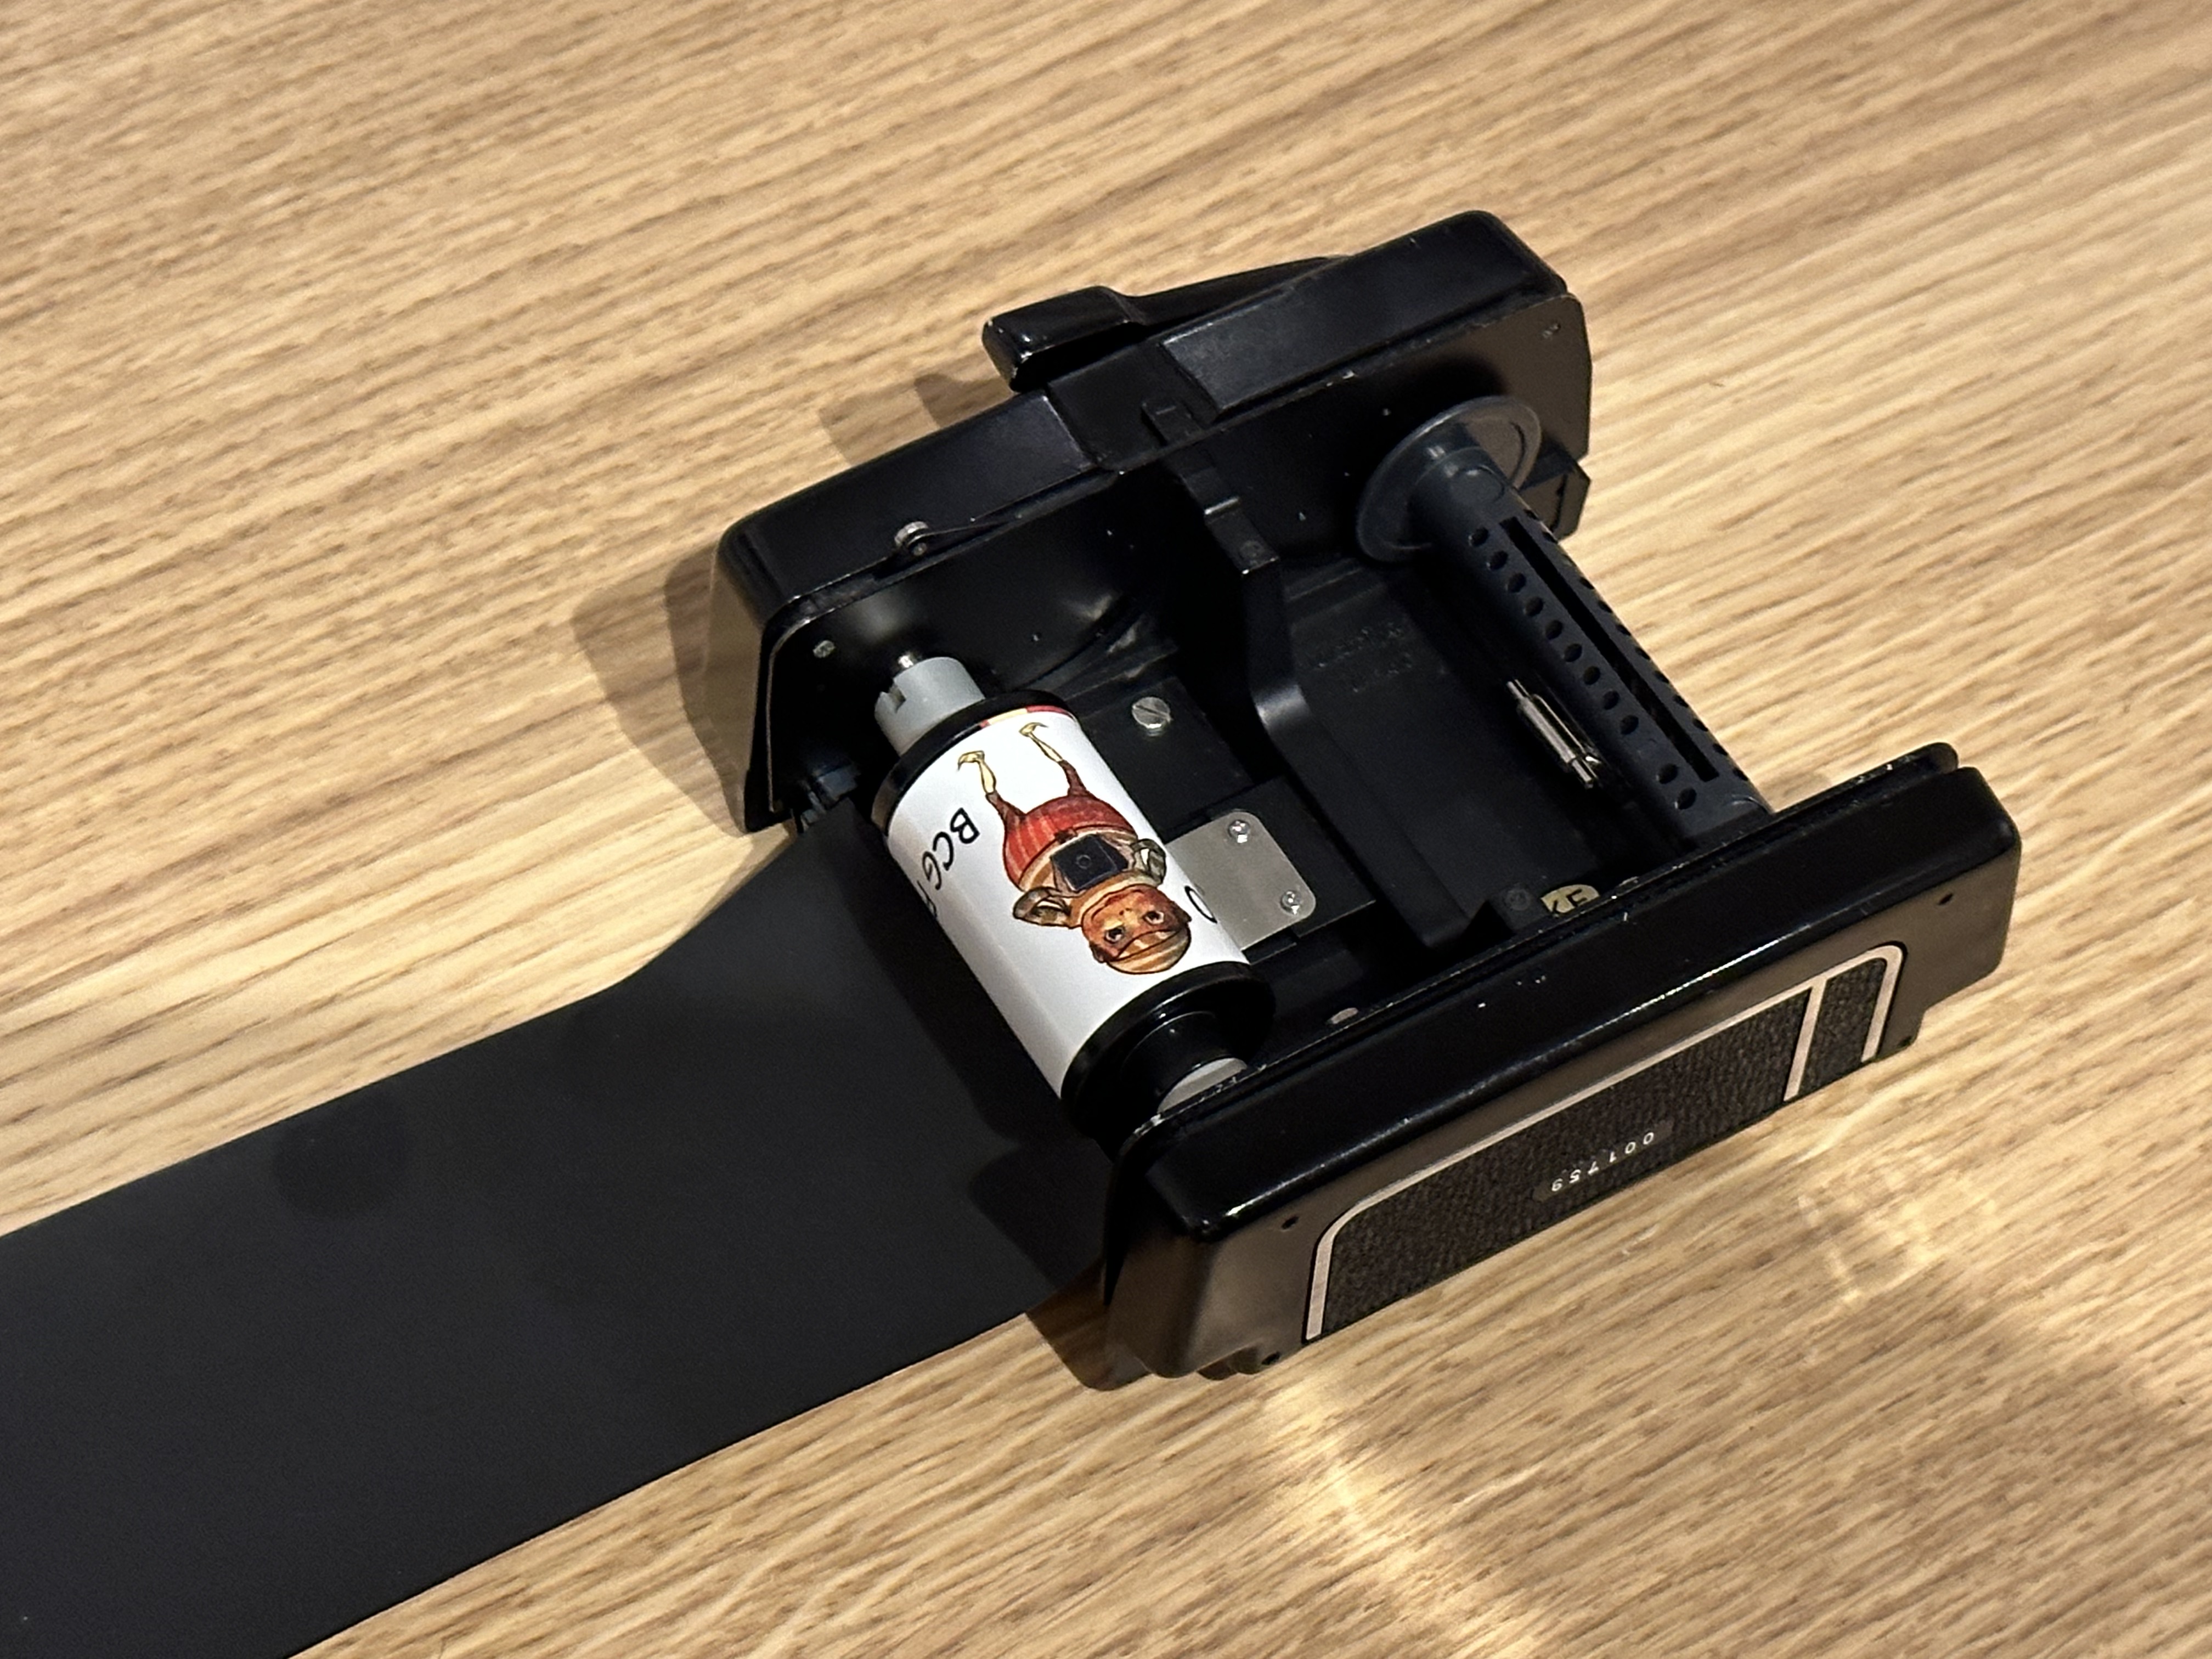
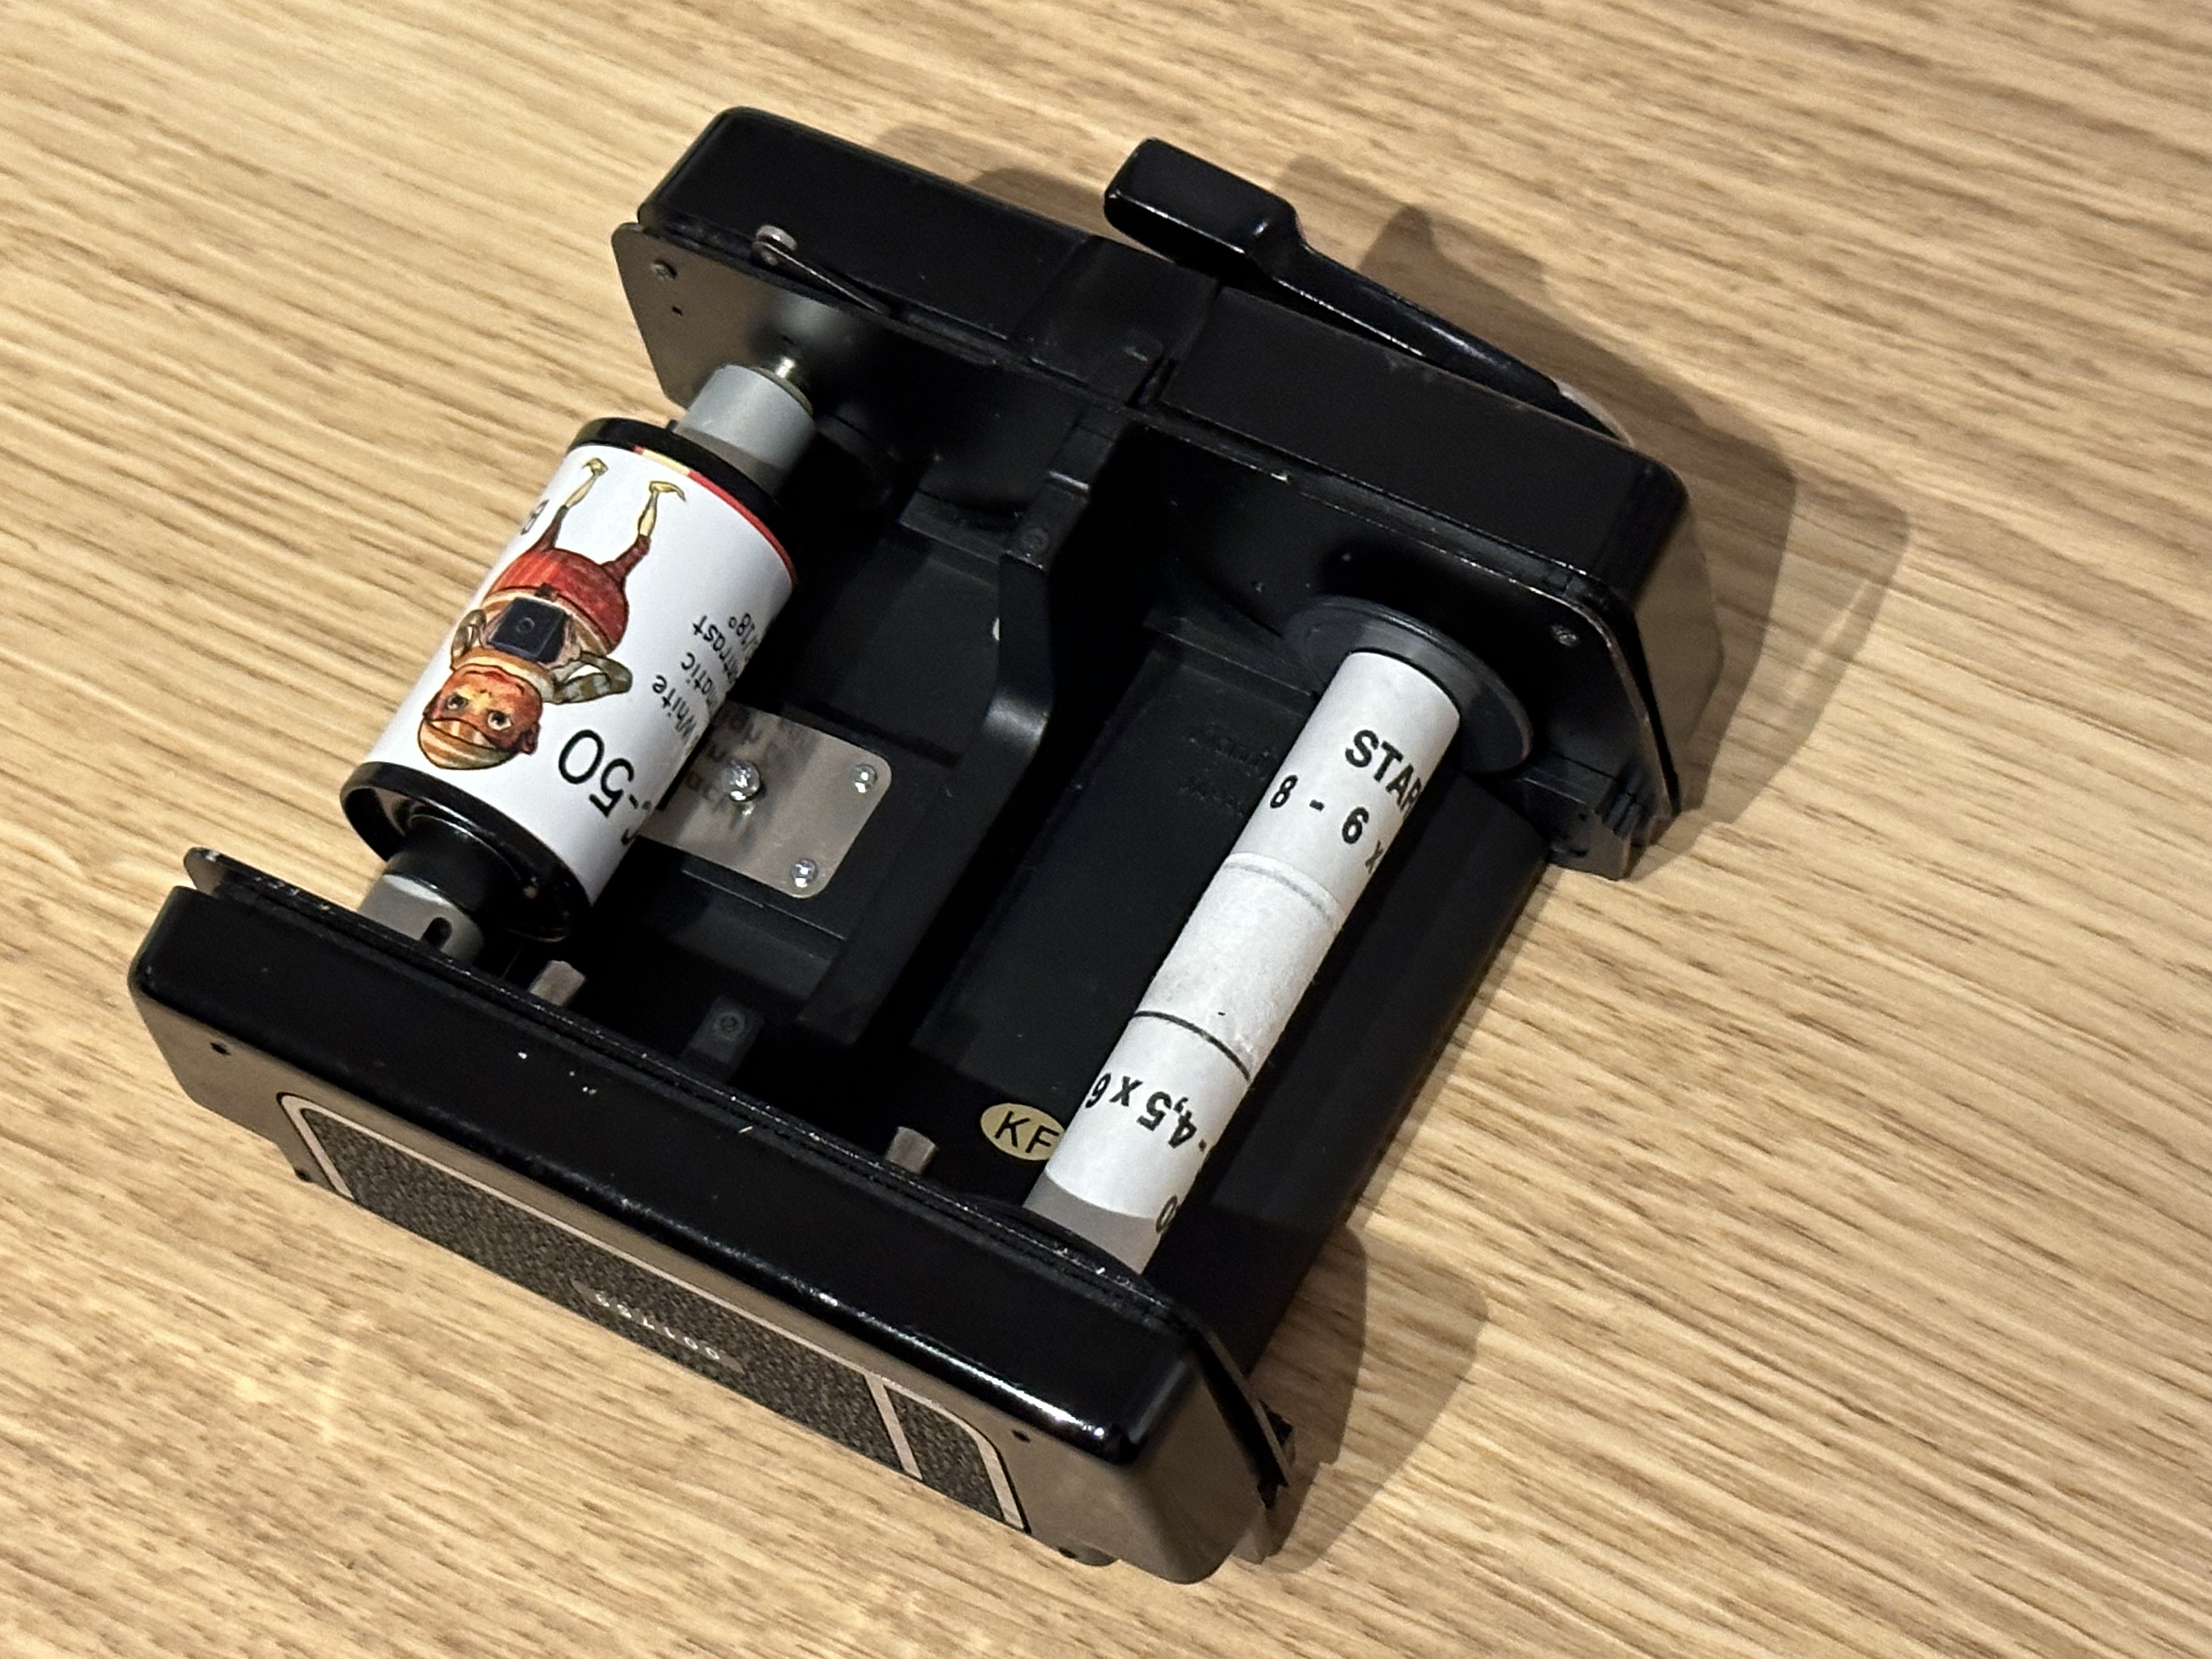
Anyway, the process is this. Place the adapters on the 135 cassette, with the taller one on the bottom of the cassette. Then, and this is the one tricky part, load that assembly as you would a spool of 120 film. It's tricky because the adapters don't stick, they like to fall off, so you have to hold everything together.
Crucially, because you want the emulsion side out, you have to put the cassette in backwards to what you are used to, with the slot around the back, closest to the take-up roller.
Then bring the leader around to the take-up spool, and wind it on just a bit. You'll see that you have quite a bit of slack in the leader. This is OK. Wind almost all of that slack onto the take-up spool.
Normally, you would wind on until the alignment arrows on the paper leader line up with the indicator in the back. Of course, we can't see the alignment arrow anymore, it's inside the cassette! So, the cut where the leader narrows from its full width down to 35mm is also a visual indicator of when to stop winding on. Stop winding on when the cut is just to the side of the take-up roller, with just a few millimeters of the narrower part of the leader showing. You can wind on a bit more if you want to be certain that you're past the exposed portion of the film leader, there's no harm in that.
Then, close it all up and mount it. Done!
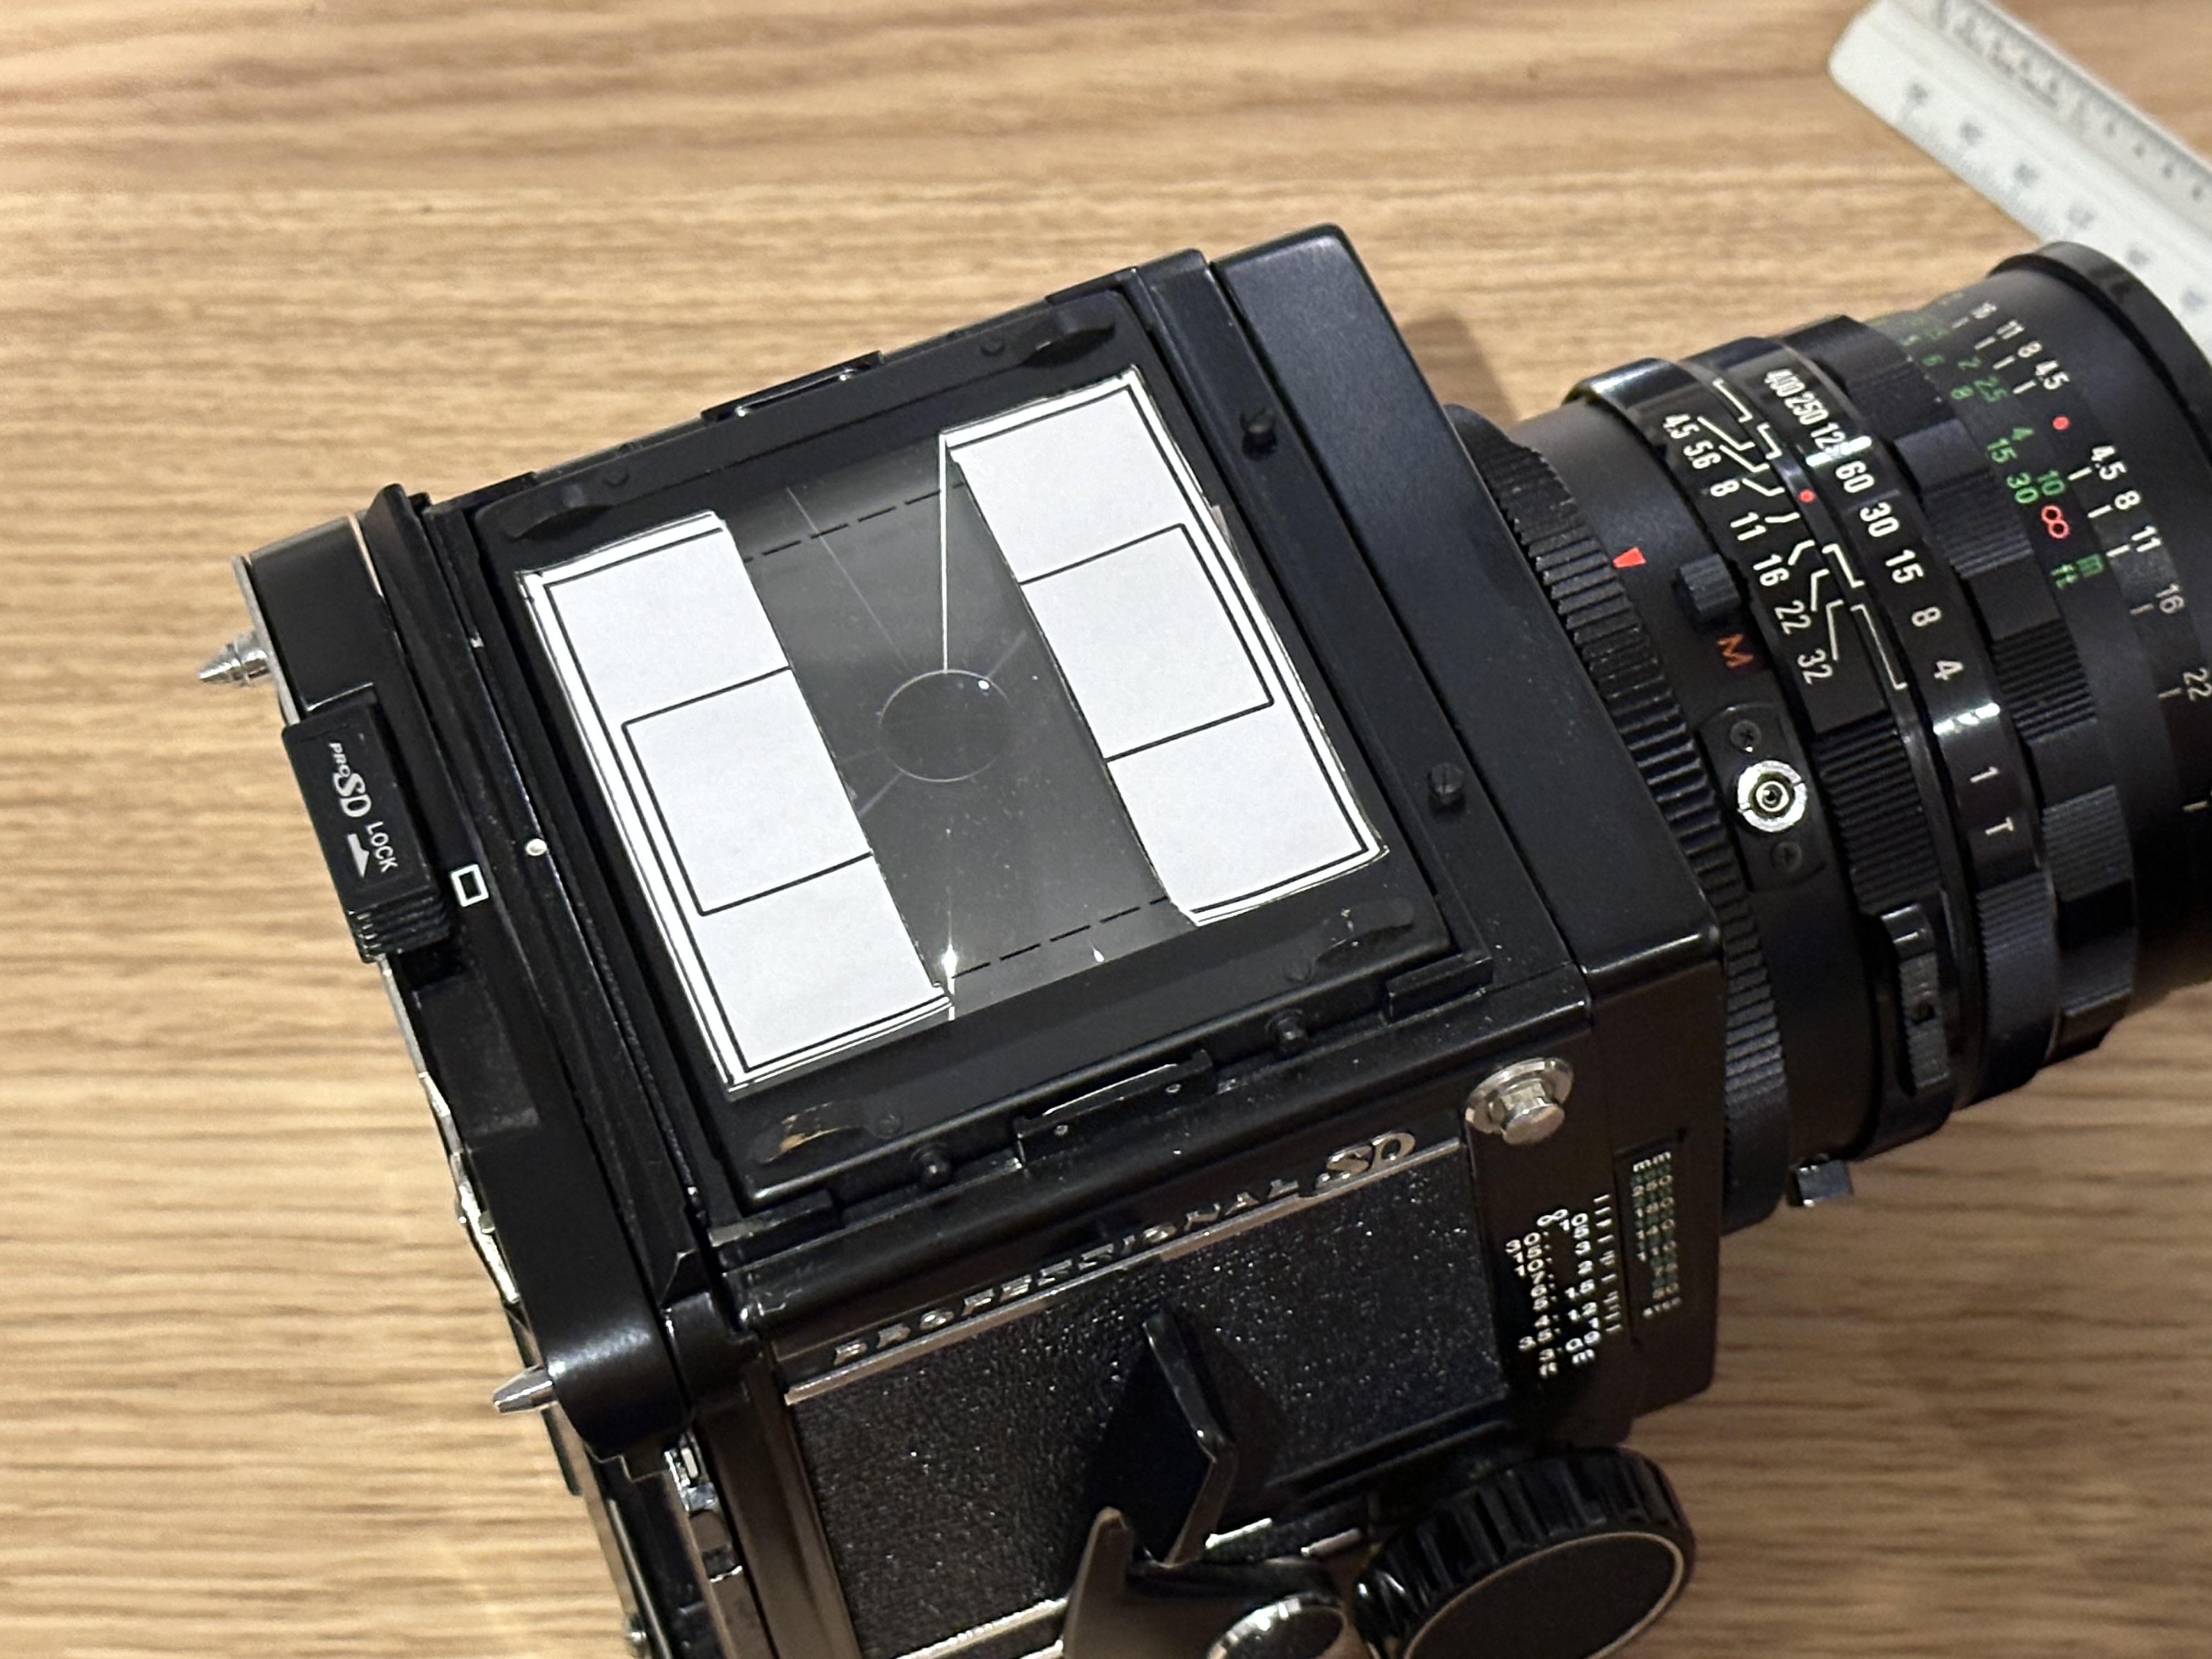
Step 6: Prepare the viewfinder mask
If you want a reasonably accurate preview of the final image, you need to make a mask for your viewfinder. Here is a PDF you can print out, cut out, and tape to the ground glass of your viewfinder.
Step 7: Take some photos!
It's an RB67, if you aren't sure how to take photos with it, it's best to read the manual first, as it can be an annoying complicated beast to operate.
Step 8: Unload the film
You need to be careful here. You can only unload the back in a darkroom or a light-tight bag. If you open the back now, you'll lose everything you've worked so hard for up to this point. Remove the back from the camera, place it in your light-tight bag, and only then open up the back.
Remove the 135 cassette first. Then remove take-up spool with all the film on it—it will probably unravel like a tightly wound spring (which is why I remove it second). Then carefully spool the film back into the cassette by hand, feeling for the paper leader as you go. The paper leader should peel right off, since you only taped it on one side. Leave the film leader hanging out if you like to make unloading the film easier later. Then pop the cassette off to your favorite lab!
Or, of course, you could just load it right into a developing tank if that is your style. If that is your style, you probably don't need an explanation for how to do that.
The Results